
Basement Underpinning Vancouver: Costs, Methods & When You Need It (2026)
Most Vancouver homeowners who inherited a basement built before 1970 know the feeling: you duck through the door, stand upright—barely—and realize that the seven-foot ceilings everyone else seems to have are nowhere in sight. Pre-1970 Vancouver homes typically have basement ceiling heights of 5’6″ to 6’4″. The City of Vancouver’s minimum for a legal secondary suite is 6’5″ (1.95 m). That gap—sometimes as little as one inch, sometimes a full foot—is all that stands between a damp, underused storage room and a legal income suite worth $2,400 or more per month.
Basement underpinning is the structural process that closes that gap. It is not a renovation in the ordinary sense—it is a foundation intervention, governed by structural engineering requirements, City of Vancouver building permits, and a sequenced construction process that cannot be rushed. Done properly, underpinning transforms a liability into one of the most profitable investments a Vancouver homeowner can make. Done poorly, it can crack your walls, flood your basement, and destabilize a neighbouring property.
This guide covers everything you need to know: what underpinning actually involves, the difference between benching and full underpinning, current 2026 costs, Vancouver-specific soil and permit considerations, waterproofing, financing through CMHC, and a detailed ROI analysis. If you are considering underpinning your Vancouver home, read this before you call a contractor.

The pre-1970 housing stock that dominates Vancouver's east side, Burnaby, New Westminster, and much of the Tri-Cities was built to different standards
Vancouver General Contractors
Why Vancouver Homeowners Underpin Basements
Vancouver’s housing economics make basement underpinning one of the highest-return investments available to homeowners. The math is straightforward: a legal secondary suite in East Vancouver or Burnaby rents for $2,200 to $2,800 per month in 2026. The City of Vancouver requires a minimum floor-to-ceiling height of 6’5″ (1.95 m) throughout all habitable rooms in a secondary suite. A basement that sits at 6’0″ is not eligible for a suite permit, regardless of how nicely it is finished.
The pre-1970 housing stock that dominates Vancouver’s east side, Burnaby, New Westminster, and much of the Tri-Cities was built to different standards. Builders in the 1940s, 1950s, and 1960s poured shallow foundations with 4″ to 6″ concrete slabs over compacted gravel, producing basements that measured 5’6″ to 6’4″ from slab to joist. Those same homes have since appreciated to $1.4 million and above, but their basements remain legally uninhabitable.
Underpinning solves this by physically lowering the basement floor. A $65,000 to $110,000 underpinning project, followed by a $60,000 to $110,000 suite finishing package, produces a legal suite that adds $150,000 to $250,000 in property value—and generates rental income from day one. With CMHC’s Secondary Suite Loan Program offering up to $80,000 at approximately 2% interest, monthly carrying costs can be lower than the rental income the suite generates within weeks of completion.
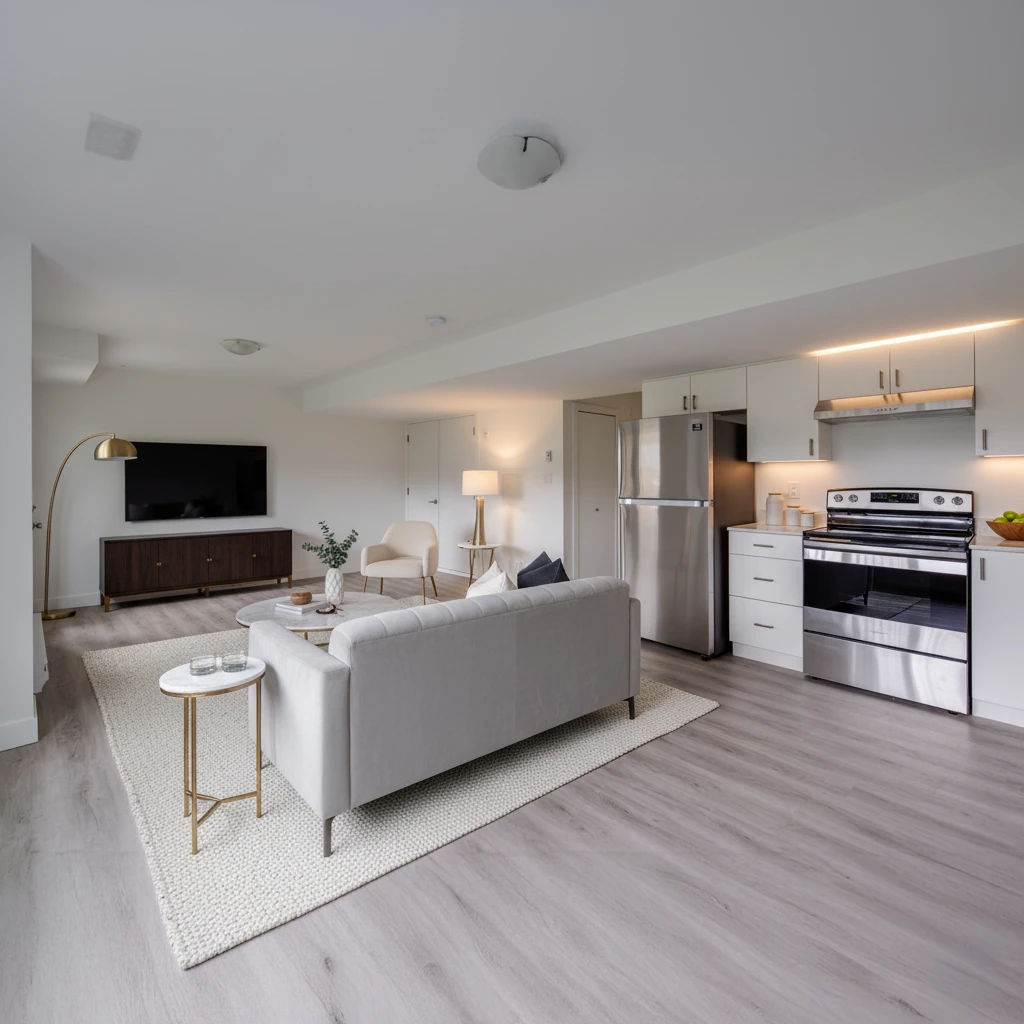
Beyond the financial case, many Vancouver homeowners underpin for personal use: a proper home office, a legal bedroom for a family member, a gym, or a media room. Underpinning is the only path to a truly livable basement when the existing ceiling height falls short.
What Is Basement Underpinning? A Technical Overview
Basement underpinning is the process of extending your home’s foundation footings deeper into the ground, allowing the basement floor to be excavated and lowered. To understand why this is necessary—and why it cannot simply be done by digging—you need to understand how a foundation works.
Your home’s weight is transferred from the framing to the foundation walls and then to the footings: wide concrete pads that spread the load across the soil beneath. The footings sit at a specific depth—typically just below the frost line—and the basement floor slab sits on top of compacted fill inside the footing perimeter. If you excavate below the existing floor without extending the footings first, you remove the bearing soil from beneath the footings. The foundation loses its support and the house can settle, crack, or in extreme cases, collapse.
The underpinning process addresses this by systematically installing new, deeper footings in small sections—typically 3 to 5 feet at a time—so that no more than a small portion of the existing footing is ever unsupported. Each section is excavated, formed, poured, and allowed to cure before the adjacent section is touched. This sequenced approach transfers the load to the new deeper footings incrementally, maintaining structural integrity throughout.
Once all new footings are in place and fully cured, the interior floor can be excavated to the new depth, a drainage system installed, and a new concrete slab poured. The result is a basement with 8″ to 12″ more headroom—enough to cross the 6’5″ threshold for a legal suite, and often enough to achieve a full 8’0″ ceiling if desired.
Underpinning vs. Benching: The Key Distinction
Benching is a related but distinct technique. Instead of extending the footings downward, benching involves pouring a new concrete “bench” along the interior perimeter of the basement wall, then excavating the central floor area lower. The bench acts as a retaining structure that supports the existing footing from the inside. The result is a lower central floor area surrounded by a raised perimeter shelf—the “bench”—typically 12″ to 18” wide.
Benching is faster and less expensive than full underpinning ($25,000–$45,000 vs. $65,000–$110,000), requires no shoring of the existing foundation, and can often be completed in 2–3 weeks rather than 4–6 weeks. The trade-off is the permanent loss of that 12″–18″ of usable floor area along each wall. For a typical 20′ × 30′ basement, benching on all four walls reduces the usable area by roughly 15%–20%, which can be acceptable if the existing ceiling height is already close to the target. Benching is not appropriate for rubble stone foundations, which are common in pre-1930 Vancouver homes.
Basement Underpinning Costs in Vancouver (2026)
Underpinning costs in Vancouver reflect both the complexity of the structural work and the local labour market. The following table reflects typical contractor pricing in Metro Vancouver in 2026, including structural engineering and City of Vancouver permits but excluding suite finishing, waterproofing, and interior work.
| Scope of Work | Typical Cost Range | Best For |
|---|---|---|
| Benching only (all four walls, ~600 sq ft basement) | $25,000–$45,000 | Homes within 4″–6″ of the 6’5″ target; concrete block foundations |
| Partial underpinning (one or two walls) | $35,000–$55,000 | Split-level situations; site access limited to one side |
| Full underpinning (all four walls, ~600 sq ft) | $65,000–$110,000 | Most pre-1970 homes; rubble foundations; maximum height gain needed |
| Full underpinning + waterproofing | $80,000–$130,000 | Any underpinning project—waterproofing should always be combined |
| Full underpinning + suite finishing (all-in) | $130,000–$220,000 | Full income suite creation; maximum ROI project |
| Structural engineering assessment | $3,000–$6,000 | Required for all underpinning permit applications |
| Geotechnical soil report (if required) | $1,500–$3,500 | Clay soils, organic soils, any non-standard conditions |
What Drives the Cost of Underpinning in Vancouver
Soil type is the single largest variable. Sandy or glacial till soils—common throughout East Vancouver, Burnaby, and Coquitlam—are relatively predictable, drain well, and can be excavated efficiently. Clay soils, found in parts of Strathcona, Grandview-Woodland, and some Burnaby neighbourhoods, are prone to heave when disturbed and require more careful sequencing and sometimes temporary shoring. Organic or peat soils in Richmond, Delta, and low-lying areas of Surrey are generally unsuitable for conventional underpinning without pile foundations, which can add $30,000–$60,000 to the project.
Foundation type matters significantly. Poured concrete foundations from the 1960s onward are straightforward to underpin. Concrete block foundations are workable but require more care at the wall-footing interface. Rubble stone foundations—common in Strathcona homes built before 1930—require full underpinning (benching is not suitable) and often involve stabilizing the existing stone wall before any excavation begins. Rubble foundations add 20%–35% to the underpinning cost.
Site access affects the cost of excavation equipment and spoil removal. A home on a corner lot with lane access is significantly cheaper to work on than a tight infill lot accessible only through the house. Crane-and-bucket excavation through a window well is slower and more labour-intensive than a mini-excavator working from a lane.
Existing plumbing and drainage add cost when they need to be relocated. Most pre-1970 basements have drain lines running below the slab at the existing floor level. When the floor drops 8″–12″, those drains need to be re-routed, which typically adds $3,000–$8,000 to the project depending on the complexity of the existing system.
The depth of height gain required affects cost directly. Adding 8″ of height requires deeper footings than adding 4″. A project targeting an 8’0″ finished ceiling (starting from 6’0″) involves more excavation and more concrete than one targeting just enough height to clear the 6’5″ minimum.
Benching vs. Full Underpinning: Which Is Right for Your Home?
The choice between benching and full underpinning depends on five factors: your existing ceiling height, your foundation type, your target height, your budget, and how you intend to use the space. Here is how to think through the decision.
If your existing basement measures 6’0″–6’3″ and your target is the legal minimum of 6’5″, benching may be sufficient. The floor in the centre of the room would be lowered 4″–6″, giving you the required ceiling height in the usable area, while the bench along the perimeter stays at the original level. This is cost-effective and faster, but it permanently reduces your floor area. A 20′ × 30′ basement with 16″ benches on all four walls loses approximately 240 square feet—reducing your usable floor area from 600 sq ft to roughly 360–380 sq ft. For a two-bedroom suite, this constraint may be acceptable; for a large open-plan suite, it may not.
If your existing basement measures 5’6″–5’10”—common in homes built in the 1940s and early 1950s—you need 7″–11″ of height gain. At this level, benching alone may not produce a usable suite even in the centre of the room, because the bench height itself eats into the gain. Full underpinning becomes the logical choice: it lowers the entire floor without sacrificing perimeter area, and achieves the full height gain uniformly across the basement.
Rubble stone foundations require full underpinning. The irregular, unmortared stone construction that characterises pre-1930 Vancouver homes cannot be trusted to bear against a concrete bench the way a poured or block foundation can. Any Vancouver contractor who proposes benching on a rubble foundation should raise an immediate red flag. The correct approach is to underpin in sections, stabilise the existing stone, and often add a poured concrete wall face to regularise the interior surface.
If you are planning to waterproof the exterior—which means excavating around the outside of the foundation anyway—full underpinning is almost always the right choice. You are already paying to expose the exterior of the foundation; the marginal cost of extending the footings while you are there is significantly less than doing it as a separate project.
| Factor | Benching | Full Underpinning |
|---|---|---|
| Height gain achievable | 4″–8″ (centre only) | 8″–24″+ (full floor) |
| Cost (600 sq ft basement) | $25,000–$45,000 | $65,000–$110,000 |
| Timeline | 2–4 weeks | 4–8 weeks |
| Floor area retained | 75%–85% | 100% |
| Suitable for rubble foundations | No | Yes |
| Exterior excavation required | No | No (interior process) |
| Shoring typically required | No | Rare, on specific soils |
| Permit complexity | Moderate | Higher |
The Basement Underpinning Process Step by Step
Understanding the sequence of an underpinning project helps homeowners set realistic expectations for timeline, disruption, and cost. Here is how a typical full underpinning project in Vancouver unfolds, from initial assessment to final slab pour.
Step 1: Structural Engineering Assessment ($3,000–$6,000)
Every underpinning project in the City of Vancouver requires a structural engineering assessment and stamped drawings before a building permit can be issued. The engineer visits the property to assess the existing foundation type, wall construction, soil conditions visible from the basement, and proximity to adjacent structures. They will review any available as-built drawings and may order a geotechnical soil report if conditions are non-standard.
The engineering assessment typically produces a set of stamped drawings specifying the underpinning sequence, new footing dimensions, reinforcement requirements, and any shoring or dewatering requirements. These drawings form the basis of the permit application. Expect to pay $3,000–$6,000 for engineering on a typical single-family project; complex sites with rubble foundations or challenging soil conditions may run higher.
Step 2: City of Vancouver Permit Application (6–10 Weeks)
The City of Vancouver’s Development and Building Services Centre processes underpinning permits as a subset of the Building Permit application. You will need the structural engineer’s stamped drawings, a site plan, a description of the proposed work, and evidence that the project will comply with the BC Building Code requirements for the intended occupancy. If the underpinning is part of a secondary suite creation, the suite drawings must also be included.
Permit review times in Vancouver currently run 6–10 weeks for a straightforward residential underpinning application. Complex applications—particularly those involving secondary suites, heritage properties, or shared lot lines—can take longer. Budget for a 10–12 week lead time from permit application to permit issuance when planning your project timeline.
Step 3: Site Setup and Excavation Access
Once permits are in hand, the contractor prepares the site. This involves establishing spoil removal access (typically through a window well enlarged or a hatch cut in the floor), bringing in a mini-excavator if lane access allows, or setting up a conveyor belt system for bucket-by-bucket removal if the site is tight. All interior contents of the basement must be removed, and mechanical systems (furnace, hot water tank, electrical panel) are temporarily relocated or protected.
Step 4: Sequenced Underpinning (The Critical Phase)
The underpinning itself proceeds in carefully sequenced sections, following the engineer’s specified order. Typically, no more than 4–6 feet of footing length is exposed at any one time. For each section, the sequence is:
- Excavate soil beneath the existing footing to the new footing depth (the engineer specifies the bearing depth based on soil conditions)
- Clean and prepare the bearing surface
- Install reinforcing steel as specified by the engineer
- Form and pour the new concrete footing section
- Allow the concrete to cure to specified strength (typically 7 days minimum before adjacent sections are disturbed; 28 days for full design strength)
- Move to the next section in the prescribed sequence
The sequence is not arbitrary—it is engineered to ensure that load redistribution occurs safely. Shortcuts in sequencing are one of the most common causes of underpinning failures. The City of Vancouver’s building inspectors will conduct staged inspections during this phase, and work cannot proceed to the next section without inspection sign-off in many cases.
Step 5: Floor Excavation and Drainage System
After all underpinning sections are poured and cured, the interior floor can be excavated to the new elevation. This is when existing drain lines are relocated, a perimeter drainage system (weeping tile or interior drainage membrane) is installed, and a sump pit is formed. The drainage system is critical—underpinning exposes the foundation to new hydrostatic conditions, and a properly designed interior drainage system prevents water from accumulating under the new slab.
Step 6: New Concrete Slab
A new 4″ concrete slab is poured over a vapour barrier and compacted gravel base. The slab is typically reinforced with wire mesh or rebar as specified by the engineer. In most cases, the slab also incorporates in-floor drain rough-ins for the future suite bathroom and laundry. Allow 28 days for full slab cure before framing begins—loading the slab before it reaches design strength can cause cracking that is difficult to remediate under a finished floor.
Step 7: Waterproofing, Rough-in, and Suite Construction
With the structural work complete, the project transitions to the suite construction phase: waterproofing membranes on the new foundation walls, framing, insulation, electrical rough-in, plumbing rough-in, HVAC, drywall, flooring, kitchen, and bathroom. This phase typically takes 6–10 weeks for a complete legal suite. See our renovation guide for a detailed breakdown of suite finishing costs and sequences.
Structural Engineering and City of Vancouver Permits
No legitimate underpinning contractor in Vancouver will begin work without a valid building permit, and no building permit will be issued without stamped structural engineering drawings. This is not bureaucratic excess—it is a direct response to a history of underpinning failures, many of which involved unpermitted work.
The structural engineer’s role in an underpinning project is not limited to drawing preparation. A thorough engineer will conduct a pre-construction site visit, review conditions during excavation (soil conditions sometimes differ from what was anticipated), respond to field changes, and conduct a post-construction review. Engineers who simply produce drawings without site involvement are cutting corners that matter.
What the Engineer Assesses
The engineering assessment for a Vancouver underpinning project covers:
- Foundation type and condition: Poured concrete, concrete block, rubble stone, or a combination. The engineer assesses the structural capacity of the existing foundation and identifies any existing deterioration, cracking, or movement.
- Soil bearing capacity: The engineer uses visible soil conditions, any available geotechnical data, and local knowledge to estimate the bearing capacity at the proposed new footing depth. For non-standard soils, a geotechnical report from a separate soil engineer ($1,500–$3,500) is required.
- Adjacent structures: Vancouver lots are narrow—often 33 feet wide—and underpinning near a shared property line or adjacent to a neighbouring structure requires analysis of the impact of excavation on neighbouring foundations. In cases where the neighbour’s foundation is shallow or in poor condition, shoring or temporary underpinning of the neighbour’s foundation may be required.
- Below-grade utility clearances: The engineer checks for existing utilities—sewer, water, gas, electrical—that could be affected by deeper excavation.
The City of Vancouver Permit and Inspection Sequence
The City of Vancouver’s inspection sequence for an underpinning project typically includes:
- Pre-pour inspection (footings): Inspector verifies excavation depth, soil conditions, and reinforcing steel placement before any concrete is poured. This inspection must be passed for each section, or in batches as agreed with the inspector.
- Foundation inspection: After the new footings are poured and forms stripped, the inspector verifies that the underpinning meets the permitted drawings.
- Drainage/waterproofing rough-in: Before the new slab is poured, the inspector verifies drainage system installation, vapour barrier, and slab sub-base.
- Slab inspection: In some cases, a pre-pour inspection of the slab reinforcing is required.
- Framing and rough-in inspections: Standard building inspections for the suite construction phase.
- Final inspection: Comprehensive inspection of the completed suite for compliance with the BC Building Code and secondary suite requirements.
Failing to obtain required inspections—or pouring concrete before an inspector has signed off—is grounds for a stop-work order and potentially a requirement to demolish completed work for inspection access. Always ensure your contractor books inspections in advance and does not proceed without sign-off.
Vancouver Soil Types and Their Impact on Underpinning
Vancouver’s geology is diverse, and the soil conditions beneath your home significantly influence both the feasibility and cost of underpinning. Understanding what is likely under your specific property helps you budget accurately and ask the right questions when evaluating contractor proposals.
Sandy and Glacial Till Soils (East Vancouver, Burnaby, Coquitlam)
The majority of East Vancouver, Burnaby Heights, and the Tri-Cities sit on sandy soils or dense glacial till deposited during the last ice age. These soils are relatively well-drained, self-supporting during excavation, and provide good bearing capacity at modest depths. Underpinning in sandy glacial till is the most predictable and cost-effective scenario—bearing capacity is typically found at 12″–24″ below the existing footing depth, and excavation proceeds efficiently.
The primary concern in sandy soils is water infiltration during excavation, particularly in the spring (March–May) when the water table is elevated. Dewatering pumps are standard equipment for spring underpinning projects in East Vancouver, and a well-designed interior drainage system is essential.
Clay Soils (Strathcona, Grandview-Woodland, Parts of Burnaby)
Clay soils present specific challenges for underpinning. Clay is moisture-sensitive: it expands when wet (heave) and contracts when dry (settlement). Excavating through clay—particularly the soft marine clay found in some low-lying parts of Strathcona and the False Creek area—requires careful sequencing to avoid triggering heave beneath adjacent footings.
For clay soil sites, a geotechnical soil report is not merely advisable—it is often required by the City of Vancouver as a condition of the permit application. The soil report will characterise the clay’s shear strength, consolidation characteristics, and sensitivity, allowing the structural engineer to specify appropriate footing dimensions and sequencing requirements. Budget an additional $1,500–$3,500 for the geotechnical report and 15%–25% premium on the underpinning cost for the more conservative sequencing required.
Organic and Peat Soils (Richmond, Delta, Low-Lying Areas)
Richmond, Delta, and parts of South Surrey sit on deep organic and peat deposits overlying Fraser River delta sands. Conventional underpinning is not recommended in these areas without a pile foundation system, because the organic material cannot provide reliable bearing capacity regardless of depth. Attempting to underpin by simply going deeper will encounter increasingly soft and compressible material.
For Richmond and Delta homes, a structural engineer specialising in soft ground conditions should be engaged before any underpinning proposal is taken seriously. In some cases, helical pile extensions can provide the deep bearing required, but the cost premium over conventional underpinning is significant ($30,000–$60,000 additional). In other cases, the most economical solution is not to underpin at all but to accept the height limitation and use the basement for legal non-habitable uses (storage, mechanical).
Mixed Fill (Urban Infill Lots, Former Industrial Sites)
Some Vancouver lots—particularly in Strathcona, Mount Pleasant, and areas with a history of urban redevelopment—contain mixed or previously disturbed fill of unknown composition. Old garbage fills, demolished building rubble, and legacy industrial contamination can all be present. A geotechnical report is essential before committing to underpinning on any site with known or suspected fill, and environmental screening may be advisable if contamination is a concern.
Waterproofing During Underpinning: The Ideal Opportunity
Basement underpinning and waterproofing are natural partners. The excavation required for underpinning exposes the interior of the foundation walls down to the new footing level—precisely the area that needs waterproofing treatment. Combining both operations is dramatically more cost-effective than doing them separately.
The typical waterproofing scope for a Vancouver underpinning project includes three components:
Interior Drainage Membrane ($4,000–$8,000)
A dimple-profile drainage membrane (Delta-MS or equivalent) is applied to the interior face of the foundation walls from the new footing elevation up to grade. The membrane creates a drainage gap between the wall and the eventual framing, directing any water that penetrates the foundation into the perimeter drain system rather than onto the floor. This is the baseline waterproofing scope for any underpinning project and should be considered non-negotiable.
Perimeter Drain System and Sump Pump ($2,500–$5,000)
A new perimeter drain (4″ perforated pipe) is installed at the new footing elevation, sloped to drain to a sump pit. A sump pump with a battery backup activates automatically when the sump fills. This system handles groundwater infiltration during high water table periods and provides ongoing drainage that prevents hydrostatic pressure from building against the foundation walls.
A quality sump pump installation—including a cast-iron primary pump, battery backup unit, and an alarm—runs $1,500–$3,000 for equipment and installation. This is not an area to cut costs: a sump pump failure during a spring freshet can cause tens of thousands of dollars in water damage to a finished suite.
Exterior Waterproofing (If Already Excavated: $8,000–$15,000 Additional)
If the underpinning project involves exterior excavation—either for access reasons or because the project scope includes exterior waterproofing—the ideal time to apply exterior foundation waterproofing is while the soil is already removed. Exterior waterproofing involves applying a waterproof membrane (typically a rubberised asphalt sheet membrane or spray-applied liquid membrane) directly to the exterior face of the foundation wall, topped with a protection board and drain layer.
If you are not already excavating the exterior for underpinning, full exterior waterproofing requires a separate excavation costing $8,000–$15,000 on its own. The cost of combining exterior waterproofing with an underpinning project that already involves exterior excavation is typically $5,000–$8,000 incremental—a fraction of what it would cost as a standalone project.
The combined saving from doing waterproofing during underpinning rather than separately is typically $12,000–$20,000 when you factor in avoided mobilisation costs, duplicate excavation, and the disruption of undertaking two large construction projects in sequence. If your basement shows any signs of moisture infiltration—efflorescence, damp spots, musty odour—address it during the underpinning project, not after the suite is finished.
Combining Underpinning With Full Suite Finishing
Most homeowners who underpin their basement do so with the ultimate goal of creating a legal secondary suite. The underpinning creates the physical prerequisite—adequate ceiling height—but the suite itself requires a complete construction package on top of the structural work. Understanding the all-in project cost and the best way to finance it is essential for making an informed decision.
The All-In Project: What Is Included
A complete legal secondary suite project starting from an unfinished basement in a pre-1970 Vancouver home typically includes:
| Work Category | Typical Cost Range |
|---|---|
| Structural engineering + permits | $5,000–$9,000 |
| Underpinning (full, 600 sq ft) | $65,000–$110,000 |
| Waterproofing + drainage + sump | $8,000–$18,000 |
| Electrical (new panel, suite wiring) | $8,000–$15,000 |
| Plumbing (bathroom, kitchen, laundry) | $10,000–$18,000 |
| HVAC (heating, ventilation, ERV/HRV) | $6,000–$12,000 |
| Insulation (walls, ceiling, spray foam rim) | $4,000–$8,000 |
| Framing + drywall | $8,000–$15,000 |
| Flooring (LVP or polished concrete) | $4,000–$8,000 |
| Kitchen (cabinets, countertop, appliances) | $12,000–$22,000 |
| Bathroom (full bath + laundry rough-in) | $8,000–$15,000 |
| Separate entrance (egress stair, door) | $3,000–$8,000 |
| Total all-in range | $141,000–$258,000 |
The wide range reflects significant variation in finish quality, suite size, and site-specific conditions. A budget project using standard-grade finishes in a straightforward soil condition can come in at the lower end. A high-quality suite with heated floors, premium kitchen, and complex soil conditions will approach or exceed the upper end.
Financing the Project
CMHC Secondary Suite Loan Program: CMHC’s MLI Select or the federal Secondary Suite Loan Program offers up to $80,000 at approximately 2% interest (2026 rate; subject to program availability) for homeowners creating a legal secondary suite. At $80,000 over 10 years at 2%, the monthly payment is approximately $737. Monthly rental income of $2,400 produces positive cash flow of $1,663 per month from the first month the suite is tenanted. The CMHC program requires that the suite meet all local building code requirements and that the underpinning and construction be permitted.
HELOC (Home Equity Line of Credit): Most Vancouver homeowners have substantial equity in their properties. A HELOC at 80% loan-to-value on a $1.4 million home provides $1,120,000 in available credit minus any existing mortgage balance. A HELOC typically charges the bank prime rate plus 0.5%, currently around 5%–6%. Interest-only payments on $150,000 at 5.5% are approximately $688 per month, leaving significant positive cash flow against $2,400 in rental income.
Construction Loan: For homeowners undertaking a larger project ($200,000+), a construction loan with progress draws matched to project milestones may be appropriate. Construction loans typically convert to a term mortgage upon project completion. Discuss the transition from construction loan to mortgage with your lender before committing, as not all lenders handle this transition smoothly.
For detailed guidance on financing a renovation project, see our home renovation page or contact us for a project consultation.
What Changes in Your Home During Underpinning
Underpinning is one of the most disruptive renovation projects a homeowner can undertake. Understanding what to expect—and planning accordingly—significantly reduces stress during the project.
Occupancy Requirements
Most underpinning projects require the homeowner to vacate the property—or at minimum, vacate the floor immediately above the basement—for the duration of the active underpinning phase (4–8 weeks). The reasons are practical: the basement is an active construction zone with no floor, open excavations, temporary supports, and concrete work in progress. The vibration from excavation and compaction equipment is also significant.
Some homeowners negotiate to remain in upper floors during underpinning if the structural engineer confirms that the work does not create a safety risk to building occupants. This is more feasible on homes where the underpinning is limited to the perimeter and the excavation is accessible entirely from outside. Budget for 4–8 weeks of alternative accommodation in your project cost if your property requires vacating—$4,000–$8,000 for a temporary rental or hotel is a realistic estimate.
Neighbour Notification and Coordination
The City of Vancouver’s building permit process for underpinning typically requires written notification to adjacent property owners before work begins. This is not merely a courtesy—if your underpinning creates settlement or cracking in a neighbouring structure, the notification record establishes the pre-construction condition. Many contractors will perform a pre-construction photo or video survey of neighbouring properties (with permission) to document any pre-existing cracks or settlement.
Noise from excavation equipment is significant during the active underpinning phase. Vancouver’s noise bylaw prohibits construction noise before 7:30 a.m. and after 8:00 p.m. on weekdays, and before 9:00 a.m. and after 6:00 p.m. on weekends. A good contractor will communicate with neighbours proactively about the construction schedule and expected noise levels.
Overall Project Timeline
A complete underpinning-to-suite project in Vancouver follows this approximate timeline:
- Engineering assessment and drawings: 3–5 weeks
- Permit application and review: 6–10 weeks (concurrent with engineering in some cases)
- Site setup and underpinning: 4–8 weeks
- Slab cure time: 4 weeks (minimum)
- Waterproofing and rough-in: 3–4 weeks
- Framing, insulation, drywall: 4–6 weeks
- Finishing (flooring, kitchen, bath): 4–6 weeks
- Final inspections and occupancy permit: 2–3 weeks
Total elapsed time from initial engagement to move-in-ready suite: 26–42 weeks (approximately 6–10 months). This is not a project that can be rushed. Homeowners who plan to rent the suite to offset their mortgage should factor in the carrying cost of the project period when calculating ROI.
ROI of Basement Underpinning for a Secondary Suite in Vancouver
The financial case for underpinning a Vancouver basement to create a legal secondary suite is compelling—but only when you run the numbers carefully. Here is a detailed ROI analysis for a typical project.
Model Assumptions
- Home value: $1,450,000 (East Vancouver detached)
- Existing basement: 600 sq ft, 5’10” ceiling, unfinished
- Project scope: Full underpinning + waterproofing + complete suite finishing
- Total project cost: $175,000 (mid-range)
- Financing: CMHC $80,000 at 2% / HELOC $95,000 at 5.5%
- Rental income: $2,400/month (one-bedroom legal suite, East Vancouver 2026 market)
Monthly Cash Flow
| Item | Monthly Amount |
|---|---|
| Rental income | +$2,400 |
| CMHC loan payment ($80K, 2%, 10yr) | −$737 |
| HELOC interest ($95K at 5.5%) | −$435 |
| Operating costs (insurance, maintenance reserve 5%) | −$150 |
| Net monthly cash flow | +$1,078 |
Property Value Impact
A legal secondary suite in Vancouver adds value through two mechanisms: direct income capitalisation and increased demand from buyers seeking income-generating properties. Appraisers in Vancouver’s market typically capitalise secondary suite income at a 5%–6% cap rate, which at $2,400/month ($28,800/year) produces an income-capitalised value addition of $480,000–$576,000. In practice, the market value addition is more conservative—typically $150,000–$250,000 for a legal suite in a detached East Vancouver home—because buyers apply their own risk and preference adjustments to rental income assumptions.
Using a conservative $200,000 property value increase on a $175,000 investment, the simple ROI is approximately 114% on invested capital, before considering the ongoing cash flow benefit. Over a 10-year hold period—accounting for cash flow accumulation and modest property value appreciation—the total return on the underpinning investment typically exceeds 200%.
Payback Period
At $1,078 per month in net cash flow, the out-of-pocket equity cost of the project (total project cost minus CMHC and HELOC financing) is recovered in approximately 5–6 years. If the homeowner retains the property for 10+ years, the total cash flow from the suite over that period approaches the total project cost—meaning the suite effectively pays for itself, and the property value increase is largely pure equity gain.
For homeowners considering underpinning primarily for personal use rather than rental income, the property value increase alone ($150,000–$250,000) typically exceeds the project cost on a well-located Vancouver property, making the project worthwhile even without rental income.
How to Choose an Underpinning Contractor in Vancouver
Underpinning is a specialised structural trade. Not every general contractor, basement finishing company, or foundation repair company has the experience to execute an underpinning project safely. Choosing the wrong contractor is the single greatest risk in an underpinning project—more consequential than soil type, foundation condition, or any other variable, because a competent contractor will identify and manage those risks, while an incompetent one will not.
What to Look for in an Underpinning Contractor
- Verifiable experience with underpinning specifically: Ask for references from underpinning projects in Vancouver, not just basement finishing or general renovation work. Request to speak with homeowners from recent projects and ask about sequencing adherence, permit management, and whether any neighbour issues arose.
- A clear relationship with a structural engineer: Legitimate underpinning contractors work closely with structural engineers throughout the project, not just to obtain a stamp on drawings. Ask how the contractor handles field conditions that differ from the permitted drawings.
- Permit management capability: The contractor should be willing and able to manage the permit application process, coordinate inspections, and ensure that all stages are properly signed off. Contractors who suggest starting work before permits are in hand should be disqualified immediately.
- WorkSafeBC registration and insurance: Verify that the contractor is registered with WorkSafeBC and carries liability insurance of at least $2 million. Request a Certificate of Insurance naming you as an additional insured.
- A written, detailed contract: The contract should specify the scope of work with reference to the engineer’s drawings, the sequencing approach, the milestone inspection schedule, the payment schedule tied to project milestones (not time), and the warranty on structural work.
Red Flags to Avoid
- Any suggestion of working without permits or “dealing with permits later”
- A very low quote that does not include engineering or permits
- Inability to provide references from completed underpinning projects
- Requests for large upfront deposits (more than 10%–15% of project value)
- Vague sequencing plans—a legitimate contractor will describe exactly how they intend to execute the underpinning in what order and why
- No mention of geotechnical assessment for non-standard soil conditions
Vancouver General Contractors has executed residential underpinning projects across Metro Vancouver, including rubble foundation underpinning in Strathcona, clay soil projects in Grandview-Woodland, and full suite creation projects in East Vancouver and Burnaby. We work with a registered structural engineer on every underpinning project and manage the complete permit process from application to final inspection. Contact us for a no-obligation site assessment and project estimate.
More Basement & Secondary Suites Guides

Interior vs. Exterior Basement Waterproofing in Vancouver: Which is More Effective?
Drywall vs. Drop Ceiling for Your Vancouver Basement: Cost and Practicality Compared

Carpet vs. LVP Basement Flooring in Vancouver: Which Handles Moisture Better?
Wood vs. Steel Stud Framing for Vancouver Basement Walls: Which is Better?
Basement Renovation Mistakes Common Vancouver Homeowners
Ready to start your renovation?
Frequently Asked Questions: Basement Underpinning Vancouver
How much ceiling height can underpinning add to my Vancouver basement?
Underpinning can theoretically add as much height as the soil and structural conditions allow, but practical projects in Vancouver typically target a gain of 8″–18″. Most homeowners with a 5’10” basement target an 8’0″ finished ceiling—a gain of approximately 26″, which requires the foundation footings to be extended roughly 26″–30″ deeper (accounting for the new slab thickness and sub-base). This is achievable on most Vancouver soils but requires more extensive structural engineering and a larger concrete volume than a project targeting the minimum legal height of 6’5″.
Can I choose benching instead of full underpinning to save money?
Yes, if conditions permit. Benching saves $30,000–$65,000 compared to full underpinning, but sacrifices 12″–18″ of floor area along each wall. For a 600 sq ft basement, four-wall benching reduces usable area to approximately 360–380 sq ft, which may be tight for a two-bedroom suite. Benching is also not suitable for rubble stone foundations or cases where a large height gain is required. A structural engineer can assess your specific basement and recommend whether benching achieves your goals.
How long does the City of Vancouver underpinning permit take?
Currently (2026), a straightforward residential underpinning permit in the City of Vancouver takes 6–10 weeks from application submission to permit issuance. Complex applications involving secondary suite creation, heritage properties, or sites adjacent to other structures can take 10–14 weeks. Applications are submitted through the City’s online portal (Dev & Build) and are reviewed by structural plan checkers. Incomplete applications—missing engineer’s drawings, missing site plans—are returned and restart the review clock, so ensuring your application is complete before submission is critical.
Do I have to move out of my house during underpinning?
In most cases, yes—at least during the active underpinning phase (4–8 weeks). The basement is an active construction zone, and the vibration, dust, and safety risks make occupancy of the immediate space above impractical and potentially dangerous. Some projects allow occupancy of upper floors during underpinning if the structural engineer has confirmed there is no risk to building occupants, the project has alternative spoil access (not through the house), and the homeowner is comfortable with the noise and disruption. Discuss this specifically with your contractor and engineer before committing to a project schedule.
Do I need to notify my neighbours before underpinning?
Yes. The City of Vancouver’s building permit process for underpinning typically requires written notification to adjacent property owners. Beyond the permit requirement, practical courtesy and legal prudence both demand it: neighbouring foundations can be affected by excavation, and pre-construction documentation of any existing cracks or settlement protects you from spurious claims. A professional contractor will conduct a pre-construction survey of adjacent properties (with permission) and maintain written communication records with neighbours throughout the project.
What are the signs that my basement might have been underpinned improperly?
Warning signs of poor or unpermitted underpinning include: stair-step cracking in the foundation walls (indicating differential settlement), horizontal cracking in the new footing sections (indicating insufficient reinforcing or inadequate cure time), water infiltration through the new floor slab (indicating inadequate drainage system), and inconsistent floor heights across the basement (indicating the new slab was poured over uneven sub-base). If you are purchasing a home with a finished basement and a recently lowered floor, request the building permit number and inspection records before completing the purchase. Unpermitted underpinning is a latent defect that can create significant liability for both buyer and seller.
Does soil type affect my underpinning cost significantly?
Yes, significantly. Sandy glacial till (most of East Vancouver, Burnaby, Coquitlam) is the most cost-effective underpinning condition—predictable, well-drained, good bearing capacity. Clay soils require a geotechnical report ($1,500–$3,500) and more conservative sequencing (15%–25% premium). Organic/peat soils (Richmond, Delta) typically require pile foundations for underpinning, adding $30,000–$60,000. Before obtaining contractor quotes, understanding your soil type helps you evaluate whether contractor proposals are appropriately accounting for your site conditions.
Should I waterproof during underpinning or wait until after?
Always waterproof during underpinning—never wait. The excavation required for underpinning already exposes the foundation walls in the areas that need waterproofing treatment. Installing drainage membrane, perimeter drain, and a sump pump during the underpinning project costs $8,000–$18,000 combined. Doing these same items after the underpinning is complete and the basement is partially finished requires tearing out framing, concrete, and flooring—adding $15,000–$30,000 in remediation cost on top of the waterproofing cost itself. There is no rational argument for deferring waterproofing on a project where you are already opening up the foundation.
Can I use the CMHC Secondary Suite Loan for underpinning?
Yes. CMHC’s Secondary Suite Loan Program covers the full cost of creating a legal secondary suite, including underpinning, when underpinning is required to achieve the minimum legal ceiling height. The program requires that the completed suite meet all local building code requirements and that the work be properly permitted. The loan amount is up to $80,000, with interest rates significantly below market (approximately 2% in 2026). Eligibility requires owner-occupancy of the primary dwelling and completion of all work within program timelines. Contact your financial institution or CMHC directly for current program terms.
What is the ROI on basement underpinning in Vancouver?
Based on 2026 market conditions, a full underpinning-and-suite project ($150,000–$175,000 total investment) returns a property value increase of $150,000–$250,000 and generates rental income of $2,200–$2,800/month. The simple capital ROI (property value increase vs. investment) is typically 85%–160%, with total 10-year returns exceeding 200% when rental income cash flow is included. These figures are for legal, permitted suites in Metro Vancouver’s primary rental market areas. Properties in lower-demand rental areas (some parts of Surrey, Langley) will show lower returns.
How long does the entire underpinning-to-suite project take from start to finish?
The complete project timeline—from initial engineering engagement to final occupancy permit—is typically 26–42 weeks (6–10 months). This includes 3–5 weeks for engineering, 6–10 weeks for permit review, 4–8 weeks for active underpinning, 4 weeks for slab cure, and 12–16 weeks for suite finishing and inspections. Timelines can be compressed by engaging an engineer before permits are applied for, and by selecting a contractor before the permit is issued (so they are ready to mobilise immediately). They can be extended by complex soil conditions, permit revisions, or material supply delays.
Is underpinning possible on a rubble stone foundation?
Yes, but it requires full underpinning (not benching) and typically costs 20%–35% more than an equivalent poured-concrete foundation project. Rubble stone foundations are common in Vancouver homes built before 1930, particularly in Strathcona, Grandview-Woodland, and Point Grey. The underpinning process involves careful sequential excavation, stabilisation of the existing stone (sometimes with mortar injection or concrete facing), and new poured-concrete footings. An engineer with specific experience in rubble foundation work is strongly recommended. The result is typically a more structurally sound foundation than before underpinning, because the new concrete footings replace the shallow, irregular stone construction as the primary bearing elements.
What are the most common things that go wrong with poorly executed underpinning?
The most consequential failures in underpinning are: (1) inadequate sequencing—excavating too long a section at once, removing bearing support from too large a footing area simultaneously; (2) insufficient curing time between sections—pouring the next section before the adjacent concrete has gained adequate strength; (3) failure to account for adjacent foundation effects—excavating close to a neighbouring property without assessing the impact on the neighbour’s shallow foundations; (4) inadequate drainage—pouring a new slab over a drainage system that is incorrectly graded or missing a sump, leading to hydrostatic uplift; and (5) unpermitted work—skipping the engineering and permit process, leaving the homeowner with an unsellable property and potential demolition orders. All five of these failures are preventable with competent engineering and contractor execution.
Can I phase the project—underpin now and finish the suite later?
Yes, phasing is common. The structural underpinning work can be permitted and completed as a standalone project, with the suite finishing done under a separate building permit at a later date. This approach can help manage cash flow and allows you to inhabit the improved basement (even unfinished) while planning the suite. The main drawback is that waterproofing, which should always be done during underpinning, must not be deferred to the suite phase—it needs to happen while the foundation is exposed. Similarly, rough plumbing should be set during the underpinning phase to avoid cutting the new slab later. Budget the structural and mechanical rough-in phases together even if the finishing is deferred.
How do I verify that my underpinning project was done correctly?
The best verification is a complete set of City of Vancouver inspection records showing that all required inspection stages were passed. Request these records from your contractor or pull them directly from the City of Vancouver’s online permit portal using your permit number. An independent structural engineer can also conduct a post-construction review of the completed underpinning to verify compliance with the permitted drawings—this costs $800–$1,500 and is worth commissioning if you have any doubts about the quality of the work. If you are purchasing a home with recent underpinning, always require the permit number and inspection records as a condition of purchase.
Do I need a separate permit for the secondary suite after underpinning is complete?
Yes. If the underpinning permit does not already include the suite construction scope, you will need a separate building permit for the secondary suite. In practice, most homeowners include both scopes in a single permit application to streamline the process and minimise permit fees. The suite permit requires drawings showing compliance with the BC Building Code’s requirements for secondary suites, including ceiling height, room sizes, window egress dimensions, smoke and CO detector placement, fire separation between the suite and the primary dwelling, and separate entrance. The City of Vancouver reviews both the structural and suite drawings together when submitted as a combined application.
Ready to assess your basement’s underpinning potential? Our team provides free site assessments and detailed project estimates. Visit our renovation guide for related information on suite creation, or contact us directly to schedule a consultation.

Get a Free Renovation Quote
Metro Vancouver’s trusted general contractors. Free consultations across Vancouver, Burnaby, Richmond, North Shore & beyond.
Get Your Free Quote →Ready to start your project? Vancouver General Contractors (VGC) provides free, fixed-price quotes for homeowners across Metro Vancouver. Learn more about our basement renovation Vancouver services or request a free quote today.
VGC serves Vancouver and surrounding areas. View all renovation services in Vancouver →
Comments are closed