
Basement Waterproofing in Vancouver: Costs, Methods, and What Works in BC’s Climate (2026)
Vancouver’s reputation for rain isn’t just a cliché — it’s a structural reality that every homeowner with a basement eventually confronts. With 1,153mm of annual rainfall and more than 167 rainy days per year, Metro Vancouver’s climate creates the perfect conditions for wet basements, hydrostatic pressure, and foundation deterioration. Whether your basement already shows signs of moisture or you’re planning to finish it as a suite or living space, understanding waterproofing is one of the most important investments you can make in your Vancouver home.
This guide covers everything Vancouver homeowners need to know: why basements leak here specifically, how to diagnose the source of moisture, what interior and exterior waterproofing actually cost, when crack repair is sufficient, and the sequence you must follow before finishing any basement. We’ve drawn on VGC’s experience investigating and waterproofing hundreds of Vancouver-area basements to give you accurate, current cost ranges and practical recommendations.
Why Vancouver Basements Leak: The Climate Reality
No Canadian city puts more sustained pressure on basement waterproofing systems than Vancouver. The numbers tell the story clearly: 1,153mm of rainfall annually — more than any other major Canadian city. Compare that to Calgary’s roughly 413mm or Toronto’s 831mm and the difference in ground saturation becomes obvious. Vancouver also logs 167 or more rainy days per year, versus Calgary’s 62 and Toronto’s 115. Rain here isn’t a summer event that soils drain between — it’s a months-long siege that keeps ground moisture continuously elevated.
 Home addition renovation in Metro Vancouver” class=”wp-image-12760″ />
Pre-1970 construction presents a particularly vulnerable baseline. The vast majority of Vancouver's housing stock was built before modern waterproofing standards existed
Vancouver General Contractors
The seasonal pattern makes things worse. The bulk of Vancouver’s rain falls between October and March — exactly when soils are already saturated from the preceding wet months. By December, the ground around many Metro Vancouver foundations is essentially at full water capacity. Every additional rainstorm pushes hydrostatic pressure — the force of water-saturated soil pressing against your foundation walls — to its seasonal peak. This is why so many homeowners notice their basement problems most acutely during the winter months and early spring.
Vancouver’s soil composition compounds the problem significantly. Much of Metro Vancouver — including large portions of Burnaby, New Westminster, Coquitlam, and parts of Vancouver proper — sits on clay-heavy soils. Clay is expansive: it swells when it absorbs water and contracts when it dries. This repeated expansion and contraction cycle creates lateral pressure on foundation walls that, over decades, causes cracking, wall movement, and the progressive failure of any waterproofing membrane that was originally installed. In areas with particularly heavy clay content, the pressure on foundation walls during a wet season can be substantial enough to bow even reinforced concrete inward.
Pre-1970 construction presents a particularly vulnerable baseline. The vast majority of Vancouver’s housing stock was built before modern waterproofing standards existed. Prior to the 1970s, standard practice involved no waterproofing membrane on exterior foundation walls, no drainage board, and weeping tile made from clay pipe laid in sections around the foundation perimeter. Those clay sections, separated at the joints and now approaching 50 to 70 years old, have typically collapsed, separated, or become completely blocked with root intrusion and soil infiltration. They no longer function. The houses built after 1970 through approximately 2000 often have tar-based dampproofing (not true waterproofing) that degrades over time. Only homes built in the last 20 to 25 years are likely to have rubber membrane waterproofing that remains effective.
Water enters Vancouver basements through several predictable points. Window wells — the excavated areas around basement windows — trap water when their drains fail or clog with leaves and debris. Cold joints, where the foundation wall meets the footing, are a major entry point because this is where two separate concrete pours meet and where shrinkage and settlement create gaps over time. Cracks in poured concrete walls, particularly vertical shrinkage cracks that develop as concrete cures, allow water through during heavy rain events. Block foundation walls, common in homes built from the 1950s through the 1970s, allow water to seep through the mortar joints between blocks. And condensation — often mistaken for intrusion — can create its own moisture problems in basements that lack proper ventilation.
Diagnosing Your Wet Vancouver Basement: Intrusion vs. Condensation
Before any waterproofing work can be properly scoped or priced, you need to identify the source of your moisture. Rushing to a waterproofing solution without this step is a common and expensive mistake. Contractors who quote waterproofing work without a thorough diagnostic inspection are often either cutting corners or quoting work you may not need.
The simplest diagnostic test costs nothing. Tape a piece of plastic sheeting — a cut garbage bag works — directly to your basement wall with all four edges sealed with duct tape. Leave it for 48 hours. If moisture forms on the wall side of the plastic (between the plastic and the concrete), water is migrating through the wall from the exterior: that’s intrusion. If moisture forms on the room side of the plastic (the surface you can see), the moisture is coming from interior air contacting the cool wall surface: that’s condensation. The distinction matters enormously because the remedies are completely different.
Signs of Water Intrusion
- Efflorescence: White, chalky mineral deposits on concrete or block walls. This is the residue left behind as water carries dissolved minerals through the wall and evaporates on the surface. Efflorescence is essentially a stain map showing where water has been moving through your foundation.
- Active seepage at the floor/wall joint: Water visibly seeping or pooling at the base of the wall, particularly at the cold joint where wall meets footing. This is one of the most common entry points in Vancouver homes.
- Mould along the base of walls: Mould growth concentrated at floor level or the lower third of walls indicates water wicking up from the floor or entering at the base.
- Brown tide marks or staining: Horizontal stain lines on foundation walls show the high-water mark of previous intrusion events, similar to bathtub rings.
Signs of Condensation
- Moisture or water droplets on cold water pipes
- Glass-like droplets forming on wall surfaces during warm weather, particularly in summer when warm humid air contacts cool basement walls
- Mould concentrated on the ceiling near HVAC vents, or on surfaces that face the interior rather than the exterior
Condensation is solved with improved ventilation and humidity control — not structural waterproofing. A Heat Recovery Ventilator (HRV) installed to code can dramatically reduce basement condensation. A quality dehumidifier ($400–$800) can manage residual humidity. These are inexpensive fixes compared to waterproofing. If condensation is your only issue, spending $15,000 on a drainage system is money wasted.
True intrusion requires waterproofing, and the method depends on the source, severity, and access. VGC’s standard process includes an on-site inspection with moisture meter readings, visual assessment of all potential entry points, and thermal imaging where indicated. We will not quote waterproofing scope without completing this diagnostic step — it’s too easy to propose the wrong solution without it.
Interior Waterproofing (Drainage Channel + Sump Pump): The Most Common Vancouver Solution
Interior waterproofing is the most frequently installed waterproofing solution in Vancouver, and for good reason. It’s effective, minimally disruptive to landscaping and exterior structures, and achieves the practical goal of keeping your basement floor and lower walls dry. Understanding what it does — and does not — do helps set realistic expectations.
An interior drainage system does not stop water from entering your foundation. It intercepts water after it enters and channels it away before it can spread across your floor. Here’s how the system works: contractors saw-cut the concrete floor around the perimeter of the basement, typically a channel 6 to 10 inches wide. Below this channel, they excavate a trench, install perforated drainage pipe in a bed of clean gravel, and route that pipe to a sump pit — a cylindrical excavation, typically 24 inches in diameter, in a corner of the basement. A sump pump sits in the pit and automatically activates when water reaches a set level, pumping the water out through a discharge pipe to daylight outside the foundation or to the city storm drain system. The floor is then patched with new concrete over the channel, leaving the drainage system hidden below.
For a typical Vancouver basement with a 600 to 1,000 square foot footprint, this system costs between $10,000 and $20,000 installed. Here is a component-by-component cost breakdown:
| Component | Typical Cost Range |
|---|---|
| Concrete cutting and perimeter channel installation | $3,000 – $6,000 |
| Drainage pipe and clean gravel bed | $1,500 – $3,500 |
| Sump pit excavation and liner | $800 – $2,000 |
| Sump pump (primary and battery backup) | $800 – $2,500 |
| Concrete repair and floor patching | $1,500 – $3,000 |
| Wall vapour barrier | $1,000 – $2,500 |
The advantages of interior waterproofing are meaningful. No exterior excavation means no disruption to your landscaping, decks, fences, or sidewalks. The work is typically completed in three to five days. Most drainage system failures are repairable without significant disruption. In the majority of cases — particularly homes with chronic seepage through the floor/wall joint or through wall cracks — an interior system effectively solves the problem.
The limitations are worth understanding. Because the system manages water after entry rather than blocking it at the source, the exterior foundation wall is still getting wet and remains subject to ongoing hydrostatic pressure. Over time, this continued pressure can worsen existing cracks or cause further wall movement. The system also depends entirely on the sump pump functioning — pump failure during a power outage (increasingly common during Vancouver’s winter storms) can result in a flooded basement. A battery backup or water-powered backup pump is not optional in Vancouver: it’s essential.
VGC’s recommendation: interior drainage systems are the right call for finished or partially finished basements where exterior excavation would require removing decks, driveways, or landscaping that would cost more to restore than the excavation itself saves. They are also appropriate for homes where the moisture issue is seepage rather than wall movement or significant structural cracking.
Exterior Waterproofing: The Permanent Solution
Exterior waterproofing addresses water intrusion at the source by creating a physical barrier on the outside face of the foundation wall before water can enter. It is more expensive and more disruptive than interior waterproofing, but it is the only method that permanently prevents water from contacting the foundation — and in certain circumstances, it is the only correct solution.
The exterior waterproofing process begins with excavation. Contractors dig down to the base of the foundation footing around the perimeter — or the affected portion of it — typically reaching depths of 6 to 10 feet depending on foundation depth. Once the foundation wall is fully exposed, the existing surface is cleaned of soil, old tar dampproofing, and debris. A new waterproofing membrane — either a rubberized asphalt membrane applied in sheets or a crystalline waterproofing compound that penetrates the concrete — is applied to the entire exposed wall surface. Over the membrane, a drainage board (a dimpled plastic sheet that creates an air gap and prevents soil from pressing directly against the membrane) is installed. New perforated weeping tile pipe is laid at the base of the footing in clean drainage gravel and connected to a positive outlet. The trench is then backfilled with drainage gravel for the lower portion and native soil above, and the exterior surface — landscaping, pathways, decks — is restored.
This is a major undertaking and priced accordingly. For a typical Vancouver detached home requiring full perimeter exterior waterproofing, the total cost ranges from $30,000 to $65,000. For work on a single wall only, the range is $8,000 to $18,000.
| Component | Typical Cost Range |
|---|---|
| Excavation (per wall, approximately 40 linear feet) | $5,000 – $10,000 |
| New waterproofing membrane (rubber or crystalline) | $3,000 – $7,000 |
| Drainage board installation | $1,500 – $3,000 |
| New weeping tile (perforated pipe and fittings) | $2,000 – $4,500 |
| Drainage gravel backfill | $1,500 – $3,500 |
| Concrete surface restoration and patching | $1,000 – $3,000 |
| Landscaping restoration | $2,000 – $8,000 |
Exterior waterproofing is required — not just preferred — in several Vancouver-specific scenarios. When a basement continues to admit water even after an interior drainage system has been installed, the problem is typically one that only exterior membrane work will resolve. Severe foundation cracks, particularly those showing lateral movement or step-cracking in block foundations, require exterior access to properly repair and waterproof. Window well failures that have allowed repeated water entry typically need exterior drainage improvements. And crucially, in Vancouver’s clay soil areas, the ongoing lateral pressure from expansive clay makes exterior membrane plus drainage board the only long-term solution. Without relieving that pressure through proper exterior drainage, even a new interior system may face accelerating wall deterioration.
The exterior approach also provides an opportunity to replace failed weeping tile — the original clay pipe drainage system around your foundation that has almost certainly failed if your home is more than 40 years old. New perforated PVC weeping tile, properly sloped and connected to a functioning outlet, restores the drainage function that the original system no longer provides.
Foundation Crack Repair in Vancouver
Foundation cracks are among the most common sources of water intrusion in Vancouver’s poured concrete homes, and they range from cosmetic hairline cracks that cause minor seepage to structural fractures requiring engineering assessment. Knowing which type you’re dealing with — and selecting the appropriate repair — determines both the effectiveness and cost of the fix.
Types of Foundation Cracks
Shrinkage cracks are the most common crack type in poured concrete foundations. They develop as concrete cures and loses moisture volume, typically within the first few years of a building’s life. Shrinkage cracks are usually vertical or slightly diagonal, hairline to a few millimetres wide, and non-structural — they don’t indicate movement or instability. However, in Vancouver’s climate, even a hairline crack can admit significant water during heavy rain events as hydrostatic pressure forces water through any available path.
Settlement cracks develop as soil beneath the foundation compresses or shifts unevenly. These may be diagonal, wider at one end than the other, or accompanied by evidence of differential movement at the crack faces. Moderate settlement cracks can often be repaired and sealed, but significant settlement — particularly if ongoing — requires geotechnical and structural assessment before waterproofing work proceeds.
Horizontal cracks in poured concrete or step-pattern cracks in concrete block walls are the highest-priority concern. Horizontal cracks indicate lateral pressure — typically from saturated soil pressing against the wall — and may signal structural compromise. If your foundation wall shows horizontal cracking, bowing inward, or step-cracking in block, you should have a structural engineer assess the wall before any waterproofing work begins. Waterproofing a structurally compromised wall without addressing the structural issue first can obscure progressive deterioration.
Crack Repair Methods and Costs
Polyurethane foam injection is the standard repair for active or recently active hairline to mid-width cracks. A two-component polyurethane foam is injected under low pressure through ports drilled at intervals along the crack. The foam expands to fill the void, bonds to the concrete faces, and remains flexible after curing — allowing it to accommodate minor seasonal movement without re-cracking. Cost: $300 to $800 per crack depending on length and depth.
Epoxy injection is appropriate for cracks that are dry and stable. Epoxy bonds rigidly to concrete, restoring monolithic structural strength across the crack face. Because it is rigid, it is not appropriate for cracks that are still actively moving or subject to thermal cycling. Cost: $400 to $1,200 per crack.
Interior carbon fibre straps are used to stabilize bowing block or concrete walls without excavation. Carbon fibre straps are fastened vertically to the wall at regular intervals, anchored at the floor and top of the wall, and prevent further inward movement. They do not restore the wall to original position, but they halt progressive movement effectively. Cost: $1,500 to $3,500 per strap installed.
Full foundation replacement is a last resort for walls that have lost structural integrity through severe cracking, movement, or deterioration. This involves temporarily supporting the structure above while the foundation wall is demolished and rebuilt. Cost: $45,000 to $120,000 for a full foundation replacement project.
The decision point for calling a structural engineer: any horizontal crack in a poured concrete wall, any step-cracking in a block wall, any visible inward bowing of a wall face, or any crack that has widened noticeably over a period of months. These are not waterproofing problems at their core — they are structural problems that happen to also allow water entry.
Window Well Drainage: Vancouver’s #1 Overlooked Issue
Ask a waterproofing contractor what single issue they encounter most often in Vancouver basements that homeowners have overlooked, and window well drainage is consistently near the top of the list. Based on VGC’s diagnostic inspections, window well failures account for more than 30% of the Vancouver basement water intrusions we investigate — yet they’re rarely the first thing homeowners think of when they notice a wet basement.
Window wells are the U-shaped excavated areas around basement windows that allow natural light into below-grade spaces. The original drainage design in most Vancouver homes built between the 1960s and 1980s was simple: fill the bottom of the window well with crushed gravel and allow water to percolate down through the gravel and away from the window. This works adequately when the gravel is clean and the soil below is permeable. In Vancouver’s clay-heavy soils, the percolation rate is too slow to handle a heavy rain event. After decades, the gravel becomes compacted and contaminated with fine soil particles, and percolation stops almost entirely. The window well fills with water during rainstorms, and that water finds the path of least resistance — usually the window frame or the cold joint at the base of the window opening.
The fix ranges from simple to comprehensive depending on the severity. Cleaning out and replacing the gravel is the minimal intervention ($200 to $500 per well). Adding a positive drain connection — a pipe from the bottom of the window well routed to the perimeter weeping tile system or to daylight — permanently resolves the drainage problem. New window well drainage connections cost $1,500 to $4,000 per well when connecting to an existing perimeter system. Installing window well covers — curved polycarbonate or metal covers that prevent leaves and debris from accumulating — costs $200 to $600 per well and dramatically reduces maintenance requirements.
A complete window well repair including drain improvement, new gravel, and cover typically runs $800 to $3,000 per well. This is frequently a fraction of the cost of interior drainage work and resolves the actual source of intrusion directly.
If your wet basement is concentrated near or below a basement window, inspect the window well before assuming you need a full interior drainage system. Probe the gravel — if it’s compacted solid and you can’t push a screwdriver through it, drainage has failed. Check whether the window well has any drain outlet at all; many original installations relied entirely on percolation with no pipe drainage.
Mould Remediation After Water Damage
Water intrusion and mould are closely linked in Vancouver’s wet climate. Once moisture reaches building materials — drywall, wood framing, carpet, insulation — mould colonization can begin within 24 to 72 hours under the right temperature conditions. In a basement that has experienced repeated or chronic water intrusion, mould growth behind finished walls or under flooring is a near certainty, even if it isn’t immediately visible.
The trigger point for professional remediation under British Columbia guidelines is visible mould growth larger than 0.1 square metres (approximately one square foot) or a pervasive musty odour that persists after drying, which indicates hidden growth. For any household member with respiratory conditions, asthma, or immune compromise, the threshold for remediation should be lower. The BC Centre for Disease Control recommends following the IICRC S520 Standard for Professional Mould Remediation for any significant mould event — this standard defines containment protocols, protective equipment requirements, and verification testing procedures.
For a typical basement mould remediation scenario — drywall removal and disposal in affected areas, HEPA vacuuming of structural surfaces, antimicrobial treatment of framing and concrete, and containment to prevent spore dispersal — costs range from $1,500 to $5,000. Severe mould events involving large surface areas, black mould (Stachybotrys) on multiple surfaces, or contamination within HVAC systems can reach $8,000 to $20,000 to remediate properly.
A critical sequencing point that is often misunderstood: mould remediation does not fix the moisture source. If you remediate mould and then finish the basement over the same wet foundation without waterproofing, the mould returns. The correct sequence is always: identify and fix the moisture source first, allow the space to dry completely (typically four to eight weeks with ventilation or dehumidification), verify moisture readings are in normal range, then remediate any remaining mould growth, then finish.
On the insurance question: most standard BC home insurance policies cover sudden and accidental water damage — a burst pipe, a sudden appliance failure. They specifically exclude slow seepage, groundwater intrusion, and flooding from the municipal storm system unless you have purchased a water backup endorsement. If your basement has been seeping for months or years, your insurer is unlikely to cover the remediation cost. Review your policy’s water damage definitions carefully and speak to your broker before assuming coverage.
VGC works directly with licensed remediation companies and coordinates scope between waterproofing and remediation to avoid conflicts — for example, ensuring that remediation containment doesn’t prevent waterproofing access, and that waterproofing work sequence doesn’t contaminate freshly remediated surfaces.
Sump Pump Selection for Vancouver Homes
A sump pump is the active component of any interior drainage system and, in many parts of Metro Vancouver with high water table, an essential piece of infrastructure regardless of whether a formal drainage system exists. Choosing the right pump — and the right backup system — for Vancouver’s specific conditions requires understanding what makes our market different from drier parts of Canada.
For the primary submersible pump, a 1/2 HP unit is the appropriate starting specification for most Vancouver homes. The 1/3 HP pumps common in drier climates can be overwhelmed during Vancouver’s peak wet-season events when ground saturation drives continuous inflow rather than the intermittent inflow these smaller pumps are designed for. In areas with known high water table — parts of Richmond, Delta, south Burnaby, and low-lying areas of Coquitlam — a 3/4 HP pump may be warranted. Top-performing brands with proven reliability in residential applications include Zoeller, Liberty, and Wayne.
The float switch type matters for sump pit configuration. Tethered float switches work well in larger pits with adequate horizontal clearance for the float to swing freely. Vertical float switches are better suited to smaller or congested sump pits. Electronic float switches are the most precise but have more components that can fail.
The backup pump is not optional in Vancouver — it is mission-critical. BC Hydro outages during winter storms are a regular occurrence throughout Metro Vancouver. A primary pump with no backup means a flooded basement the next time a major atmospheric river event hits during a windstorm. Two backup technologies are available. Battery backup pumps activate automatically when the primary pump loses power, operating until the battery is depleted — adequate for outages of several hours. Water-powered backup pumps use municipal water pressure to operate without electricity or batteries and can run indefinitely as long as water pressure is maintained. Water-powered backups require connection to a pressurized water supply line and are the more reliable choice for extended outages.
The sump pump discharge must terminate at least 3 metres from the foundation and slope away from the building. Discharging too close to the foundation simply recirculates the water back into the soil against the wall. Check your municipality’s requirements before connecting to the city storm drain system — Vancouver, Burnaby, and surrounding cities have varying rules about residential sump connections to storm infrastructure.
A high-water alarm is a strongly recommended addition. These simple devices mount in the sump pit and trigger an audible alarm if water reaches a level indicating the pump has failed or is overwhelmed. The alarm cost ($50 to $150) is trivial relative to the cost of the water damage it prevents. Annual maintenance should include: testing the float switch by pouring water into the pit, checking the discharge line for obstructions, inspecting the inlet screen for debris, and verifying the backup system is functional. Typical residential sump pump life is 7 to 12 years. When you are renovating your basement, replace the pump proactively if it is within that age range — pump failure during a renovation is dramatically more costly than a preventive replacement.
Weeping Tile Replacement in Vancouver
The term “weeping tile” refers to the perforated drainage pipe — or, in older homes, the perforated clay pipe — installed around the base of a foundation to collect and redirect groundwater before it builds up hydrostatic pressure against the foundation walls. This drainage system is a critical component of any home’s water management system, and in Vancouver, where rainfall intensity and ground saturation are extreme, it is the first line of defence against basement intrusion.
In pre-1970 Vancouver construction, weeping tile was made from clay pipe sections laid end-to-end around the foundation perimeter with small gaps between sections to allow water entry. After 50 to 70 years in Vancouver’s clay soils, these systems have almost universally failed. Root intrusion has forced its way through the joints. Clay pipe sections have collapsed under soil load. Fine soil particles from Vancouver’s clay-rich ground have infiltrated and blocked the gaps. The result is a drainage system that exists in form but has ceased to function. When ground saturation reaches its seasonal peak, there is nothing redirecting groundwater away from the foundation — all of that pressure bears directly on the wall.
The signs that your weeping tile has failed are distinctive. Wet basement conditions that persist even during dry spells — particularly in spring after snowmelt or sustained winter rain — suggest that groundwater is rising from below rather than simply penetrating through cracks during active rain events. Water appearing to rise through the basement floor slab, or seeping consistently at the floor/wall joint even without active precipitation, points to failed weeping tile allowing the water table to reach the foundation level.
An interior perimeter drainage system effectively replaces the weeping tile function from the inside, intercepting groundwater that has already reached the foundation wall and routing it to the sump. This is why interior systems are often called “interior weeping tile” even though they are not installed in the same location as the original system.
True weeping tile replacement — installing new perforated PVC pipe in a gravel bed at the footing level — requires exterior excavation and is typically included as part of a comprehensive exterior waterproofing project. When exterior waterproofing is undertaken, replacing the weeping tile is a standard component, not an add-on. The cost of weeping tile replacement is incorporated into exterior waterproofing pricing: $8,000 to $18,000 per wall for a combined exterior membrane and new weeping tile installation, or $30,000 to $65,000 for a full perimeter project.
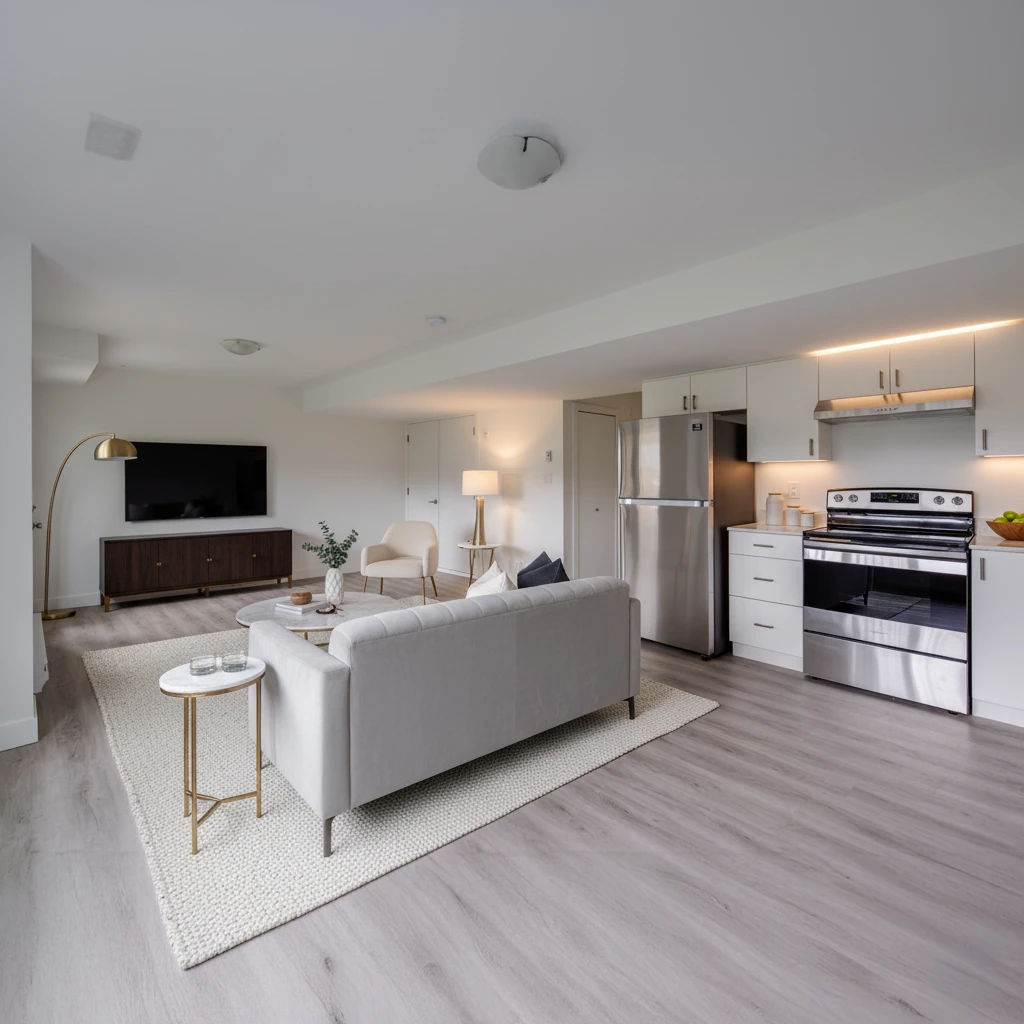
Should You Finish Your Basement Before or After Waterproofing?
This question comes up in nearly every basement renovation consultation we conduct, and the answer is unambiguous: waterproof first, finish second. Always. Without exception. The consequences of finishing a basement that subsequently experiences water intrusion are severe: drywall removal, flooring removal and disposal, insulation replacement, mould remediation, and then finally the waterproofing work that should have been done at the start. We regularly see basements where a homeowner has spent $40,000 to $60,000 on a finished basement suite, experienced water entry within two or three years, and then faced another $20,000 to $30,000 in damage remediation plus the original waterproofing cost that was skipped. The total expenditure is nearly double what it would have been in the correct sequence.
The correct sequence for a basement project in any Vancouver home that has shown any history of moisture — even minor, even just efflorescence, even just occasional dampness — is as follows:
- Investigate and diagnose: On-site moisture assessment to identify all entry points and classify the source (intrusion vs. condensation). Do not skip this step or let a contractor skip it.
- Repair foundation cracks: Polyurethane or epoxy injection for all identified cracks before other waterproofing work. Cracks should be sealed from the interior at a minimum, exterior from outside if accessible.
- Install the waterproofing system: Interior drainage channel with sump pump, or exterior membrane work, or both — based on the diagnostic findings.
- Install the sump pump: Ensure primary and backup are both in place and functioning before the pit area becomes inaccessible under finished flooring.
- Allow walls to dry: Four to eight weeks of active ventilation and dehumidification after waterproofing work is complete. Take moisture meter readings before proceeding to confirm acceptable levels.
- Frame and insulate: Use moisture-resistant materials where appropriate — treated lumber for bottom plates, closed-cell spray foam for below-grade wall insulation.
- Finish: Drywall, flooring, and final finishes with confidence that the structural envelope is sound.
VGC’s policy is clear: we will not provide a fixed-price estimate for a finished basement renovation until a moisture assessment has been completed. We’ve seen too many projects where a homeowner received a basement finishing quote from a contractor who never looked at the foundation, and the homeowner discovered the omission only when water appeared under new laminate flooring six months later.
If you’re planning a basement project and want to understand what’s involved before committing to scope, our renovation guide walks through the planning process and what to expect at each stage. For site-specific moisture assessment, contact VGC directly — we conduct diagnostic inspections as the first step of every basement project engagement. You can also explore our dedicated Vancouver basement renovation service page for information on the full range of below-grade work we undertake.
How VGC Approaches Basement Waterproofing in Vancouver
Vancouver General Contractors has been working in Metro Vancouver’s residential renovation market long enough to understand the patterns that lead to costly mistakes in basement projects. Our waterproofing approach is built around the principle that diagnosis before prescription produces better outcomes for homeowners and better long-term results for the buildings we work on.
Every VGC basement waterproofing engagement begins with an on-site moisture investigation. This is not a brief walk-through — it includes moisture meter readings at multiple points on the foundation walls and floor slab, visual inspection of all window wells and their drainage condition, assessment of any visible cracks including their orientation, width, and evidence of recent or historical movement, and thermal imaging where moisture mapping would benefit from it. We identify all entry points before we scope any work. This step is what allows us to recommend an interior system where it’s sufficient and exterior work where it’s genuinely required — rather than defaulting to the more expensive option for every situation.
Our recommendations are transparent and written. We explain why we are recommending the proposed scope rather than alternatives, what the expected outcome is, and what maintenance the system will require. For drainage work requiring permits — which includes most sump pump installations and structural crack repairs — we manage the permit application process and ensure inspections are completed.
When mould remediation is required before or alongside waterproofing, we coordinate directly with the licensed remediation company to sequence work appropriately. Waterproofing and remediation scopes need to be carefully coordinated — containment barriers installed for remediation must not prevent waterproofing access, and waterproofing concrete work must not introduce dust into recently cleaned spaces. We manage this coordination so the homeowner deals with a single point of contact rather than having to manage two separate contractors whose work overlaps.
For homeowners planning to finish their basement after waterproofing, we offer the option to scope and price the combined project — waterproofing plus basement renovation — from the start. This bundled approach typically produces meaningful cost savings compared to executing the work in two separate phases with two sets of mobilization costs, and it ensures the waterproofing design accommodates the finished basement layout rather than being retrofitted around it afterward.
If your Vancouver basement is showing any signs of moisture intrusion, or if you’re planning to finish your basement and want to be certain the foundation envelope is sound before you invest in finishes, reach out to VGC for a diagnostic consultation. We work throughout Metro Vancouver including Vancouver, Burnaby, North Vancouver, West Vancouver, Coquitlam, Port Moody, New Westminster, and Surrey.
More Basement & Secondary Suites Guides

Interior vs. Exterior Basement Waterproofing in Vancouver: Which is More Effective?
Drywall vs. Drop Ceiling for Your Vancouver Basement: Cost and Practicality Compared

Carpet vs. LVP Basement Flooring in Vancouver: Which Handles Moisture Better?
Wood vs. Steel Stud Framing for Vancouver Basement Walls: Which is Better?
Basement Subfloor Options Sleepers Dricore Lvp Concrete
Ready to start your renovation?
Frequently Asked Questions: Basement Waterproofing in Vancouver
How much does basement waterproofing cost in Vancouver?
The cost depends entirely on the method and scope. Interior drainage systems (perimeter channel, weeping tile, sump pump) for a typical Vancouver basement run $10,000 to $20,000. Exterior waterproofing for a single wall costs $8,000 to $18,000; full perimeter exterior waterproofing runs $30,000 to $65,000. Individual crack repairs cost $300 to $1,200 each depending on repair method and crack length. Window well drainage repairs range from $800 to $4,000 per well. A diagnostic inspection by VGC will clarify which scope applies to your specific situation before any cost commitment is made.
Does my Vancouver basement need waterproofing?
If your basement shows any of the following, waterproofing assessment is warranted: efflorescence (white mineral deposits) on walls, staining or tide marks, mould at the base of walls or in lower corners, visible seepage at the floor/wall joint, musty odour, or any history of standing water. If you plan to finish your basement, a moisture assessment is advisable regardless of visible symptoms — minor seepage that is tolerable in an unfinished space becomes a serious problem once it’s behind drywall.
What is the best basement waterproofing method?
There is no universally “best” method — the right choice depends on the source of intrusion, the severity, the access available, and the homeowner’s goals. For most Vancouver homes with chronic seepage at the floor/wall joint, interior drainage with a sump pump is effective and appropriately priced. For homes with significant structural concerns, severe wall cracking, or cases where interior work has not resolved the problem, exterior waterproofing is the correct solution. The best method is the one that addresses the actual source of your specific intrusion.
Interior vs. exterior waterproofing — which is better?
Exterior waterproofing is more comprehensive because it stops water at the source before it contacts the foundation wall. Interior waterproofing manages water after entry. However, exterior waterproofing requires significant excavation, costs two to four times more, and disrupts landscaping and exterior structures. For many Vancouver homeowners — particularly those with finished basements, attached decks, or tight site conditions — interior waterproofing is the practical choice. The decision should be made based on diagnostic findings, not price alone.
How do I know if my basement has a drainage problem?
Persistent moisture at or below floor level, particularly when it appears even during dry periods or in spring after sustained rain, suggests a groundwater or weeping tile issue rather than simple wall seepage. Water rising through floor cracks, or water levels in a sump pit that never drop completely despite the pump running, indicate that the water table is reaching your foundation level — a classic weeping tile failure symptom. A professional diagnostic inspection with moisture meters and site observation during or after a rainfall event will confirm the diagnosis.
Can I waterproof my basement from the inside?
Yes. Interior waterproofing — perimeter drainage channel and sump pump — is a legitimate and effective system for the majority of Vancouver basement moisture situations. It does not stop water from entering the wall, but it intercepts and manages water before it reaches your floor, keeping the space dry and livable. For cases where the moisture source is genuinely at the wall face or in the soil rather than through cracks, interior systems work well. They are less effective when the fundamental problem is structural wall deterioration requiring exterior membrane work.
Does homeowner insurance cover basement water damage in Vancouver?
Standard policies cover sudden and accidental water damage (burst pipe, appliance failure) but typically exclude groundwater seepage, gradual intrusion, and flooding from municipal storm systems. Overland flood coverage and sewer/water backup endorsements are available separately and are worth adding given Vancouver’s rainfall levels. Review your specific policy and speak with your broker about water damage exclusions before assuming coverage. Slow seepage — the most common Vancouver basement issue — is almost never covered without a specific endorsement.
How long does basement waterproofing last?
Exterior membrane waterproofing, when properly installed with quality materials, is typically warranted for 10 to 25 years and often lasts longer. Interior drainage systems are mechanically durable — the channel and pipe components are effectively permanent — but the sump pump requires replacement every 7 to 12 years. Crack injection repairs with polyurethane remain effective for 10 to 20 years for stable cracks; actively moving cracks may need re-treatment. Maintenance of the sump system (annual testing, pump replacement on schedule) is the primary factor in long-term performance of interior systems.
Do I need a sump pump in Vancouver?
If you have an interior drainage system, yes — the sump pump is the active discharge component without which the system cannot function. Even without a formal drainage system, homes in areas with high water table (Richmond, Delta, low-lying Burnaby, Coquitlam) benefit significantly from sump systems as primary groundwater management. Given Vancouver’s regular winter storm outages, a battery or water-powered backup pump is essential alongside any primary unit.
What is weeping tile and do I need to replace it?
Weeping tile is the perforated drainage pipe (originally clay pipe, now PVC) installed at the base of the foundation footing to collect groundwater and direct it away from the building. If your home was built before approximately 1970, the original clay weeping tile has almost certainly failed and is no longer providing meaningful drainage. An interior drainage system replaces its function from inside. True weeping tile replacement requires exterior excavation and is typically bundled into exterior waterproofing projects. If your basement symptoms suggest groundwater rising from below rather than seeping through the wall, weeping tile failure is the likely cause.
How do I fix a foundation crack in my Vancouver basement?
The repair method depends on the crack type. Hairline to moderate vertical shrinkage cracks are typically repaired with polyurethane foam injection ($300 to $800 per crack) — the foam fills and seals the crack while remaining flexible to accommodate minor movement. Stable, non-active cracks can be repaired with epoxy injection ($400 to $1,200 per crack) which restores structural strength. Horizontal cracks or cracks showing inward wall movement require structural assessment before repair — these may indicate a problem beyond simple waterproofing.
Is condensation or water intrusion causing my wet basement?
Tape a piece of plastic sheeting to the wet wall with all edges sealed and leave it for 48 hours. Moisture on the wall side of the plastic means intrusion; moisture on the room side means condensation from interior air. Condensation is addressed with ventilation (HRV) or dehumidification — not waterproofing. Intrusion requires waterproofing. Getting this diagnosis right before spending money on remediation is critical.
Can I finish my basement if it gets some water?
No. Even occasional or minor moisture intrusion will cause serious problems once it’s enclosed behind drywall and under flooring. Mould colonization of enclosed framing and insulation can occur with surprisingly little moisture. “Some water” becomes a significant mould and structural problem when it’s hidden. The only responsible sequence is to fully resolve the moisture issue, verify dry conditions with moisture meter readings, and then finish. Finishing first costs significantly more in the long run.
How do I fix a window well that lets in water?
Start by cleaning the window well thoroughly — remove all debris, leaves, and contaminated gravel. Probe the gravel to assess percolation. If the gravel is compacted and water doesn’t drain, replace it with clean drainage gravel. Install a window well cover ($200 to $600) to prevent future debris accumulation. For window wells that continue to hold water after gravel replacement, a positive drain connection to the perimeter system or to daylight is needed ($1,500 to $4,000). Complete window well drainage restoration typically costs $800 to $3,000 per well.
What type of sump pump do I need for a Vancouver home?
A 1/2 HP submersible pump is the appropriate minimum specification for most Metro Vancouver residential applications — the heavier seasonal rainfall here overwhelms the 1/3 HP units common in drier regions. Pair it with a water-powered or battery backup pump — power outages during winter storms are a regular Vancouver event and a primary pump without backup means a flooded basement during the worst possible conditions. Zoeller, Liberty, and Wayne are consistently reliable brands. Include a high-water alarm. Annual maintenance and proactive replacement within the 7 to 12 year service life window are non-negotiable for a system that protects a finished basement.
Get a Free Renovation Quote
Metro Vancouver’s trusted general contractors. Free consultations across Vancouver, Burnaby, Richmond, North Shore & beyond.
Get Your Free Quote →VGC serves Vancouver and surrounding areas. View all renovation services in Vancouver →
Comments are closed