
Bathroom Tile Vancouver: Types, Costs & How to Choose (2026 Guide)
Tile is the most consequential material decision you’ll make in a bathroom renovation. It sets the aesthetic, defines the maintenance burden, and accounts for 20–30% of your total bathroom renovation budget. Choose wrong and you’re looking at a costly teardown — ceramic can’t be patched, and removing poorly installed tile often damages the substrate underneath it. Choose well and your bathroom looks better a decade from now than it did on day one.
This guide covers everything you need to know about bathroom tile in Vancouver: every major tile type, realistic installed costs, what’s trending in 2025–2026, how to evaluate installation quality, where to buy in Metro Vancouver, and the questions we get asked most often. Whether you’re tiling a guest bath powder room or doing a full primary ensuite renovation, the decisions here are the same — the budget just scales.
Why Tile Decisions Drive Your Bathroom Renovation
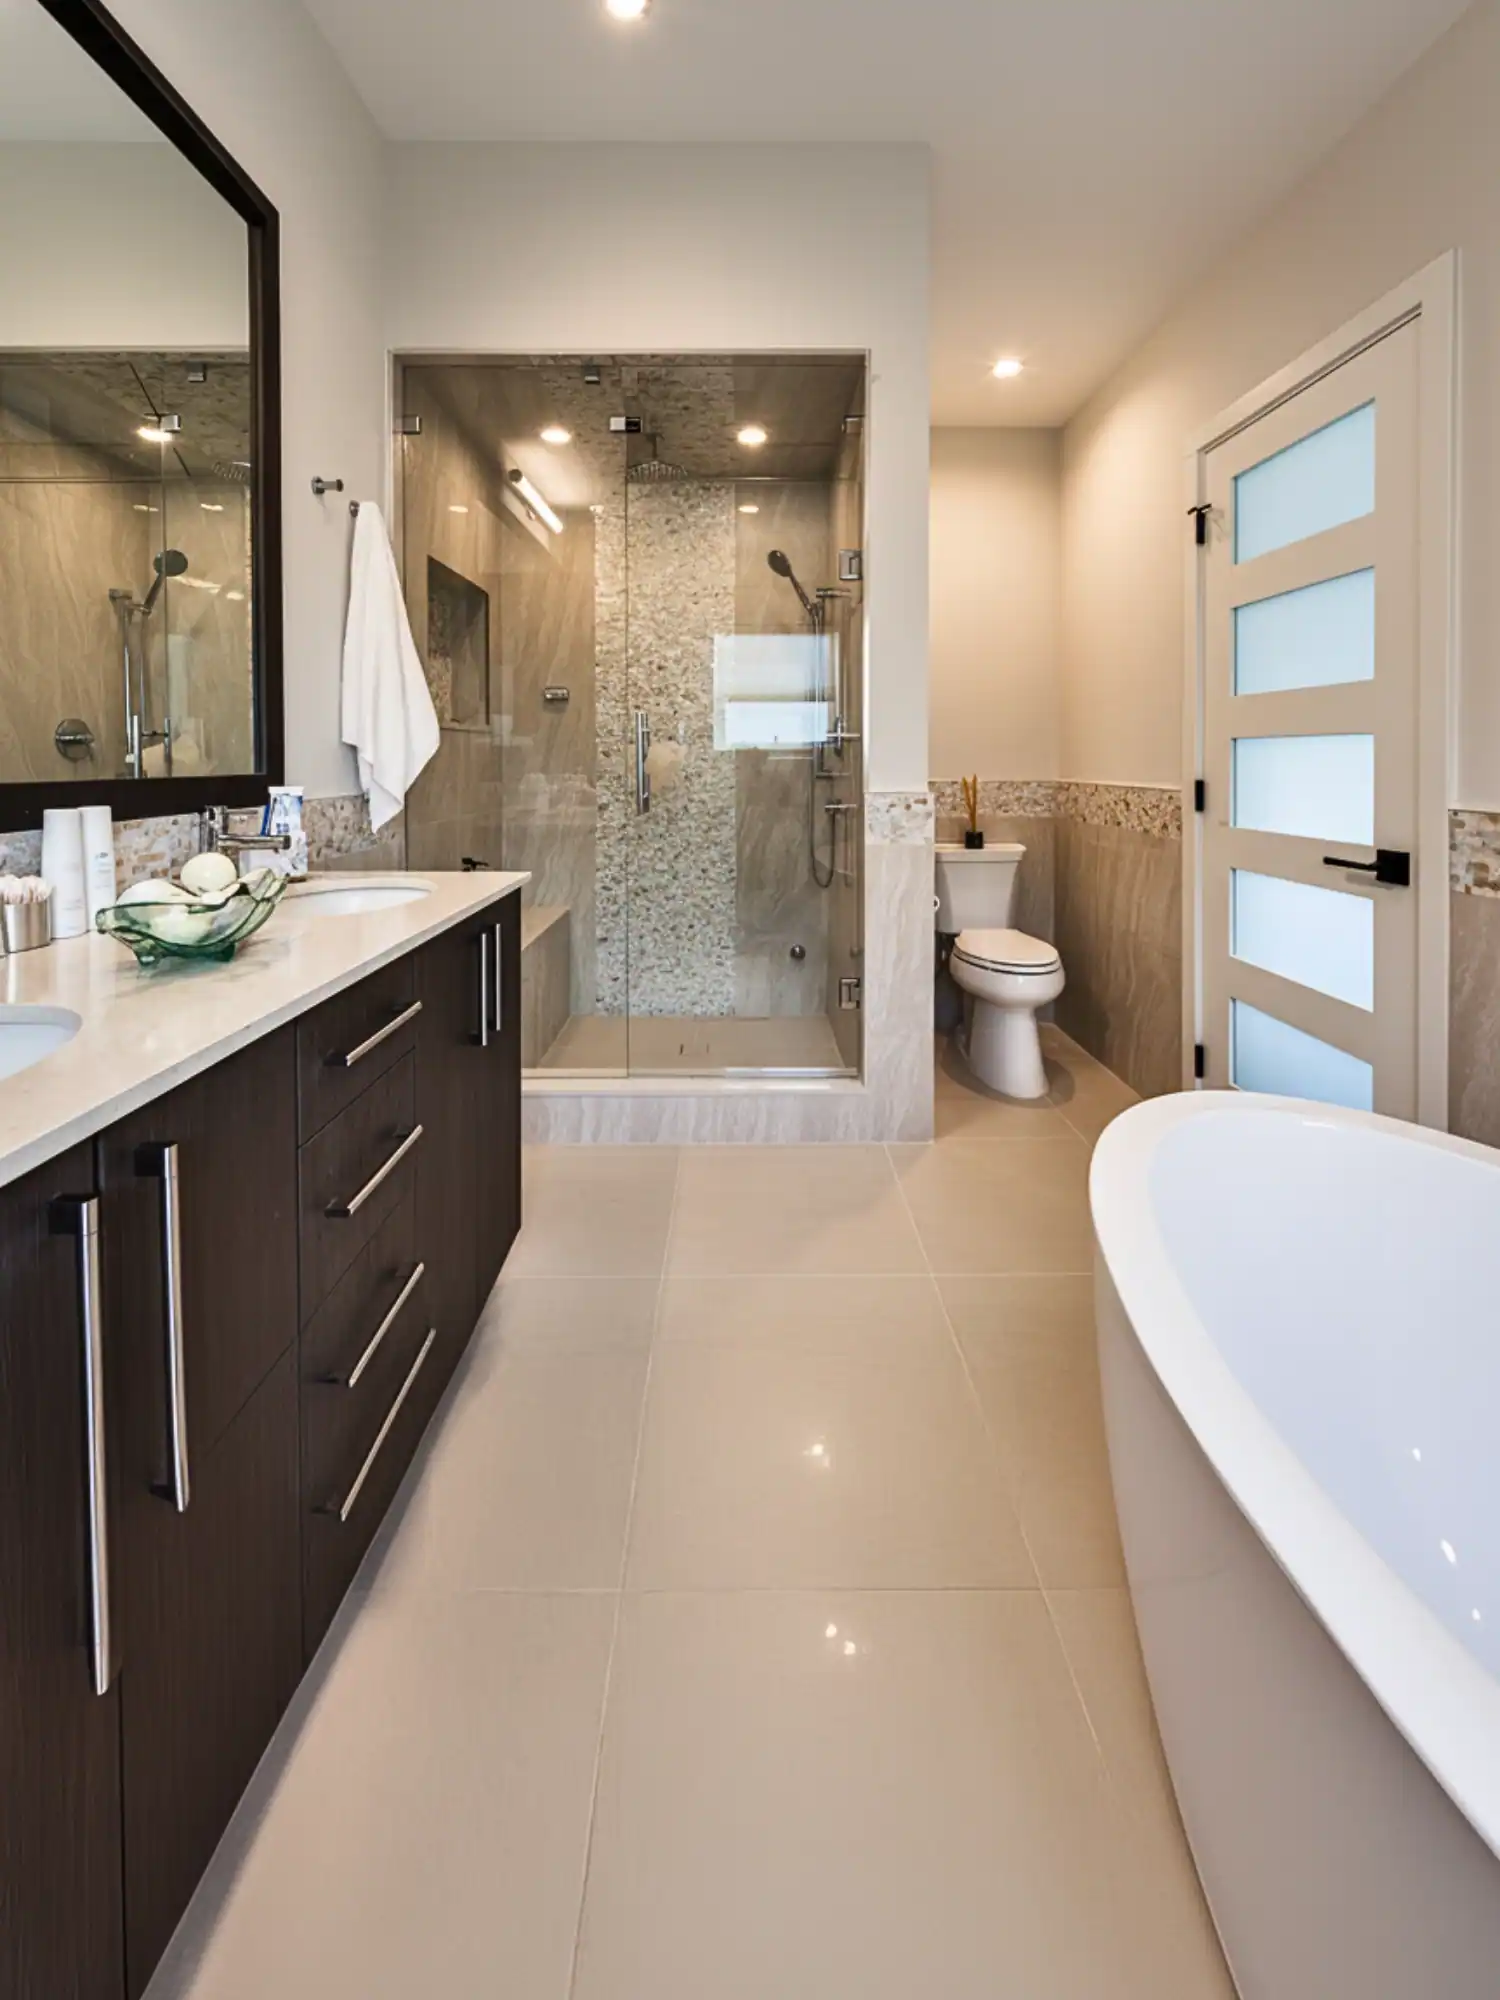
A bathroom renovation has many moving parts — plumbing, electrical, cabinetry, fixtures, lighting — but tile is the one element that touches every surface you see. Your floor tile, wall tile, and shower tile collectively define the look of the room more than any other single category. And unlike a light fixture you can swap in an afternoon, tile is a multi-day installation that requires demolition to undo.
Important notes on these numbers: Installation costs in Vancouver are higher than the Canadian average due to labour rates. Figures above assume standard prep on a sound substrate
Vancouver General Contractors
In a typical Vancouver bathroom renovation, tile materials and labour together run $3,000–$12,000 depending on the scope, tile selection, and complexity of the layout. A straightforward 50 sq ft bathroom with standard porcelain and a basic subway shower surround lands at the lower end. A primary ensuite with large-format porcelain floors, zellige accent walls, a fully tiled shower with niche, and heated floor will reach or exceed the top of that range before you’ve selected a single fixture.
The three tile decisions every bathroom renovation requires:
- Floor tile — anti-slip rating, format, heated floor compatibility
- Wall tile — full height or wainscot, accent vs. field tile, grout joint width
- Shower tile — waterproofing system behind it, floor pitch, niche tile, drain integration
These decisions interact. A large-format porcelain tile you love for the floor may be the wrong choice for the shower floor (drainage slope becomes very difficult on large tiles). The grout colour you choose for the walls changes the entire character of the room. Getting expert input before you purchase a single tile saves money and prevents regret — which is exactly what our renovation guide is designed to help with.
Bathroom Tile Costs in Vancouver — Full Price Breakdown by Type
Vancouver tile pricing reflects both the tile itself (material cost per square foot) and the labour to install it (cost per square foot, which varies with tile size, pattern complexity, and surface prep requirements). Here is a realistic overview of what you’ll pay in Metro Vancouver in 2026:
| Tile Type | Material (per sq ft) | Installation (per sq ft) | Total Installed Range |
|---|---|---|---|
| Standard Ceramic | $3–$7 | $8–$14 | $11–$21/sq ft |
| Porcelain (standard format) | $5–$15 | $10–$18 | $15–$33/sq ft |
| Large Format Porcelain (24″+) | $8–$20 | $14–$22 | $22–$42/sq ft |
| Natural Stone — Marble | $12–$35 | $16–$28 | $28–$63/sq ft |
| Zellige / Handmade Moroccan | $18–$45 | $18–$28 | $36–$73/sq ft |
| Glass Mosaic | $15–$40 | $18–$30 | $33–$70/sq ft |
| Travertine / Limestone | $8–$22 | $14–$24 | $22–$46/sq ft |
| Subway Tile (ceramic/porcelain) | $3–$10 | $9–$16 | $12–$26/sq ft |
Important notes on these numbers: Installation costs in Vancouver are higher than the Canadian average due to labour rates. Figures above assume standard prep on a sound substrate. Surface preparation — levelling a subfloor, installing cement board, applying a waterproofing membrane in a shower — is typically quoted separately and can add $500–$2,000 to a project depending on existing conditions. Heated floor systems (electric mat) add $8–$15/sq ft installed on top of tile cost.
Waste factor matters: always order 10–15% extra for cuts and future repairs. Tile from different production lots will not match — ordering enough upfront is not optional, it is essential. For complex patterns like herringbone or diagonal layouts, order 15–20% extra.
Floor Tile — Choosing the Right Tile for Bathroom Floors
Bathroom floor tile has one requirement that wall tile does not: it must be safe when wet. Anti-slip rating (the R-rating system) is the standard measure. R10 is the minimum for residential bathroom floors. R11 is recommended for wet areas like open showers and around bath surrounds where water puddles regularly. R12 and above are commercial ratings used in institutional settings — not typically required in residential bathrooms but available if a client has specific safety requirements.
How do you identify an R10+ tile? The rating should be on the tile packaging or available from your supplier. Matte and textured finishes almost always meet R10. Polished porcelain and high-gloss ceramics frequently do not — they are beautiful on walls but dangerous on floors when wet. This is not a preference; it is the reason slip-and-fall incidents in bathrooms are so common when homeowners choose aesthetics over anti-slip performance.
Large format tile on bathroom floors — 24″x24″ and larger — creates a sleek, contemporary look with fewer grout lines breaking up the visual plane. The trade-off is installation complexity. Every shower floor must slope toward the drain at a minimum pitch of 1/4″ per foot. On a 12″x12″ or smaller tile, this slope is easy to achieve with a mortar bed. On a 24″x48″ tile, you are pitching a rigid 2-square-foot slab — it requires a very skilled installer and a linear drain (which allows the entire floor to slope in one direction rather than four). Large format floor tile in a shower is genuinely harder to do well, and the cost premium for installation reflects that.
Mosaic floor tile — typically 1″x1″, 2″x2″, or 1″x2″ brick-shaped tiles on mesh backing — is the traditional shower floor solution because the small tile format makes achieving the required slope straightforward. More tiles mean more grout joints, and more grout joints mean more surface area for mold and soap scum to accumulate. This is the mosaic floor’s primary maintenance disadvantage. Epoxy grout (covered in the grout selection section below) largely solves this problem but adds cost.
Heated floor compatibility: Electric in-floor heating mats work with virtually all tile types — porcelain, ceramic, and natural stone are all thermally compatible. The one restriction is tile format: large format tile (24″+ in any dimension) requires a decoupling membrane (such as Schluter Ditra-Heat) to protect against thermal expansion cracking the tile or breaking the grout joints. Any reputable Vancouver tile installer will include this specification automatically for heated floor projects, but ask explicitly if it is not mentioned in your quote.
Shower Tile — What You Need to Know Before Tiling Your Shower
The most expensive tile failure in a bathroom is not a cracked tile or discoloured grout. It is water getting behind the tile and damaging the structure of your home. A shower that leaks behind the tile wall can cause tens of thousands of dollars in framing damage, mold remediation, and secondary repairs — all hidden behind surfaces that look perfectly intact until they fail catastrophically. The tile itself is almost irrelevant compared to the waterproofing system it sits on.
In Vancouver, where we run showers daily and the climate creates ideal conditions for mold growth, a proper waterproofing system is non-negotiable. The current gold standard is a continuous membrane system — either sheet-applied (Schluter Kerdi, WEDI board) or liquid-applied (Redgard, Mapelastic) applied over cement board. Both approaches are accepted by BC building code and both work when installed correctly. What does not work: standard drywall (even “green board” moisture-resistant drywall) as a shower tile substrate. Any contractor still using drywall as a shower substrate is cutting a dangerous corner.
Large format tile in showers dramatically reduces the number of grout joints — and grout joints are where mold establishes itself. A shower tiled with 24″x48″ porcelain slabs has a fraction of the grout surface area compared to a subway-tiled shower, which means less scrubbing, fewer staining events, and a cleaner look over time. This is a practical argument for large format in the shower, not just an aesthetic one.
Full-height tile vs. tiled wainscot: Full-height tiling (floor to ceiling on all shower walls) is the current standard for new Vancouver bathroom renovations. Tiled wainscot with painted drywall above was standard practice 15–20 years ago and remains structurally sound if the transition is above the wet zone. However, full-height tiling is more practical (no painting required, no moisture intrusion risk at the transition), looks better, and adds more value. The additional tile cost for the upper portion of the wall is typically modest compared to the total project cost.
Shower niche tile: A recessed shower niche is one of the most requested features in Vancouver bathroom renovations. The niche is typically tiled with the same tile as the shower walls, a contrasting accent tile, or a single slab of natural stone. Waterproofing the niche is critical — a niche that is not properly waterproofed on all five interior surfaces will leak into the wall. Ask your contractor specifically how niches are waterproofed in their standard process.
Shower floor tile: Anti-slip is mandatory on shower floors — this is not optional from either a safety or building code perspective. Mosaic tile (1″x1″ to 2″x2″) is the most common shower floor choice because the small format accommodates the required drain slope easily and the additional grout joints improve grip. Pebble tile is another popular option that provides excellent drainage and tactile interest. Whatever you choose, the shower floor tile must have a slip resistance rating of at least R11.
Porcelain Tile — The Workhorse of Vancouver Bathroom Renovations
Porcelain tile is the dominant tile type in Vancouver bathroom renovations, and for good reason. It is fired at higher temperatures than ceramic tile, producing a denser, harder material with a water absorption rate below 0.5% (ceramic is typically 3–7%). That low absorption rate makes porcelain genuinely frost-resistant, highly stain resistant, and suitable for both floors and walls in wet environments. It requires no sealing. It tolerates heavy use. And the manufacturing technology has advanced to the point where porcelain tile can credibly replicate marble, wood grain, concrete, limestone, and virtually any other natural material — often indistinguishably so at normal viewing distance.
Standard format porcelain (12″x12″, 12″x24″, 18″x18″) runs $5–$15 per square foot for materials in Metro Vancouver. The price spread reflects finish quality, brand, and source country — Italian and Spanish porcelains command a premium over comparable product from Asia, and the premium is partially justified (quality control is generally tighter) but partially brand perception. Good porcelain tile at $8–$12/sq ft is genuinely excellent product.
Large format porcelain — 24″x24″, 24″x48″, and slab formats up to 60″x120″ — is the defining trend in Vancouver bathroom design over the past three years and shows no sign of reversing. Large format tile creates a cleaner, more expansive feel, particularly in smaller bathrooms where a 12″x12″ grid visually fragments the space. Material costs run $8–$20/sq ft; installation adds $14–$22/sq ft because the tiles require more precise substrate preparation, are heavier to handle, and must be back-buttered (adhesive applied to both substrate and tile) to achieve the required contact coverage.
Book-matched porcelain is a technique where adjacent tiles are mirror-imaged so that the veining or patterning flows continuously across tile joints — the same effect as opening a book and seeing a symmetrical pattern on both pages. Manufacturers produce matching tile lots specifically for book-matching. When executed well, a book-matched porcelain wall reads as a continuous stone slab. It requires careful planning (you must install the tiles in the correct orientation), precise layout, and a skilled installer who has done it before.
Rectified vs. non-rectified porcelain: Rectified tile is mechanically cut to precise dimensions after firing, resulting in straight edges that allow grout joints as narrow as 1/16″. Non-rectified tile has slight edge variation from the firing process and requires wider grout joints (typically 3/16″ to 1/4″) to accommodate dimensional variation. Large format tile is almost always rectified. For a clean, contemporary look with minimal grout lines, specify rectified tile.
Natural Stone Tile — Marble, Travertine, Limestone, and Slate
Natural stone brings something to a bathroom that no porcelain tile fully replicates: the knowledge that no two pieces are identical. The variation in veining, colour, and texture is not a manufacturing defect — it is the geological record of how that stone formed over millions of years. For clients who value authenticity and are willing to accept the maintenance requirements, natural stone remains the prestige material in Vancouver bathroom renovations.
Marble is the benchmark luxury tile for bathroom walls and floors. Carrara, Calacatta, and Statuario are the most common marble varieties in Vancouver projects, ranging from $12–$35/sq ft for materials. Marble is beautiful and it is demanding. It is a calcium carbonate material, which means it reacts chemically with acids — lemon juice, many cleaning products, wine, and even prolonged contact with hard water will etch the polished surface, leaving dull spots that cannot be wiped away. Marble floors must be sealed on installation and resealed at least twice a year. Cleaning must be done with pH-neutral products only. In a bathroom with careful owners who understand the maintenance requirements, marble performs magnificently. In a family bathroom used by children, the maintenance demand is often unrealistic.
Travertine is a warm, earthy stone with a naturally porous surface that creates a rustic, Mediterranean aesthetic. It must be filled (the voids sealed with grout or epoxy filler) and sealed before installation, and resealed regularly. Travertine is softer than marble and more prone to scratching, but many clients find its warm, lived-in character more appealing than marble’s pristine formality. Material costs range from $8–$22/sq ft.
Limestone shares marble’s calcium carbonate composition and therefore the same vulnerability to acidic etching. It tends to be more uniform in appearance than marble — subtler veining, more consistent colour — which some clients prefer. The maintenance requirements are identical to marble: seal twice yearly, clean with pH-neutral products only.
Slate takes a different position in the natural stone category. It is a metamorphic rock with natural cleft texture that provides excellent slip resistance without any additional treatment — making it one of the few natural stones that is genuinely appropriate for bathroom floors without modification. The rustic, layered texture of slate creates a very different aesthetic than polished marble or travertine, but for bathrooms with a natural, spa-like, or mountain-retreat aesthetic, slate is a compelling choice at $8–$18/sq ft.
Porcelain marble-look vs. real stone: This is the question every client considering natural stone eventually asks, and the honest answer is that the trade-offs are real on both sides. Porcelain marble-look tile at $10–$20/sq ft looks excellent, requires no sealing, never etches, and performs perfectly in a high-use bathroom. Real marble at $20–$35/sq ft has a depth and variation that high-resolution porcelain does not fully replicate, especially on polished surfaces viewed at close range. The right choice depends on your priorities. We work with clients using both materials and can help you compare samples from our preferred Vancouver suppliers.
Zellige and Handmade Tiles — The Statement Tile of Vancouver’s 2024–2026 Bathrooms
If you have spent any time on Instagram or Pinterest looking at bathroom renovation inspiration over the past two years, you have seen zellige tile — probably without knowing the name. Zellige (pronounced zuh-LEEJ) is a traditional Moroccan tile made by hand from natural clay. Each tile is cut individually from a larger fired slab and glazed using techniques that have not changed significantly in 600 years. The result is a tile with:
- Slight thickness variation from tile to tile (2–6mm variation is normal)
- Irregular surface texture that catches and reflects light differently at every angle
- Colour variation within a single production batch — no two tiles are identical
- A handmade quality that reads as authentic luxury at any viewing distance
That irregular thickness is also the primary installation challenge. Zellige requires an installer who has worked with it before — the mortar bed must be adjusted tile by tile to compensate for thickness variation, and achieving flush surfaces (no lippage) requires patience and skill. An inexperienced installer working with zellige produces visibly uneven results. When specifying zellige for a Vancouver bathroom project, ask your contractor specifically about their zellige installation experience.
Zellige is available in Vancouver through specialty suppliers including Saltillo Imports and select showrooms at Centura and Mandarin Stone. Expect to pay $18–$45/sq ft for materials depending on colour and source. True imported Moroccan zellige from Fez commands the premium end; domestic and Spanish approximations are available at lower price points but lack some of the surface character that makes the original compelling.
Where zellige works best in Vancouver bathrooms: Zellige is most impactful as an accent application — a full shower wall, a vanity backsplash, or a feature wall behind a freestanding tub. Full coverage zellige (all four walls plus floor) in a bathroom is a design statement that works beautifully in the right home, but at $36–$73/sq ft installed, it is also a significant budget commitment. Most Vancouver clients we work with use zellige for one or two feature surfaces paired with a complementary neutral porcelain on the remaining surfaces.
The colours most requested in Vancouver projects: sage green, warm ivory, dusty terracotta, and deep teal. White zellige is perennially popular and reads very differently from standard white subway tile — the surface variation gives it a warmth and movement that glazed ceramic cannot match.
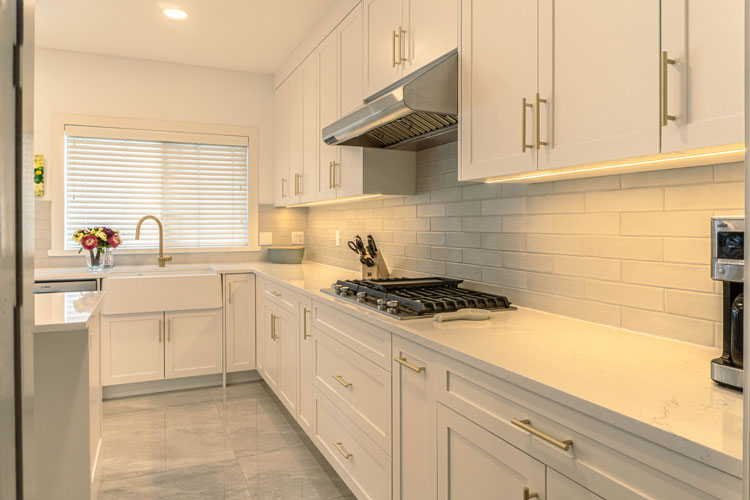
Subway Tile — The Classic That Keeps Evolving
Subway tile has been the default bathroom wall tile in North American renovation for 30 years. The original 3″x6″ format — inspired by the glazed white tiles of the New York City subway system, installed in 1904 — remains one of the most recognizable and versatile tile formats available. It is also, in 2026, evolving into something more varied and interesting than the standard white brick-bond grid that defined bathrooms from the 1990s through the early 2010s.
Format variations:
- 2″x4″ mini subway — smaller scale creates a denser, more detailed surface; popular in powder rooms and as shower accent tile
- 3″x6″ standard — the classic; still excellent, particularly in herringbone or vertical stack layouts
- 4″x8″ large subway — bridges subway tile and large format; fewer grout lines, slightly more contemporary scale
- 4″x12″ and 3″x12″ plank subway — very popular 2023–2026; the elongated format works beautifully in vertical stack, adding height to lower-ceilinged bathrooms
Layout patterns: The pattern you choose changes the entire character of the same tile. A standard 3″x6″ subway in a 1/3 offset brick bond reads as traditional. The same tile in a herringbone pattern reads as artisan and graphic. A vertical stack (tiles oriented vertically, stacked without offset) reads as contemporary and adds visual height. A horizontal stack (tiles horizontal, no offset) reads as minimal and modern. Your tile installer can mock up patterns for your approval before committing — ask for this, particularly on expensive tile.
Grout colour is the most underestimated subway tile decision. White tile with bright white grout reads as clean and classic. The same white tile with charcoal grout reads as graphic and contemporary, with the grid pattern itself becoming a design element. White tile with warm grey grout reads as soft and transitional. The grout colour you choose is as important as the tile colour — ask your supplier for grout colour sample cards and test them against your actual tile before making a final selection.
Is subway tile outdated in 2026? The standard white 3″x6″ brick bond layout is no longer the cutting-edge choice it was in 2010, but it remains a solid, timeless option that will not look dated in five years the way some design-forward choices can. Where subway tile has become genuinely stale is in low-effort, low-budget renovations that use it as a default rather than a considered choice. When selected deliberately, finished with a thoughtful grout colour, and installed in a non-standard pattern, subway tile remains a strong choice at $3–$10/sq ft installed.
Grout Selection — The Decision Most Homeowners Get Wrong
Grout is a minority of the tile installation by area but a majority of its visual impact and long-term maintenance burden. The wrong grout choice — particularly grout colour on a floor — is one of the most common bathroom renovation regrets we hear about. Understanding the basic categories before you commit saves a significant headache.
Sanded vs. unsanded grout: The rule is simple: grout joints 1/8″ wide or narrower require unsanded grout. Joints wider than 1/8″ require sanded grout. Sanded grout has finer sand particles added for dimensional stability in wider joints — using it in narrow joints scratches polished tile surfaces. This is a technical specification, not a preference, and your installer will know which applies to your tile layout.
Epoxy grout is the premium option that every homeowner with a mosaic shower floor should know about. Unlike cement-based grout, epoxy grout is non-porous — it does not absorb water, does not stain, does not require sealing, and resists mold growth at the grout line. The trade-offs: it costs $3–$5/sq ft more to install than standard grout (it is harder to work with and requires a faster, more experienced installer), and it cannot be easily removed and replaced later. For shower floors and other high-maintenance grout applications, the long-term maintenance savings make epoxy grout worth the upfront premium for most clients.
Colour selection guidelines:
- White grout — shows every stain. Requires regular sealing on floors. Beautiful when clean; difficult to keep that way in a family bathroom. Best for low-traffic walls.
- Light grey grout — the practical compromise. Hides daily soil while remaining visually light. The most forgiving choice for bathroom floors in most Vancouver homes.
- Medium grey grout — creates visible grid definition. Pairs well with large format tile where you want some grout line presence.
- Charcoal / dark grey grout — dramatic, graphic, contemporary. Very popular with white tile. Fades over time with cleaning, though modern stain-resistant grouts have reduced this problem significantly.
- Matching grout (same colour as tile) — minimizes visual grid, makes the tile surface appear continuous. The preferred choice for large format tile where you want the fewest visual interruptions.
Grout joint width is both a technical specification and a design choice. Very narrow joints (1/16″–1/8″) on rectified large format tile create a seamless, almost grout-free appearance. Wider joints (3/16″–1/4″) on standard ceramic create a more traditional look. For subway tile, joint width changes the character significantly: 1/16″ joints on subway tile creates a very flat, modern look; 3/16″ joints create the classic brick-wall appearance most people associate with traditional subway tile.
Tile Layout and Installation Quality — How to Know If the Work Is Good
The difference between a professional tile installation and an amateur one is not always obvious on day one. Both may look passable immediately after installation. The difference shows up at 60 days when grout begins cracking, or at 18 months when tiles in the shower start coming loose, or at 5 years when water damage behind the tile becomes apparent. Understanding what good tile work looks like — and knowing how to assess it — protects your investment.
What to look for in a completed tile installation:
- No lippage — run your hand across the tile surface. Tile edges should be flush with adjacent tiles. A slight variation of up to 1/32″ is acceptable; anything you can catch your fingernail on is not. Lippage becomes a safety issue on floor tile and looks amateurish on wall tile.
- Consistent grout joint width — look down a long run of tile. Joints should be even width from top to bottom and side to side. Widening or narrowing joints over a run indicates poor layout planning.
- Correct shower floor slope — pour a cup of water on the shower floor. It should drain toward the drain without pooling anywhere. Test this before grouting if possible.
- Full mortar contact — ask your contractor about the mortar coverage percentage. Industry standard (ANSI A108.02) requires 80% coverage for floors and walls, 95% for wet areas and large format tile. Insufficient coverage creates hollow spots that cause cracking under load.
- Grout joint sealing — cement grout on floors must be sealed after installation and before first use. Ask whether this is included in your quote.
- Clean grout lines — grout should fill joints without smearing onto tile faces and without being concave (scooped below tile surface). Concave grout holds water and stains faster.
Before you sign off on a tile installation and release final payment, take 15 minutes to assess the work against this list. A professional tiler will not object to this inspection — they do it themselves. If a contractor pushes back on a quality inspection before final payment, that is a significant red flag.
Layout planning is where quality tile work begins. A good installer plans the tile layout before cutting a single tile: identifies the visual centre of each wall, determines where cut tiles will fall (ideally in corners and below fixtures, not in prominent visual locations), and confirms the grout joint alignment is consistent between connected surfaces. For complex layouts like herringbone or diagonal patterns, a skilled installer will dry-lay a section of the floor before committing to adhesive to verify the pattern alignment is correct.
Ready to see what your bathroom renovation will cost? Our free renovation guide and quote request form gives you a realistic budget estimate based on your specific scope. Or contact us directly to schedule a consultation.
Where to Buy Bathroom Tile in Vancouver — Supplier Guide
Metro Vancouver has a well-developed tile supply market with options across every price point and style category. Here is an honest assessment of where to shop depending on what you are looking for:
Centura Tile — multiple Metro Vancouver locations including Burnaby, Surrey, and Vancouver. The largest selection of standard to mid-range porcelain and ceramic in the region. Centura’s own-brand lines offer excellent value at $4–$12/sq ft. Their showrooms are well-merchandised and their staff can assist with design coordination. Strong for everyday porcelain floor and wall tile; more limited for high-end artisan selections.
Tile Town — another multi-location Metro Vancouver retailer with a broad range of mid-market tile. Similar positioning to Centura; worth visiting both to compare selection and pricing. Tile Town often has competitive promotions on porcelain and frequently discounts tile packages for renovation projects.
Olympia Tile — trade-focused supplier with a strong selection of Italian and Spanish porcelain. Olympia carries higher-end large format options and is a good source for premium rectified porcelain in the $12–$25/sq ft range. Better for design-forward projects than budget renovations. Located in Burnaby.
Mandarin Stone — the premium end of the Vancouver tile market. Mandarin Stone specializes in natural stone, high-end porcelain, and artisan tiles including zellige and handmade options. Their showroom is a design destination in itself. For clients whose bathroom renovation has a material budget of $15,000+, Mandarin Stone carries product that is difficult to find elsewhere in Metro Vancouver.
Saltillo Imports — the Vancouver specialist for Mexican, Moroccan, and artisan tile including authentic zellige from Fez. If zellige or terracotta tile is on your list, Saltillo is the first call. They also carry handmade encaustic cement tile and other artisan formats that the larger chain showrooms do not stock.
MSI Surfaces — major North American tile distributor with a Vancouver warehouse. Strong for large format porcelain, quartz surfaces, and natural stone in the mid-to-premium range. MSI sells primarily to trade but their products are widely available through local retailers. If your contractor sources tile from MSI, the quality is reliable.
Online tile ordering: Possible, and sometimes the only way to access specific styles or price points. The primary risk is lot number matching. Tile is manufactured in batches and colour can vary between lots — sometimes slightly, sometimes noticeably. When ordering tile from photos on a screen, you are working without the benefit of seeing the actual tile in your space’s lighting. Order samples before committing to a large purchase, and if the project requires a second order, always verify the lot numbers match your original purchase. Lead times for online special orders can be 4–12 weeks — plan accordingly.
Lead times for special tiles: In-stock tile at a local showroom is available immediately. Special order tile — specific colours, imported products, custom sizes — typically takes 4–6 weeks from a domestic distributor and 8–12 weeks for direct imports. If your renovation start date is firm, confirm tile availability and lead times before finalizing your design selection. We have seen projects delayed by 6–8 weeks because a tile the client selected at the showroom turned out to be a special order item.
More Bathroom Renovations Guides
Frameless vs. Semi-Frameless Shower Door in Vancouver: Which is Worth the Cost?
Freestanding vs. Alcove Bathtub in Vancouver: Design, Space, and Cost Comparison
Porcelain vs. Natural Stone Tile for Vancouver Bathrooms: The Complete Comparison
Electric vs. Hydronic Heated Bathroom Floor in Vancouver: Which is Better?
Bathroom Tile Selection Guide for Vancouver Homeowners: Porcelain, Ceramic, Natural Stone
Ready to start your renovation?
Frequently Asked Questions About Bathroom Tile in Vancouver
What is the best tile for a small bathroom?
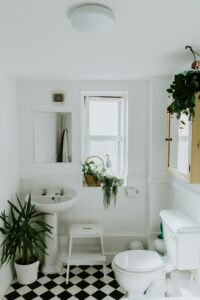
Large format tile — 24″x24″ or even 24″x48″ — is counterintuitively better in small bathrooms than small tile. Fewer grout lines crossing the floor make the space read as larger and less visually cluttered. On walls, vertical-format tile (such as a 4″x12″ plank subway installed vertically) adds perceived height. Light colours and minimal grout line contrast also help small bathrooms feel more open. Avoid busy patterns and strong colour contrasts in small spaces — they fragment the visual field and make the room feel smaller.
What grout colour should I choose for bathroom tile?
For floor tile: medium grey or a colour that closely matches your tile. White grout on bathroom floors is a maintenance commitment that most households cannot sustain — it stains, and it requires regular resealing to stay clean. For shower walls: match the grout colour to the tile or go one shade darker. Bright white grout in a shower turns grey within 12–18 months of regular use regardless of sealing. A grey grout that matches a grey tile shows almost nothing. For feature walls and wainscot: this is where you can make a design choice — charcoal grout on white subway tile creates a graphic grid effect that many clients love.
What is the difference between porcelain and ceramic tile?
Both are clay-based and kiln-fired, but porcelain is fired at higher temperatures using more refined clay. The result is a denser, harder, less porous tile. Porcelain has a water absorption rate below 0.5% versus 3–7% for standard ceramic. In practical terms: porcelain is appropriate for floors, showers, and any wet application. Ceramic is appropriate for walls, backsplashes, and light-traffic floors where water exposure is minimal. Ceramic costs less ($3–$7/sq ft vs. $5–$15/sq ft for porcelain) and is somewhat easier to cut. For shower floors and any surface that will be regularly wet, specify porcelain.
How much maintenance does natural stone tile require?
More than most clients expect when they buy it. Marble, limestone, and travertine all require sealing before installation and at least twice a year thereafter — in a bathroom, plan on resealing every 6 months if you want the stone to resist staining. All acidic cleaners (including many standard bathroom cleaners) must be avoided — use only pH-neutral stone cleaners. Marble will etch if exposed to lemon juice, wine, or acidic hard water over time. Sealing slows absorption but does not make stone impervious. Slate requires less maintenance than polished marble but should still be sealed annually. If you want the look of marble without the maintenance, consider porcelain marble-look tile — modern examples are excellent.
Is large format tile harder to install?
Yes, meaningfully so. Large format tile (24″+ in any dimension) requires a flatter substrate — any high or low spots in the floor or wall are amplified across a larger tile face, creating lippage. The tiles are heavier and require back-buttering (applying adhesive to both substrate and tile back). Achieving required grout coverage percentages (95% in wet areas) requires more care. In a shower, getting adequate slope to a drain with large format tile requires either a linear drain or exceptional installer skill. Installation costs for large format tile run $14–$22/sq ft vs. $8–$14/sq ft for standard ceramic — the labour premium is real and reflects the additional skill and time required.
Can I put heated floor tile in my bathroom?
Yes, and it is one of the best bathroom renovation upgrades available. Electric in-floor heating mats sit between the substrate and the tile and connect to a thermostat. They work with porcelain, ceramic, and natural stone. For large format tile, a decoupling membrane (Schluter Ditra-Heat is the most common in Vancouver) is required to protect against thermal expansion cracking. Electric heated bathroom floors are energy-efficient for the area they heat (typically 30–60 sq ft in a bathroom), and the cost premium — $8–$15/sq ft installed on top of tile costs — has a reasonable payback in comfort, particularly for primary ensuites in Vancouver’s damp winters.
What is the anti-slip rating requirement for bathroom tile?
For residential bathroom floors, the minimum anti-slip rating is R10. For wet areas including open showers, wet rooms, and around bathtubs where water puddles, R11 is recommended. These ratings come from the German DIN 51130 standard used by most tile manufacturers worldwide. The R-rating is determined by the tile’s COF (coefficient of friction) when wet — higher is more slip resistant. Polished porcelain and glazed ceramic typically rate below R10 and are not appropriate for bathroom floors. Matte, textured, and stone tile typically meet R10 or R11. Always confirm the anti-slip rating with your supplier before purchasing floor tile.
Can I tile over existing tile?
Technically yes; practically, it depends on the situation. Tiling over existing tile is feasible when: the existing tile is firmly bonded (no hollow tiles), the substrate can bear the additional weight (two layers of tile plus adhesive), and the added height does not create problems with door clearances, fixtures, or trim. The risks: if the existing tile ever fails or has any moisture intrusion behind it, the second layer compounds the problem and makes repair more expensive. For shower walls especially, we recommend full removal and substrate inspection rather than tiling over existing tile — the cost difference is modest and you eliminate the risk of discovering hidden moisture damage years later.
What tile should I use in a shower niche?
The most common approach is to use the same tile as the shower walls, which makes the niche feel integrated with the rest of the shower. A popular alternative is to use a contrasting tile in the niche — a zellige accent, a marble slab cut to fit, or a mosaic tile — to create a focal point. Functionally, the niche tile must be waterproof (same specification as the surrounding shower tile). The niche interior must be waterproofed on all five surfaces before tiling. A single 12″x24″ or similar slab format for the niche back wall is elegant and minimizes grout joints inside the niche.
What tile trends are outdated in 2026?
The beige and brown ceramic tile that defined bathrooms from 1990–2010 is definitively dated and we would not recommend reproducing that palette intentionally. Highly variegated stone-look tile from the 2005–2015 era — where every tile had a different, busy pattern — has aged poorly. The small (4″x4″) glossy ceramic wall tile from the 1980s and 1990s is dated and hard to find new. What is not outdated: white subway tile installed thoughtfully with a good grout colour choice. Classic marble in a high-quality application. Natural stone used consistently. Good design based on classic materials does not go out of fashion — it is the shortcuts and trend-chasing that date poorly.
How long does it take to get specialty tile delivered in Vancouver?
In-stock tile at Metro Vancouver showrooms: 1–5 business days. Special order tile from a domestic distributor: 3–6 weeks. Imported tile direct from manufacturer (zellige, specialty Italian stone, custom sizes): 8–14 weeks. If your renovation is starting in 6 weeks, your tile needs to be ordered within the next week if it is anything other than a standard stocked product. We have seen multiple projects delayed by 4–8 weeks because tile lead times were not accounted for in the project timeline. Confirm availability before finalizing your tile selections.
How do I compare contractor quotes for tile installation?
Compare line by line, not just total. A lower total quote may exclude waterproofing membrane, backer board installation, or heated floor mat — costs that must be paid regardless. A complete tile installation quote should specify: surface preparation and substrate work, waterproofing system (membrane type and coverage), tile adhesive type, grout type (cement vs. epoxy), sealing of grout and/or stone, and debris removal. Quotes that do not itemize these components are difficult to compare accurately. Also ask about the installer’s experience with your specific tile type — zellige and large format porcelain both require skills that not every tile setter has.
What is the most durable tile for a family bathroom?
Rectified porcelain tile with epoxy grout is the most durable combination available for a high-traffic family bathroom. Porcelain’s low absorption rate makes it stain resistant without sealing. Epoxy grout eliminates the grout maintenance burden — no sealing, no staining, minimal mold risk. A matte or textured porcelain in a medium colour (not white, not very dark) will hide daily soil while being easy to clean. For the floor, specify R10 or R11 anti-slip rating. This combination outperforms natural stone in a family context on every maintenance dimension, and modern porcelain in the $8–$15/sq ft range is genuinely beautiful.
Should I use the same tile throughout the bathroom or mix tile types?
Both approaches work when executed with intention. Using the same tile throughout — same floor tile extended into the shower, same wall tile on all surfaces — creates a cohesive, spa-like environment that reads as seamless and expensive. Mixing tile types allows you to define different zones (shower vs. main floor, feature wall vs. field wall) and add visual interest. The risk with mixing is that competing tile choices can make a small bathroom feel busy and confused. A safe approach: one tile for the floor throughout, one tile for the shower feature wall, one tile for all other walls. That gives you visual variety while maintaining coherence.
What questions should I ask a Vancouver tile supplier before buying?
The essential questions: (1) What is the anti-slip rating (R-rating) of this tile, and is it appropriate for my application? (2) Is this tile in stock or special order, and what is the lead time? (3) How many square feet are in each carton, and what lot numbers will my order come from? (4) What grout joint width does the manufacturer recommend? (5) Does this tile require sealing, and what product do you recommend? (6) Is this tile rectified? (7) What is the return policy on unused tile? (8) Can I get a sample to take home and assess in my bathroom’s lighting? Good suppliers answer all of these questions confidently and without hesitation.
Ready to start planning your bathroom renovation? Visit our renovation guide for a comprehensive overview of the full renovation process, or contact our team for a free consultation and quote. Vancouver General Contractors has completed hundreds of bathroom renovations across Metro Vancouver — we can help you navigate tile selection, find the right suppliers, and deliver an installation that will look excellent for decades. Explore our full range of home renovation services as well.
Get a Free Renovation Quote
Metro Vancouver’s trusted general contractors. Free consultations across Vancouver, Burnaby, Richmond, North Shore & beyond.
Get Your Free Quote →Ready to start your project? Vancouver General Contractors (VGC) provides free, fixed-price quotes for homeowners across Metro Vancouver. Learn more about our bathroom renovation Vancouver services or request a free quote today.
VGC serves Vancouver and surrounding areas. View all renovation services in Vancouver →
Comments are closed