
Heated Bathroom Floors Vancouver: Costs, Types & Is It Worth It? (2026)
There’s a specific kind of misery that only Vancouver homeowners know: stepping out of a warm shower onto a cold tile floor at 7 a.m. in November. The thermostat says 20°C, the house feels fine, but that tile might as well be a slab of glacier. Heated bathroom floors solve exactly this problem — and in Vancouver’s damp, cool climate, they’ve become one of the most requested upgrades in bathroom renovations at every price point.
This guide covers everything you need to know: how the systems work, what they actually cost installed in Vancouver in 2026, electrical and permit requirements, which tile types work best, and whether the investment makes financial sense at resale. We’ve installed heated floors in hundreds of Vancouver bathrooms — here’s what we’ve learned.
Why Heated Bathroom Floors Are Worth It in Vancouver
Vancouver sits in a climate zone that doesn’t get brutally cold the way Calgary or Winnipeg does, but that mild-and-damp combination means tile floors feel cold for a surprisingly large portion of the year. From October through May — that’s roughly eight months — unheated bathroom tile will register somewhere between 12°C and 17°C even in a well-heated home. Tile doesn’t hold warmth the way wood or carpet does; it conducts heat away from your feet immediately on contact.
The cost to add electric radiant heating during a bathroom renovation is typically $800–$2,200 depending on bathroom size
Vancouver General Contractors
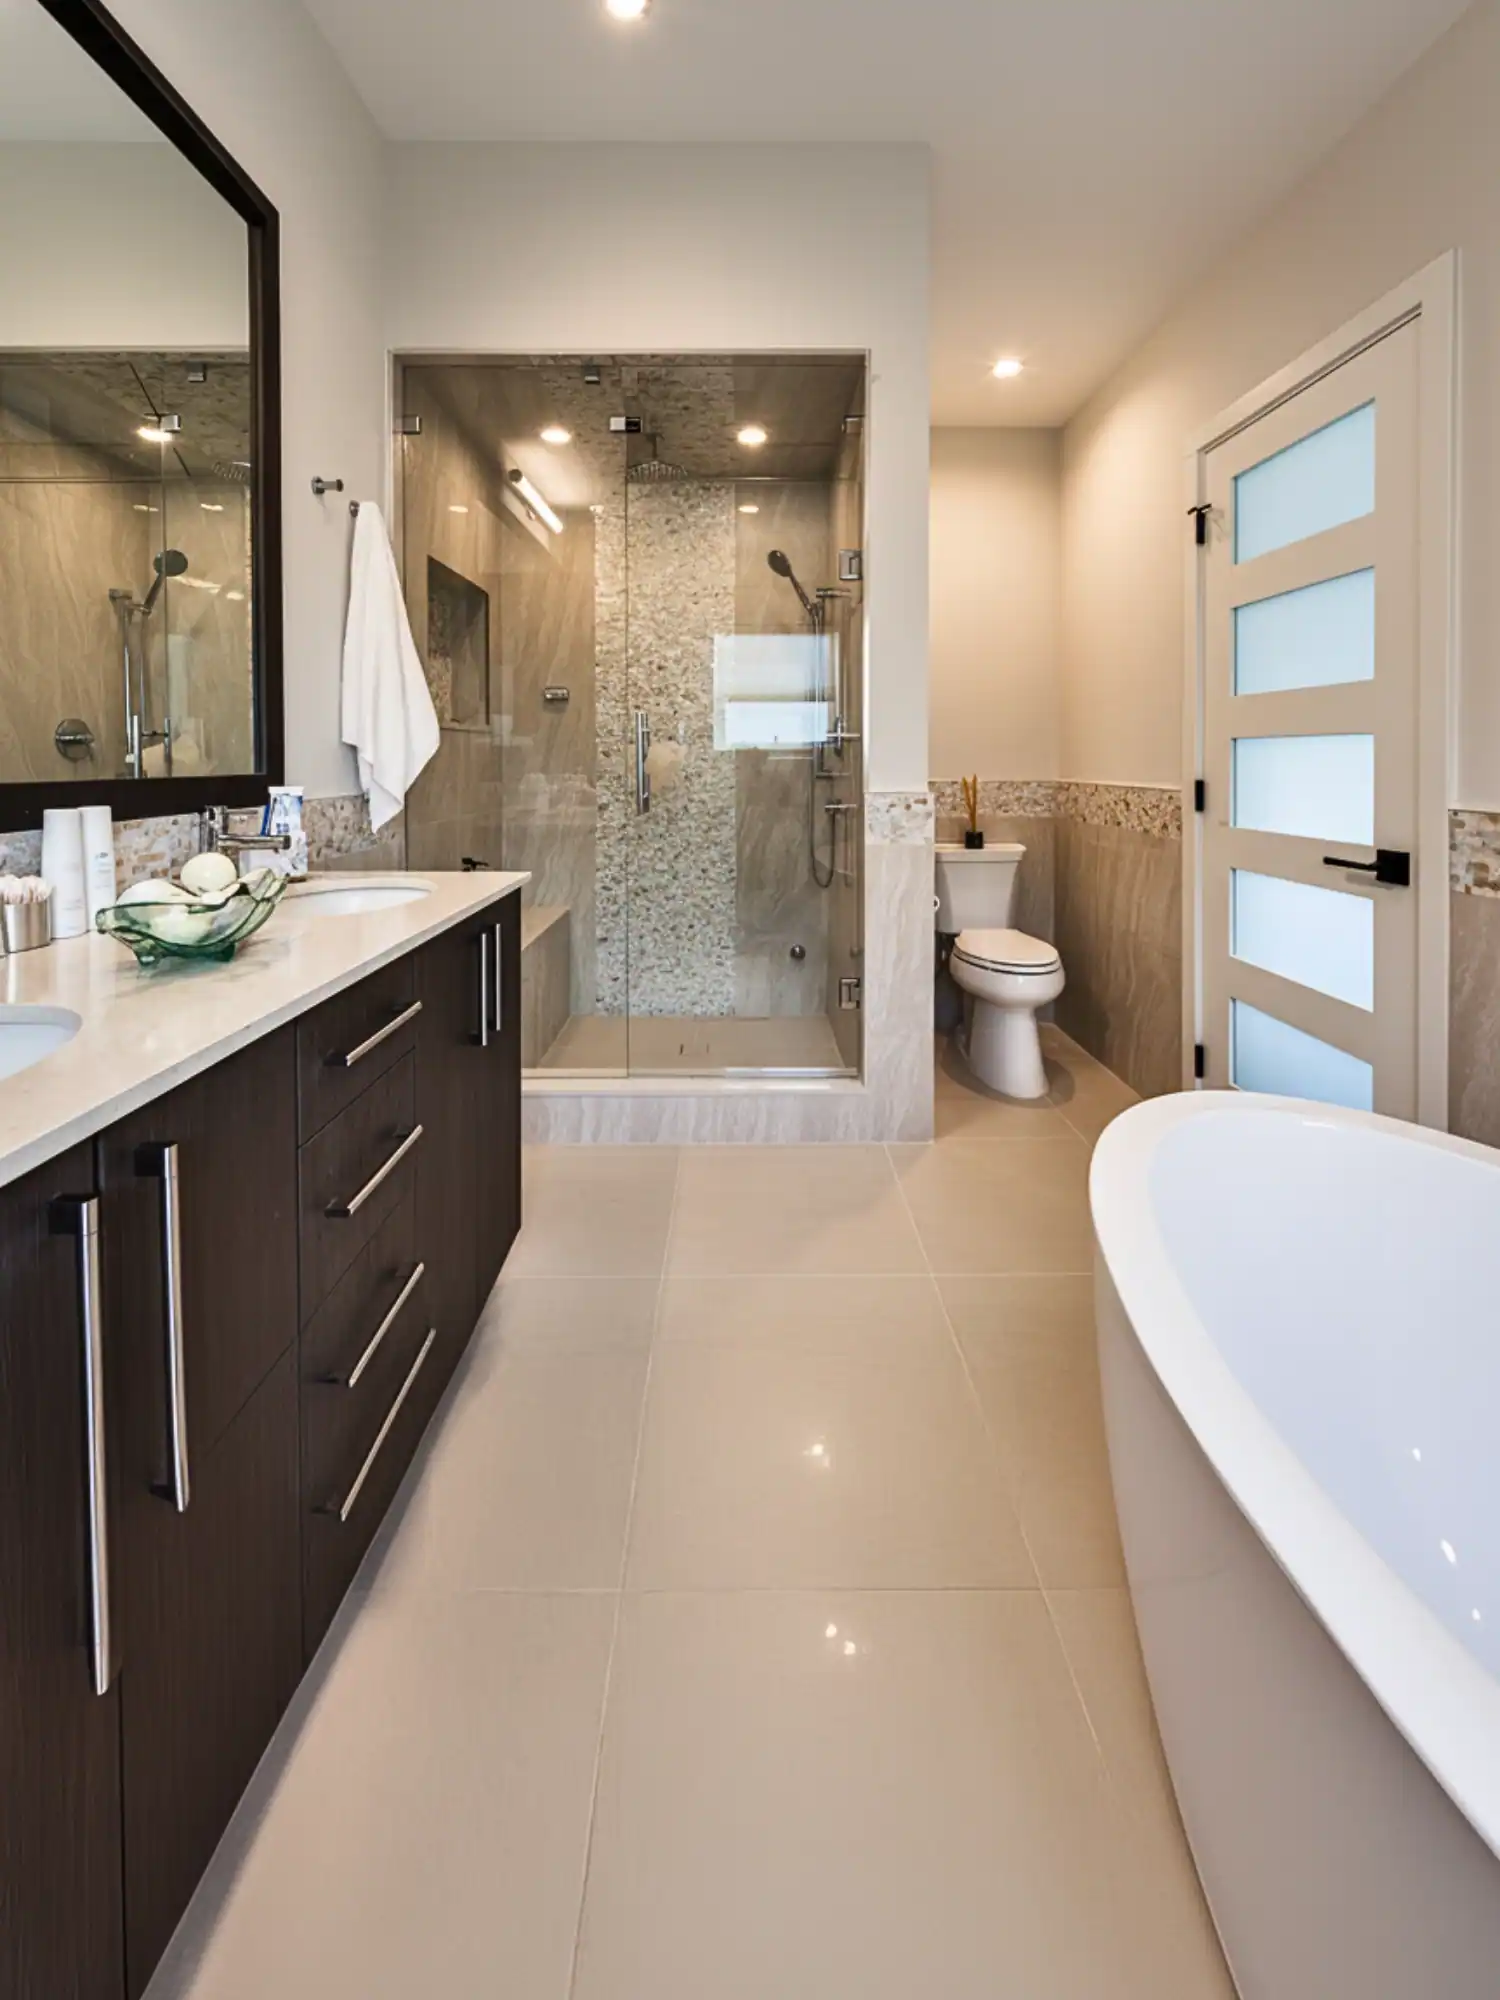
That’s the practical argument. But the financial argument is almost as compelling. In Vancouver’s mid-range and high-end renovation market, heated bathroom floors have shifted from a luxury feature to a standard expectation. When we do a full ensuite renovation at the $25,000–$45,000 level, clients are surprised if we don’t include radiant floor heating. Buyers notice it during home viewings. Real estate agents report that homes with heated bathroom floors in the primary ensuite consistently outperform comparable homes without them — not by enormous amounts, but the feature registers as a signal of quality that influences overall perception of the home.
The cost to add electric radiant heating during a bathroom renovation is typically $800–$2,200 depending on bathroom size. Spread over the daily comfort improvement and the expected 20–25 year lifespan of a quality electric mat system, that’s an extremely low cost per use. For most Vancouver homeowners doing a bathroom renovation anyway, not including heated floors is leaving daily comfort on the table for a relatively modest incremental cost.
Types of Heated Bathroom Floor Systems
There are two main categories of radiant floor heating: electric and hydronic. Each has sub-types, and the right choice depends on your bathroom size, layout, and existing mechanical systems.
Electric Radiant Floor Heating
Electric systems run a resistance heating cable either embedded in a mesh mat or laid as a loose cable beneath the tile. They’re powered by a dedicated electrical circuit and controlled by a thermostat. Installation is straightforward — the mat or cable goes down in thinset before the tile is laid — and they require minimal ceiling height increase (the heating element is approximately 3mm thick).
Electric mat systems use a pre-spaced heating cable attached to a fibreglass mesh. You roll it out, cut the mesh (never the cable) to navigate around obstacles, and embed it in thinset before tiling. For standard rectangular bathrooms, mat systems are fast to install and produce reliable, even heat distribution. Most quality mats come with a 25-year warranty.
Loose cable systems give you a spool of heating cable that you lay out yourself in a serpentine pattern, fixing it to the substrate with cable clips or a membrane. They take more labour to install but allow complete control over spacing and coverage — essential for L-shaped rooms, bathrooms with complex fixtures, or areas where you want to avoid heating under the vanity base or toilet (where heat would be wasted).
Hydronic Radiant Floor Heating
Hydronic systems circulate hot water through tubing beneath the floor, typically connected to a boiler. They’re the dominant choice for whole-home radiant heating and are highly efficient when heating large areas. For bathrooms specifically, hydronic systems are rarely the right choice: they’re expensive to install ($20–$40 per square foot installed), they require connection to a boiler or hot water system, and they don’t respond quickly to on-demand use the way electric systems do. If you already have a hydronic system in your home, extending it to a bathroom can make sense — but for most Vancouver bathroom renovations, electric radiant is the practical and cost-effective answer.
| System Type | Installed Cost (per sq ft) | Response Time | Best For | Drawbacks |
|---|---|---|---|---|
| Electric Mat | $6–$12 | 30–60 min | Rectangular rooms, new renos | Less flexible layout |
| Electric Loose Cable | $8–$14 | 30–60 min | Irregular rooms, complex layouts | More labour to install |
| Hydronic | $20–$40 | Several hours | Whole-home systems, large areas | High cost, slow response |
Heated Bathroom Floor Costs in Vancouver (2026)
The total installed cost of a heated bathroom floor in Vancouver includes the heating mat or cable, the thermostat, an electrical permit, and labour for both the electrical and tile work. Here’s what to expect at each bathroom size in 2026, based on current Vancouver trade rates.
| Bathroom Size | Heated Area (sq ft) | Total Installed Cost Range | Notes |
|---|---|---|---|
| Small bathroom | ~40 sq ft | $800–$1,400 | Powder room, small ensuite |
| Medium bathroom | ~60 sq ft | $1,100–$2,000 | Standard main bath |
| Large ensuite | ~80 sq ft | $1,400–$2,600 | Primary ensuite, walk-in shower area |
| Very large ensuite | 100+ sq ft | $1,800–$3,400+ | Luxury ensuite, multiple zones |
These costs assume the heated floor is being installed as part of a bathroom renovation where tile work is already happening. Adding heated floors to an existing bathroom requires complete tile removal and reinstallation, which adds $1,500–$3,000 in tile demo and reinstallation labour — making standalone heated floor retrofits significantly more expensive than including them in a planned renovation.
Cost Components Breakdown
| Cost Component | Typical Range | Notes |
|---|---|---|
| Electric heating mat (materials) | $150–$450 | Based on square footage; quality brands like Nuheat, WarmUp |
| Programmable thermostat | $150–$400 | Standard programmable; floor sensor included |
| Smart Wi-Fi thermostat | $250–$500 | App control, scheduling, usage monitoring |
| Electrical permit | $75–$200 | Required in BC for new circuits |
| Electrical labour | $350–$700 | Dedicated 20A circuit, GFCI, thermostat wiring |
| Tile installation labour (heated) | $200–$500 | Premium for working around heating elements |
What makes costs vary most significantly: whether a panel upgrade is needed (adds $1,500–$3,500 if the main panel lacks capacity), whether the bathroom is on the main floor versus a slab-on-grade (slabs require more attention to insulation board beneath the heating element), and how complex the room layout is. Simple rectangular rooms cost less to heat effectively; bathrooms with multiple alcoves, custom shower areas, and freestanding tubs require more planning and material.
For a full bathroom renovation budget and planning context, see our comprehensive renovation guide.
Electric Mat vs. Loose Cable: Which Is Right for Your Bathroom
Both electric mat and loose cable systems produce identical heat output and have similar operating costs. The difference is entirely in installation methodology and suitability for different room layouts.
Electric Mat Systems
Mat systems are the most common choice for Vancouver bathroom renovations. The heating cable comes pre-attached to a fibreglass mesh at a fixed spacing (typically 3-inch centres), which produces consistent heat distribution without any installer judgment required on spacing. You roll out the mat, cut the mesh to fit around obstacles (the toilet flange, vanity kickspace, bathtub edge), and embed it in thinset during the tile installation. The entire mat is approximately 3mm thick — thin enough that it doesn’t create noticeable height transitions at doorways in most cases.
Mat systems work best in rooms with straightforward geometry: rectangular bathrooms, square ensuites, standard layouts where the heated zone is basically the whole floor minus the vanity footprint. They’re faster to install than loose cable because there’s no layout planning required — you order the right wattage for your square footage and the spacing is handled for you.
Quality mat brands available in Vancouver include Nuheat, WarmUp, and ThermoSoft. These carry 25-year warranties and have a proven track record in the Vancouver market. We’ve had no callback issues with any of these manufacturers.
Loose Cable Systems
Loose cable gives the installer complete control over heating cable placement. You run the cable in a serpentine pattern at whatever spacing achieves your target wattage per square foot, fixing it in place with cable staples or a metal clip track. This flexibility is valuable in irregularly shaped rooms — L-shaped bathrooms, bathrooms with angled walls, or layouts where you want to deliberately skip certain areas.
Situations where loose cable is the better choice include: bathrooms where the toilet and vanity positions mean the “heated zone” is an unusual shape that no standard mat size covers well; bathrooms where you want different heating density in different zones; and large ensuite renovations where the floor plan is complex enough that pre-made mat sizes would leave gaps or require too many separate mats.
The additional labour for loose cable installation is typically $150–$350 compared to a mat system of equivalent square footage. For most standard bathrooms, the mat system is the right choice — use loose cable when the room geometry genuinely warrants it.
How They Work and Thickness
Both systems use resistance heating: electrical current passes through the cable, which has carefully calibrated resistance that converts electrical energy to heat. The heating element itself is approximately 3mm thick. When embedded in thinset (typically 6–10mm of thinset above the cable/mat), the total tile installation adds roughly 10–15mm to your floor height compared to a standard tile installation without heating.
This height increase is important to plan for: door clearances, transitions to adjacent flooring, and toilet flange extensions may be needed depending on your existing conditions. In most bathroom renovations where the floor is being torn down to the subfloor anyway, this is a non-issue — the tile system is being rebuilt from scratch and heights are set accordingly.
Thermostats and Controls for Heated Bathroom Floors
The thermostat is one of the most important components of a heated floor system — it controls both comfort and operating cost. Every heated floor installation requires a thermostat with a floor temperature sensor. The sensor wire runs beneath the tile (alongside the heating mat) and feeds temperature data to the thermostat continuously.
Programmable Thermostats ($150–$400)
A programmable thermostat lets you set a weekly heating schedule — typically warming the floor before your morning routine and turning off during the day when the bathroom isn’t in use. A well-programmed schedule typically runs the heating element for 2–4 hours per day (e.g., 6–8 a.m. and again for 30 minutes in the evening), which keeps operating costs low while ensuring the floor is warm when you need it.
Standard programmable thermostats from manufacturers like Nuheat, WarmUp, and OJ Microline include the floor sensor, are straightforward to program, and meet all BC Electrical Code requirements. These are our default recommendation for most clients.
Smart Wi-Fi Thermostats ($250–$500)
Smart thermostats add app control, remote monitoring, and integration with home automation systems. The WarmUp 4iE and Nuheat ELEMENT are popular in Vancouver renovations — they offer scheduling via smartphone, usage tracking (so you can see exactly how much electricity your heated floor is using), and geofencing that can automatically turn the floor on when you’re heading home. For clients who want maximum control and smart home integration, these are worth the premium.
GFCI Protection
BC Electrical Code requires GFCI (Ground Fault Circuit Interrupter) protection for all bathroom electrical circuits, including heated floors. Most quality radiant floor thermostats include built-in GFCI protection that satisfies this requirement. If the thermostat doesn’t include GFCI, a GFCI breaker at the panel is required. Your electrical contractor will confirm the correct configuration during the permit process.
Power Consumption and Monthly Operating Costs
Standard electric radiant heating mats draw approximately 12 watts per square foot. A 60 sq ft bathroom floor uses 720 watts — less than a standard hair dryer. BC Hydro’s residential rate is approximately $0.0999/kWh (Step 1) in 2026.
Running that 60 sq ft floor for 3 hours per day: 0.72 kW × 3 hours = 2.16 kWh/day × 30 days = 64.8 kWh/month × $0.0999 = approximately $6.47/month. If you run it for 6 hours per day (some clients like all-day warmth in winter), that’s approximately $13/month. Even at maximum use across Vancouver’s cold season, annual operating cost for a medium bathroom is typically $75–$150.
| Floor Size | Wattage | 2 hrs/day (monthly) | 4 hrs/day (monthly) | 6 hrs/day (monthly) |
|---|---|---|---|---|
| 40 sq ft (small bath) | 480W | ~$2.90 | ~$5.75 | ~$8.63 |
| 60 sq ft (medium bath) | 720W | ~$4.33 | ~$8.63 | ~$12.95 |
| 80 sq ft (large ensuite) | 960W | ~$5.75 | ~$11.51 | ~$17.27 |
| 100 sq ft (very large) | 1200W | ~$7.19 | ~$14.39 | ~$21.58 |
These are real operating costs, not marketing estimates. Heated bathroom floors in Vancouver are genuinely cheap to run — the capital cost of installation is the real investment, not the ongoing electricity.
Tile Compatibility: What Works and What Doesn’t
Electric radiant heating is compatible with virtually all tile types, but there are important compatibility and installation considerations depending on the specific tile you’re using.
Tile Types That Work Well
Porcelain tile is the ideal partner for heated floors. Dense, durable, and an excellent heat conductor, porcelain distributes warmth evenly and retains heat well. Most Vancouver bathroom renovations using heated floors specify porcelain for exactly this reason. Rectified porcelain with thin grout joints (2–3mm) produces the most even heat distribution.
Ceramic tile works equally well. It’s slightly less dense than porcelain and conducts heat marginally less efficiently, but the difference is imperceptible in practice. Standard ceramic tile with heated floors performs excellently.
Natural stone — including marble, travertine, slate, and limestone — is fully compatible with electric radiant heating. Stone is an excellent thermal mass material: it takes longer to heat than tile, but once warm it holds heat longer. One important note for marble specifically: large marble tile over heated systems needs to be brought up to temperature gradually during initial heating cycles. Rapid temperature change (e.g., turning a brand new system to full heat immediately) can cause thermal shock cracking in marble. Your thermostat’s ramp-up setting handles this automatically on quality systems.
Large format tile (600×600mm and larger, including 600×1200mm planks popular in contemporary Vancouver ensuites) works well with heated floors. The key installation requirement is ensuring complete thinset coverage beneath large tiles — no voids beneath the heating mat. Large format tile over heated floors requires back-buttering during installation to achieve the 95%+ thinset contact coverage required by TCNA standards.
Flooring Types That Are Not Compatible
Hardwood flooring cannot be installed over electric radiant heating systems. Wood expands and contracts significantly with temperature changes, and the heat cycle of a radiant system — even on a timer — will cause hardwood to cup, crack, and separate over time. This is a code-level installation prohibition, not just a manufacturer recommendation. If you want heated floors with a wood look, use wood-look porcelain tile over the radiant system.
Luxury Vinyl Plank (LVP) and Vinyl Plank flooring generally cannot be used with electric radiant heating. Most LVP manufacturers void their warranty if the flooring is installed over radiant heating elements that exceed 27°C at the floor surface. Some specific LVP products marketed as “radiant-ready” can be used with low-output systems, but this is the exception rather than the rule — and a bathroom installation in Vancouver would be unusual anyway, since LVP’s moisture performance advantages don’t apply in a wet-area floor that’s going over heated elements.
Carpet acts as insulation and prevents heat from reaching the surface efficiently. It also creates a fire risk with resistance heating systems. Electric radiant heating under carpet is not appropriate.
The Installation Process: Step by Step
Understanding the installation sequence helps you plan your bathroom renovation correctly and avoid the mistakes we see in retrofit installations. Here’s how a properly executed heated bathroom floor installation proceeds.
Step 1: Subfloor Preparation
The subfloor must be structurally sound, level, and clean before any heating elements are installed. In most Vancouver bathroom renovations, this means removing the existing tile (if any), inspecting the subfloor for damage from moisture, and installing cement backer board (typically 6mm or 12mm HardieBacker or Schluter Ditra) over the plywood subfloor. The backer board is critical: it provides a stable, non-compressible surface for the thinset and tile system and prevents subfloor movement from cracking tiles over time.
For slab-on-grade installations (common in Vancouver basement suites and main-floor additions), an insulation layer beneath the heating mat is important. Without insulation, heat transfers down into the concrete slab rather than up through the tile — reducing efficiency significantly. Schluter DITRA-HEAT and similar membrane systems address this with integrated insulation.
Step 2: Plan the Layout
Before installing any materials, the installer marks the heated zone on the floor — typically the entire floor area minus the vanity footprint (no point heating under a fixed cabinet), toilet area (heat is wasted under the toilet base), and inside fixed shower or tub enclosures (not required there). The thermostat location is chosen — typically on the wall adjacent to the light switch — and the route for the power feed and sensor wire is planned.
Step 3: Electrical Rough-In
The electrician runs the dedicated 20A circuit from the electrical panel to the thermostat location before the tile work begins. This is rough-in only — the thermostat is not installed yet, just the wiring in the wall. The electrician also verifies that the GFCI requirements are satisfied by the thermostat specification or provides a GFCI breaker at the panel.
Step 4: Mat or Cable Installation
The heating mat is rolled out across the prepared substrate, cut to navigate around obstacles (always cut the mesh, never the heating cable), and secured flat. The temperature sensor wire is run alongside the mat in the thinset layer, positioned in the mid-zone of the heated area (not near the cold connection end), and the sensor conduit tube is run up through the wall to the thermostat location so the sensor can be replaced in the future without tile demolition.
Before any thinset is applied, the resistance of the heating cable should be measured and recorded. This baseline measurement allows future troubleshooting — if the cable is damaged during tile installation, the resistance will change and the problem can be identified and fixed before the floor is completed.
Step 5: Tile Installation
Thinset is applied over the heating mat using a notched trowel, with care taken to achieve full coverage beneath the mat wires. The tile is then installed in the standard manner. Large format tiles require back-buttering to ensure no voids exist above the heating element — voids create hot spots that can cause premature wire failure or uneven heating.
During tile installation, the mat resistance should be checked periodically. Trowels and tile cutters can snag heating cables if the installer isn’t careful. Catching a cable nick while the floor is accessible (before grouting) is a simple repair; finding it after grouting means tile removal.
Step 6: Curing and First Use
After grouting, the thinset and grout need to cure before the heating system is activated. Standard recommendation: do not run the heated floor for at least 7 days after grouting. Full thinset cure takes 28 days — you can test the system lightly at 7 days (confirm it heats up and the thermostat reads correctly), but regular daily use should wait for the 28-day full cure. Running the system too early during cure can cause cracking as moisture is driven out of the thinset too quickly.
Electrical Requirements for Heated Bathroom Floors in BC
Electrical requirements for heated bathroom floors in British Columbia are governed by the BC Electrical Code (which adopts the Canadian Electrical Code with BC-specific amendments). Understanding these requirements upfront prevents surprises during permit inspection.
Dedicated 20-Amp Circuit Required
Every electric radiant floor heating system requires its own dedicated circuit. You cannot share a circuit between a heated floor and other bathroom loads (lights, exhaust fan, outlets). For most Vancouver bathrooms under 100 sq ft, a dedicated 20A/120V circuit is sufficient — the loads are well within capacity. For very large ensuite floors over 100 sq ft or where multiple heating zones are installed, a 240V circuit may be specified depending on the total wattage.
Many older Vancouver homes and pre-1990s condos have electrical panels that are already at or near capacity. If your panel doesn’t have a free 20A breaker slot, a panel upgrade is required before the heated floor circuit can be added. Panel upgrades in Vancouver typically cost $1,500–$3,500 depending on the scope — it’s a significant additional cost, but one you’d need for any major bathroom renovation that adds circuits.
GFCI Protection is Mandatory
All bathroom electrical circuits in BC require GFCI protection, and heated floor circuits are no exception. Most quality thermostat units (Nuheat, WarmUp, OJ) include built-in GFCI protection that satisfies the code requirement. Your electrical inspector will verify that GFCI protection is present either at the thermostat or at the circuit breaker.
Electrical Permit Process
In BC, adding a new circuit requires an electrical permit. Your electrical contractor pulls the permit, does the work, and arranges the inspection. The inspector typically checks: wire gauge (12 AWG for 20A circuits), GFCI protection, thermostat mounting and clearances, and that the heating cable is a listed product. The permit and inspection process typically takes 2–3 weeks from application to final inspection in Metro Vancouver, which fits easily within a standard bathroom renovation timeline.
Skipping the permit is not something we recommend or do. Beyond the legal requirement, an uninspected electrical circuit in a wet area like a bathroom creates genuine safety and insurance risk. If you sell the home, the absence of permits for electrical work in bathrooms can complicate the transaction.
Combining with a Panel Upgrade
If your Vancouver bathroom renovation involves other electrical improvements — adding a ceiling heat lamp, upgrading from a 15A to 20A circuit on bathroom outlets, replacing aluminum wiring — it can make sense to combine all this electrical work with the heated floor circuit and potentially a panel upgrade. Doing it all in one trade visit minimizes electrician call-out costs and produces a single permit and inspection covering all the work.
For a full overview of what’s typically included in a bathroom renovation permit package, see our home renovation services page.
Why Heated Floors Should Be Done During a Full Bathroom Renovation
We get calls from Vancouver homeowners who want to add heated floors to an existing bathroom that was renovated 5–10 years ago — good-looking tile, everything else working fine, they just want warm floors. We have to deliver the bad news: to add heated floors to an existing tiled bathroom, all the tile has to come out. There is no way to install the heating elements beneath existing tile without removing it.
This makes the economics very different from including heated floors in a planned renovation:
| Scenario | Additional Cost for Heated Floors | Notes |
|---|---|---|
| During full bathroom renovation | $800–$2,200 | Tile removal already happening; incremental cost is just materials + electrical |
| Adding to existing bathroom | $2,800–$5,500+ | Adds full tile demo ($600–$1,200), tile reinstallation ($1,200–$2,500), plus heated floor materials + electrical |
The sequencing within a bathroom renovation also matters. Heated floor installation follows this order: subfloor prep → electrical rough-in → heating mat/cable installation → tile installation → electrical final (thermostat installation) → inspection. The electrical rough-in needs to happen before tile, and the heating element is installed as part of the tile setting process. If electrical isn’t roughed in before tiling starts, you’re looking at wall repairs after the fact.
For homeowners who are on the fence about adding heated floors to a planned renovation, our recommendation is always: do it now. The incremental cost during a renovation is modest. The cost to add it later — with full tile demo and reinstallation — is three to four times higher. And you’ll want warm floors every single morning for the next 20 years.
Heated Floors in Vancouver Rental Suites
Vancouver’s secondary suite and laneway house market is competitive, and finishing details increasingly influence whether a suite sits vacant or gets top-of-market rent. Heated bathroom floors in a well-finished suite typically justify a rent premium of $50–$100/month in the current market — for a feature that costs $800–$1,400 to install, the payback on rental income alone is well under two years.
Billing Considerations
In most Vancouver suite arrangements, electricity is included in the rent or billed separately based on the BC Hydro account for the suite. Given that heated bathroom floors cost $75–$150/year to operate, this is not a significant cost item either way. Landlords who include utilities tend to set a “reasonable use” expectation in the tenancy agreement — a programmable thermostat with a sensible schedule is a practical way to ensure the system isn’t running 24/7 unnecessarily.
Durability in Rental Context
Quality electric radiant floor heating mats (from Nuheat, WarmUp, or equivalent manufacturers) carry 25-year warranties and have no moving parts. In a rental context, the system is essentially maintenance-free. The only failure mode is physical damage to the heating cable, which requires tile removal to repair — but this is an extremely rare occurrence when the system is properly installed. We’ve installed these systems in rental properties in Vancouver over many years without a single callback for mat failure.
Insurance Considerations
Electric radiant floor heating installed under permit with proper GFCI protection does not affect home insurance rates and is not a flag for insurers. The same is not true of DIY or unpermitted electrical work — which is another reason to do this correctly from the start.
Heated Towel Bars: The Natural Companion Upgrade
If you’re investing in a heated bathroom floor, a heated towel bar is the natural companion upgrade. Together, they transform the bathroom experience in Vancouver’s damp climate — stepping out of the shower onto a warm floor and reaching for a pre-warmed, dry towel is the kind of daily luxury that sounds indulgent but costs very little to provide.
Types of Heated Towel Bars
Electric heated towel bars are the most common in Vancouver bathrooms. They’re hardwired to a switched circuit (or plugged into a GFCI outlet in some configurations), reach operating temperature in 10–20 minutes, and draw 60–150W depending on size. They’re available in every finish — brushed nickel, matte black, polished chrome — and can be installed on any tile wall.
Hydronic heated towel bars connect to the home’s hot water system. They’re common in European installations but rarely specified in North American bathroom renovations unless the home already has a hydronic heating system. For most Vancouver bathrooms, electric is the right choice.
Cost Range
| Item | Cost Range | Notes |
|---|---|---|
| Electric heated towel bar (materials) | $150–$600 | Quality brands: Mr. Steam, WarmlyYours, Jeeves |
| Electrical (if adding to existing circuit) | $150–$350 | May share bathroom outlet circuit if load permits |
| Total installed (during renovation) | $400–$1,200 | Most add-ons during full reno are at lower end |
Placement is typically on the wall beside the shower or bath, at a height that allows full-length bath towels to hang without touching the floor. The electrical connection during a bathroom renovation is usually the same visit as the heated floor electrical work — the incremental cost of adding a towel bar circuit is modest when the electrician is already on site for the floor heating work.
Ready to plan your bathroom renovation with heated floors? Contact our team for a free consultation and quote.
More Bathroom Renovations Guides

Frameless vs. Semi-Frameless Shower Door in Vancouver: Which is Worth the Cost?
Freestanding vs. Alcove Bathtub in Vancouver: Design, Space, and Cost Comparison
Porcelain vs. Natural Stone Tile for Vancouver Bathrooms: The Complete Comparison
Electric vs. Hydronic Heated Bathroom Floor in Vancouver: Which is Better?
Bathroom Renovation in Burnaby: 2026 Cost Guide and Contractor Tips
Ready to start your renovation?
Frequently Asked Questions About Heated Bathroom Floors in Vancouver
1. Should I choose electric or hydronic heated floors for my bathroom?
For almost every Vancouver bathroom renovation, electric radiant heating is the right choice. Hydronic systems are expensive to install in bathrooms ($20–$40/sq ft vs. $6–$14/sq ft for electric), require connection to a boiler, and respond slowly to thermostat changes. Electric systems are faster to install, respond quickly, cost much less upfront, and have operating costs that are entirely reasonable given BC Hydro’s rates. The only situation where hydronic makes sense in a bathroom is if you already have a whole-home hydronic system and extending it to the bathroom is economical on a per-zone basis.
2. How much does it cost to run heated bathroom floors in Vancouver?
For a medium-sized bathroom (60 sq ft) running 3 hours per day, expect approximately $6–$7/month on BC Hydro rates. For a large ensuite (80 sq ft) running 4 hours per day, approximately $11–$12/month. Annual operating costs for typical daily use patterns are $75–$150 for most Vancouver bathrooms — comparable to a few months of streaming service subscriptions.
3. What thermostat options are available?
You have three practical options: basic programmable ($150–$250), advanced programmable with touch screen ($200–$400), and smart Wi-Fi thermostats with app control ($250–$500). All include a floor temperature sensor. Smart thermostats from WarmUp (4iE model) and Nuheat (ELEMENT model) are popular in Vancouver renovations and integrate with Google Home and Amazon Alexa. For most clients, a quality programmable thermostat is the right balance of functionality and cost.
4. What tile types work with heated floors?
Porcelain, ceramic, natural stone (marble, travertine, slate, limestone), and all tile formats including large-format tile are fully compatible with electric radiant heating. Heated floors do NOT work under hardwood, standard LVP, or carpet. For wood-look flooring over heated systems, wood-look porcelain tile is the correct specification.
5. Can I install heated floors over my existing tile?
In some cases, yes — if your existing tile is in perfect condition, fully adhered, and the height increase won’t create transition problems. Installing over existing tile adds approximately 15–20mm to the floor height. You’d also need to verify that the subfloor can support the additional load and that the existing tile surface is compatible with the thinset used to embed the heating mat. In practice, most bathroom renovation scenarios benefit from removing existing tile anyway (to inspect and repair the subfloor), so this approach is less common than it sounds. We recommend discussing with your contractor whether your specific conditions make tile-over viable.
6. Can I install heated bathroom floors myself?
The heating mat installation itself is within reach of experienced DIYers — rolling out a mat and embedding it in thinset during a tile installation is not technically complex. However, the electrical work — running the dedicated 20A circuit, connecting the thermostat, ensuring GFCI compliance — requires a licensed electrician in BC and must be permitted. You cannot legally do your own new electrical circuit work in a BC residence unless you’re a licensed electrician. The combination of tile skill (for the mat installation) and electrical permit requirements means that most homeowners are better served by a general contractor who coordinates both trades. Saving money by doing the mat installation yourself while still hiring an electrician is a reasonable approach if you’re a competent tile setter.
7. Is a permit required for heated bathroom floors in Vancouver?
Yes. Adding a new electrical circuit requires an electrical permit in BC, regardless of circuit size. The permit process involves your electrician filing the permit application, completing the rough-in and final installation, and scheduling a BC Safety Authority inspection. Permit fees typically run $75–$200. The inspection process is straightforward for a standard heated floor installation and rarely causes delays in a renovation timeline.
8. How long does it take for the floor to heat up?
A programmable thermostat pre-heats the floor on your schedule, so in normal use the floor is already warm when you wake up. Cold-start warm-up time (floor at ambient temperature to comfortable warmth) is typically 30–60 minutes for most tile types. Natural stone takes somewhat longer due to its thermal mass. Smart thermostats with occupancy sensing or geofencing can automate the pre-heat schedule so the floor is always warm when you need it without running continuously.
9. What if I want to add heated floors to my existing bathroom?
Adding heated floors to an existing bathroom requires removing all the tile, installing the heating mat, and re-tiling — there’s no shortcut. The total cost including tile demo, new heating system, and tile reinstallation typically runs $2,800–$5,500+ for a medium bathroom, depending on tile selection and current conditions. For bathrooms where the tile is already aging or you want a refresh anyway, this can make sense. For a recently renovated bathroom where you just want warm floors, the cost-benefit is less compelling — it’s more cost-effective to plan for heated floors in the next full renovation cycle.
10. How long do heated bathroom floors last?
Quality electric radiant heating mats have no moving parts and are rated for 20–25 years of regular use. Major manufacturers (Nuheat, WarmUp) back this with 25-year warranties. The thermostat has a shorter lifespan — typically 10–15 years — and is easily replaced without any tile work. The heating cable itself, once properly installed beneath tile, essentially lasts indefinitely barring physical damage. We’ve seen installations in Vancouver from the late 1990s still functioning correctly.
11. What warranty comes with heated bathroom floors?
The heating mat itself typically carries a 25-year manufacturer warranty (Nuheat, WarmUp, ThermoSoft). Thermostats typically carry 3-year warranties, with extended warranties available. Your installation warranty depends on your contractor — we provide a 1-year workmanship warranty on all installed systems, covering any installation-related issues. Note that manufacturer warranties require the resistance of the heating cable to be documented before and after tile installation, which is standard practice for any properly executed installation.
12. Can heated bathroom floors integrate with smart home systems?
Yes — smart thermostats from WarmUp (4iE), Nuheat (ELEMENT), and Schluter DITRA-HEAT-E-R all offer Wi-Fi connectivity and integrate with Google Home, Amazon Alexa, and Apple HomeKit. You can control the floor temperature from your phone, set occupancy-based schedules, review energy usage, and include heated floors in whole-home automation routines. For clients building smart homes or renovating with home automation in mind, specifying a smart thermostat is a minimal upcharge ($100–$200 over a standard programmable) for significant functionality improvement.
13. Will heated floors cause tile cracking?
No — when properly installed, electric radiant heating does not cause tile cracking. Tile cracking from heated floors is caused by installation errors: inadequate thinset coverage (voids beneath the tile create hot spots), heating the system before thinset has cured, or using materials that aren’t rated for radiant applications. When installed correctly — full thinset coverage, 28-day cure before full use, proper ramp-up for stone tile — there is no additional cracking risk compared to a standard tile installation.
14. Do heated floors affect bathroom ventilation requirements?
Heated floors increase ambient temperature in the bathroom slightly, which can affect condensation and humidity if ventilation is inadequate. BC Building Code requires bathroom exhaust fans with a minimum capacity sized to the room — ensuring your exhaust fan is properly specified and functioning is important in any bathroom renovation. In practice, a properly vented bathroom with a well-functioning exhaust fan handles the minor temperature increase from radiant floor heating without issue.
15. How do I get a quote for heated bathroom floors in Vancouver?
The most accurate approach is to have a contractor assess the bathroom, confirm the subfloor conditions, review the electrical panel capacity, and specify the system that’s right for your layout. We provide free in-home consultations for all bathroom renovation projects in Metro Vancouver, including heated floor assessment and quoting. Contact Vancouver General Contractors to schedule a consultation, or visit our renovation guide to learn more about planning your bathroom renovation.
Making the Decision: Is a Heated Bathroom Floor Worth It in Vancouver?
Let’s answer the question directly: yes, in Vancouver, heated bathroom floors are worth it — with one important condition. They’re worth it when installed as part of a planned bathroom renovation. At $800–$2,200 incremental cost during a renovation that’s already happening, the cost-per-comfort ratio is excellent. At $2,800–$5,500 as a standalone retrofit, the value calculation is more individual.
The arguments in favour are concrete and well-established:
- Vancouver’s cool, damp climate means unheated tile floors are uncomfortably cold 8+ months of the year
- Operating costs are genuinely low — $75–$150/year for most bathrooms at typical BC Hydro rates
- Quality systems last 20–25 years with no maintenance
- At resale, heated floors in the primary ensuite are a recognized value signal that influences buyer perception
- The incremental cost during a renovation is modest relative to total project cost
The arguments for waiting or skipping are also real: if your bathroom was just renovated and the tile is in good condition, the cost to retrofit is significantly higher. If your home’s electrical panel is already at capacity and needs an upgrade, the total cost of adding heated floors increases substantially.
For homeowners planning a bathroom renovation in the next 12–24 months, the answer is clear: include heated floors in the scope. You will use the system every single day, your family will appreciate it immediately, and you will not regret the decision.
For more information on planning and budgeting a bathroom renovation in Vancouver, see our complete renovation planning guide or get in touch with our team to discuss your project.
Get a Free Renovation Quote
Metro Vancouver’s trusted general contractors. Free consultations across Vancouver, Burnaby, Richmond, North Shore & beyond.
Get Your Free Quote →Ready to start your project? Vancouver General Contractors (VGC) provides free, fixed-price quotes for homeowners across Metro Vancouver. Learn more about our bathroom renovation Vancouver services or request a free quote today.
VGC serves Vancouver and surrounding areas. View all renovation services in Vancouver →
Comments are closed