
Kitchen Layout Guide Vancouver: Best Layouts for Every Home Type (2026)
The single most consequential decision in any kitchen renovation is the layout. You can upgrade your countertops from laminate to quartz, swap cabinet hardware, or install a restaurant-grade range — but if the layout is wrong, none of those investments will fix a kitchen that does not work. Layout determines every step you take while cooking, how many people can be in the kitchen at once, where natural light reaches your work surfaces, and whether the space integrates with the rest of your home or feels cut off from it.
In Vancouver, layout decisions are layered on top of one of the most varied residential building stocks in Canada. A 650-square-foot condo in Yaletown, a 1960s Vancouver Special in East Van, a century-old character house in Kitsilano, and a two-storey detached home in South Surrey each present completely different structural realities, ceiling heights, plumbing locations, and available square footage. The right layout for your kitchen depends first on what your home will physically allow — and second on how you actually cook and live.
This guide covers every major kitchen layout used in Metro Vancouver homes, with real dimensions, minimum clearance requirements, cost comparisons, and specific guidance for each Vancouver home type. Whether you are planning a full renovation or just trying to understand what is possible before you call a contractor, this is the reference you need.
 Burnaby” class=”wp-image-12767″ />
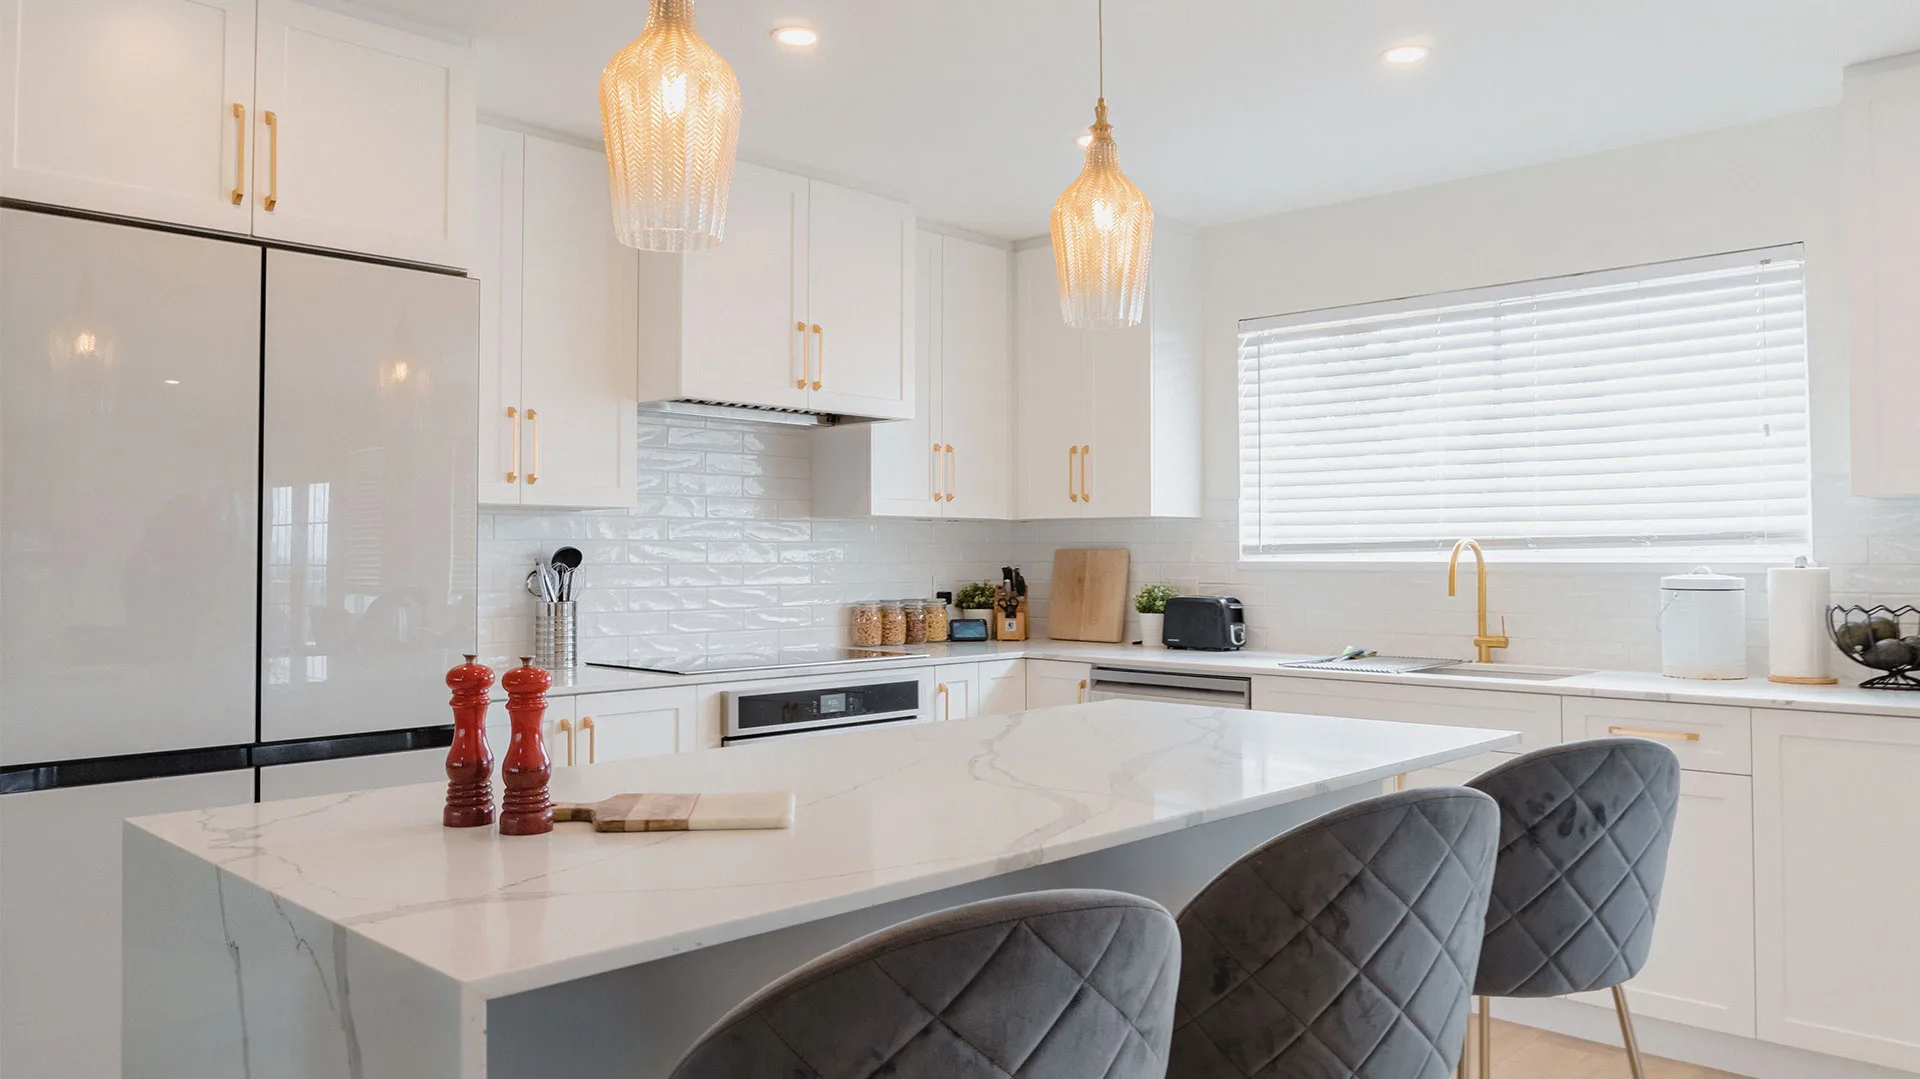
Galley kitchens carry a meaningful cost advantage over L-shaped and island kitchens
Vancouver General Contractors
Why Kitchen Layout Is the Most Important Decision You Will Make
Layout is the one element of a kitchen renovation that cannot be corrected after the fact without tearing everything out and starting over. A wrong cabinet colour can be repainted. Outdated hardware can be swapped in an afternoon. Countertops can be replaced in a day. But if your sink is on the wrong wall, your refrigerator opens into your prep space, or your aisle is four inches too narrow to open the dishwasher properly, no amount of spending on finishes will solve the problem.
The foundational principle governing kitchen layout design is the work triangle. Developed in the 1940s by researchers at the University of Illinois, the work triangle connects three primary work centres: the sink, the refrigerator, and the range. The principle holds that each leg of the triangle should measure between four and nine feet, and the total perimeter should fall between thirteen and twenty-six feet. When each leg is within that range, the cook takes fewer steps, turns fewer times, and the kitchen functions with maximum efficiency.
The work triangle is not a rigid rule — modern kitchen design has evolved toward work zones, which we cover in detail later in this guide — but it remains the most reliable diagnostic tool for identifying a layout that will frustrate you. If your sink-to-fridge leg is eleven feet, every trip from the dishwasher to the fridge and back covers more distance than necessary. If it is three feet, you have no counter space between the two appliances and cannot work effectively in the zone.
Vancouver’s housing stock makes layout planning particularly important because the home type often dictates which layouts are even structurally possible:
- Condos and apartments: Kitchens typically run 60–90 square feet. Wall removal is often not an option (concrete or load-bearing). Layouts are usually galley or linear.
- Vancouver Specials: Kitchen sits at the rear of the home, typically 120–160 square feet, often enclosed. The wall to the dining area is frequently non-structural and removing it transforms the space.
- Character houses (pre-1940): Kitchens were designed as separate work rooms with galley or U-shaped configurations. Plumbing stacks are often in inconvenient locations. Ceilings may be lower.
- Two-storey detached homes (1980s–present): Kitchens are typically 150–250 square feet, open to family room, with the greatest layout flexibility.
Understanding which category your home falls into is step one. From there, layout decisions become much clearer — and the conversation with your contractor is more productive. Ready to talk through your options? Contact VGC for a kitchen layout consultation.
The Galley Kitchen: Maximum Efficiency in Minimum Space
The galley kitchen — also called a corridor kitchen — consists of two parallel runs of cabinets and countertops facing each other along opposite walls. It is named after ship galleys, where food for an entire crew was prepared in a narrow, purpose-built passage. The name is apt: galley kitchens deliver more functional workspace per square foot than any other layout, and they are the layout of choice for professional kitchens worldwide for exactly that reason.
In a galley, every step you take reaches a work surface. You can pivot 180 degrees from stove to counter without moving your feet. There is no dead corner, no wasted space, and no unnecessary walking. For one or two serious cooks who want a kitchen that works hard, the galley is often the most satisfying layout available — regardless of how small it appears from the outside.
Galley Kitchen Dimensions
The minimum workable galley width is 7 feet between walls, which provides a 36-inch aisle between opposing countertops (standard countertop depth is 25 inches per side). A 42-inch aisle — requiring approximately 7 feet 8 inches total width — is the preferred minimum and allows two people to work side by side or one person to fully open an oven door without blocking the passage. At 8 feet or wider, a galley feels generous and accommodates two cooks comfortably.
| Total Width | Aisle Width | Suitability |
|---|---|---|
| 7’0″ | 36″ | Minimum — one cook only, tight |
| 7’8″ | 42″ | Preferred minimum — comfortable for one cook |
| 8’0″–8’6″ | 46″–50″ | Comfortable — two cooks workable |
| 9’0″+ | 54″+ | Generous — consider peninsula or island instead |
Galley Kitchens in Vancouver Pre-War Homes
Vancouver’s pre-war housing stock — character homes built between 1900 and 1945 in neighbourhoods like Strathcona, Mount Pleasant, Grandview-Woodland, and parts of Kitsilano — was designed with separate, purpose-built kitchen rooms. These rooms are typically 8–10 feet wide and 12–16 feet long, which is exactly the galley dimension sweet spot. Many of these kitchens have already been renovated into galley configurations, but if yours has not, the bones are often ideal.
When one end of a galley opens to a dining area — as is common in Vancouver character homes where the rear of the kitchen connects to a breakfast nook or dining room — the layout can be designed with an open end that provides visual connection to the dining space without disrupting the galley’s efficiency. Placing the sink on the wall facing the dining area, with a window above, creates a natural focal point and a sense of openness even in a narrow space.
Cost Advantage of the Galley Layout
Galley kitchens carry a meaningful cost advantage over L-shaped and island kitchens. Because both runs of cabinets run in straight lines, there are no corner units, no specialty corner hardware, and no complex installation angles. Countertop cuts are straightforward. Tiling is simpler. Labour time is lower. For a comparable square footage of cabinetry and countertop, a galley kitchen typically costs 10–15% less than an equivalent L-shaped kitchen and 20–30% less than an island kitchen of similar quality.
The L-Shaped Kitchen: Versatile and Open-Concept Friendly
The L-shaped kitchen uses two perpendicular runs of cabinets meeting at a corner, forming an L when viewed from above. It is the most commonly specified layout in Metro Vancouver renovations, and for good reason: it works in open-concept homes, accommodates a natural work triangle, and scales well across a wide range of room sizes.
The L-shape is ideal for rooms between 8×8 feet and 12×12 feet. Below 8×8, the corner eats too much usable space. Above 12×12, the legs of the L become long enough that the work triangle starts to exceed the nine-foot maximum per leg, and a U-shape or island layout becomes more practical.
The Corner Storage Challenge
Every L-shaped kitchen has one unavoidable design challenge: the corner. Standard base cabinets cannot reach into a 90-degree corner without creating a dead zone that is difficult to access. Vancouver homeowners have four primary solutions:
- Lazy Susan: A rotating shelf system that brings items at the back of the corner into reach. The most economical solution at $200–$400, but wastes some corner space to the rotating mechanism.
- Pull-out corner unit (Le Mans or Magic Corner): A linked two-shelf system that slides and pivots out of the cabinet. More expensive ($600–$1,200) but more accessible and efficient than a lazy Susan.
- Blind corner pull-out: A single pull-out shelf that extends from the blind corner. Works in tighter spaces. Mid-range cost ($400–$800).
- Open corner shelving: Eliminating the corner cabinet entirely and installing open shelves at the corner. Creates visual lightness and eliminates the access problem, but reduces closed storage.
The 10×10 Kitchen Benchmark
When you receive a kitchen renovation quote and see a price described as a “10×10 kitchen price,” it refers to the industry standard of a 10-foot by 10-foot L-shaped kitchen with two 10-foot runs of cabinets (20 linear feet total). This is the benchmark the kitchen cabinet industry uses to compare pricing across manufacturers and retailers. When comparing quotes, always verify whether the quoted price is for your actual kitchen dimensions or for the 10×10 standard — the difference can be significant.
Adding a Breakfast Bar to an L-Shape
One leg of the L — typically the one that faces the living or dining area in an open-concept home — can be extended 12–18 inches beyond standard countertop depth to create a breakfast bar. This overhang provides knee clearance for bar stools and creates a casual dining area without adding square footage. A 12-inch overhang accommodates bar stools if the countertop is at bar height (42 inches); an 18-inch overhang works for standard counter height (36 inches) and provides more comfortable seating. This is one of the most cost-effective ways to add dining space to an open-concept Vancouver home.
The U-Shaped Kitchen: Maximum Storage, Maximum Counter Space
A U-shaped kitchen wraps three walls with cabinets and countertops, creating the most storage and the most linear counter space of any layout. The cook works within the U, which means every work surface is within two or three steps — an exceptionally efficient configuration for serious home cooks, bakers, or households that entertain frequently.
Minimum Clearance Requirements
The critical constraint for a U-shaped kitchen is the aisle width between the two parallel runs. The minimum is 42 inches between opposing countertop faces (not between cabinet boxes, but between the countertop overhangs). Many designers specify 48 inches as the preferred minimum for comfortable single-cook use, and 60 inches for two-cook households. Below 42 inches, appliance doors cannot open fully without blocking the opposite counter, and two people cannot pass each other without turning sideways.
This means the minimum room width for a U-shaped kitchen is approximately 8 feet: 25 inches of countertop depth on one side + 42 inches of aisle + 25 inches of countertop depth on the other side = 92 inches, or just over 7 feet 8 inches. Most designers and contractors recommend 9–10 feet as the practical minimum for a U-shape that feels comfortable.
U-Shaped Kitchens in Vancouver Homes
True U-shaped kitchens are relatively rare in Vancouver condos, where room widths rarely reach the 9-foot minimum needed for a comfortable configuration. They are more common in:
- Pre-war character homes with dedicated, wide kitchen rooms (10–12 feet wide)
- Older detached homes (1950s–1970s) with separate enclosed kitchens and sufficient room width
- Large Vancouver Specials where the rear kitchen area is 10+ feet wide
- New construction where the layout is designed from scratch to accommodate U-shape dimensions
Cost Comparison: U-Shape vs. L-Shape
A U-shaped kitchen involves substantially more cabinetry than an L-shaped kitchen of the same room size. The third run of cabinets, additional countertop length, and two corner units (versus one in the L-shape) typically add $8,000–$15,000 to the cabinet and countertop cost compared to an equivalent L-shaped kitchen. That range reflects the quality of the cabinets and countertop material chosen — the cost premium at the semi-custom level is generally lower as a percentage than at the entry-level.
For homeowners who cook seriously and prioritize storage and counter space over other concerns, the U-shape often delivers the best functional return on investment of any layout. For those who entertain in an open-concept home, the enclosed nature of the U-shape can feel isolating, and an L-shape with island may be a better fit.
The Island Kitchen: Flexibility, Seating, and the Space It Demands
A kitchen island is a freestanding or fixed counter unit positioned in the centre of the kitchen, accessible from all four sides. Islands have become the most requested kitchen feature in Metro Vancouver renovations over the past decade, and for good reason — when the space supports one, an island transforms both the function and the feel of the kitchen. When the space does not support one, an island creates the single most common kitchen renovation mistake: a room that is harder to use than the one it replaced.
Minimum Space Requirements for a Kitchen Island
The non-negotiable minimum is 36 inches of clear aisle on all sides of the island, measured from the island edge to the nearest countertop, appliance, or wall. This is the absolute minimum for one person to walk past without turning sideways. The National Kitchen and Bath Association (NKBA) recommends 42 inches as the preferred working aisle minimum, and 48 inches for multiple-cook kitchens.
For a practical, usable island, the minimum island size is 42 inches x 84 inches (roughly 3.5 feet by 7 feet). Smaller than this and the island provides minimal prep surface, no room for a sink or appliance, and seating is compromised. With a 42×84 island and 42-inch aisles on all sides, the minimum kitchen footprint is approximately:
- Width: 42″ (countertop) + 42″ (aisle) + 84″ (island) + 42″ (aisle) = 210″ → approximately 17’6″
- Depth: 25″ (countertop) + 42″ (aisle) + 42″ (island) + 42″ (aisle) = 151″ → approximately 12’7″
In practical terms, this means you need a kitchen that is at minimum 12 feet by 12 feet to accommodate an island without feeling cramped, and 14 feet by 14 feet for comfortable two-cook use with island seating. Most Vancouver condos and many Vancouver Special kitchens do not meet this threshold.
Island Seating
Islands can provide casual dining seating when one side of the island overhangs by 12–18 inches for counter height (36″) or 12–15 inches for bar height (42″). Allow 24 inches of width per stool for comfortable seating. A 60-inch seating run accommodates two stools; an 84-inch run accommodates three. The overhang side of the island should not have base cabinets on that face — it is pure knee clearance space.
What Islands Provide vs. What They Remove
An island adds prep surface, seating, and potentially a second sink or additional storage. But it removes floor area and requires clear aisles on four sides rather than one or two. In a kitchen that is borderline in size, an island can actually reduce the effective working space by creating cramped aisles on multiple sides. A peninsula — discussed in the next section — provides most of the benefits of an island while requiring clear aisle on only three sides.
The Peninsula Kitchen: Island Benefits Without the Space Penalty
A peninsula is a counter run that connects to the main kitchen layout on one end and extends into the room like a promontory, accessible from three sides rather than four. Think of it as an island that is anchored to the wall or to the end of the kitchen’s main run of cabinets. This single difference — the connection on one end — has significant implications for how much space the layout requires and how it interacts with the rest of the home.
Why a Peninsula Requires Less Space Than an Island
Because one end of the peninsula connects to the kitchen, you only need clear aisles on three sides instead of four. For a peninsula the same size as an island, this saves at least 42 inches in one direction — often the difference between a layout that works and one that does not. For Vancouver homes with kitchens in the 10×12 to 12×14 foot range, a peninsula is frequently the right answer when an island would be too large.
How Peninsulas Define Kitchen and Living Space
In open-concept Vancouver homes, the peninsula serves a second important function: it creates a visual and spatial boundary between the kitchen and the living or dining area without putting up a wall. The living-room-facing side of the peninsula becomes a natural breakfast bar with overhang seating, while the kitchen-facing side provides base cabinet storage. This definition of space is particularly valuable in homes where the kitchen, dining area, and living room share one large open floor plan — it creates zones without closing the space.
Storage and Cost Comparison: Peninsula vs. Island
A peninsula typically provides more storage than an equivalent island because the connected end can house a full cabinet stack (upper and lower) integrated with the main kitchen run. An island, being freestanding, can have base cabinets on all accessible sides but cannot connect to upper cabinets without blocking sight lines. For households where storage is a priority, a peninsula often wins even in kitchens large enough to accommodate an island. Cost-wise, a peninsula is generally 10–20% less expensive than a comparable island because it has fewer exposed faces to finish and one end is handled by the existing cabinet run.
Open Concept Kitchen Design: What It Changes and What It Costs
Open concept kitchen design — removing the wall or walls between the kitchen and adjacent living or dining areas — has been the dominant trend in Vancouver residential renovation for the past fifteen years. The appeal is clear: sight lines to the living area, better natural light distribution, social cooking where the cook faces the room rather than a wall, and the sense of a larger combined space.
But open concept is not free of trade-offs, and understanding those trade-offs before committing to wall removal is important — especially in Vancouver homes where structural realities vary considerably.
What Wall Removal Actually Involves
In Vancouver detached homes, the wall between the kitchen and dining or living area may be load-bearing or non-load-bearing. A non-structural wall can be removed with a building permit and straightforward carpentry work. A load-bearing wall requires an engineer’s assessment, a beam and post system to transfer the load, a building permit, and structural inspection — adding $8,000–$20,000 to the project cost depending on the span and beam specification.
Wall removal also affects:
- Hood fan venting: An enclosed kitchen can vent a range hood through a soffit or wall relatively easily. In an open concept, the range may be on an island or peninsula, requiring venting through the ceiling — a more complex and expensive installation that may require modifications to structural members above.
- Storage: The wall you remove had cabinets on it. Removing the wall removes that storage. The layout must be redesigned to compensate, or the total storage decreases.
- Acoustics: Cooking noise travels through an open floor plan. The sound of a running dishwasher, exhaust fan, or sizzling pan will reach the living room. This is not a problem for everyone, but it is something to anticipate.
- Cooking smells: Open concept kitchens require a properly sized and ducted exhaust fan. A recirculating range hood is insufficient for an open kitchen — cooking odours will migrate throughout the home.
Design Cohesion in Open Concept Kitchens
When the kitchen is visible from the living room, the two spaces must feel cohesive. Cabinet finishes, countertop materials, and hardware need to work with the living room’s colour palette and furniture style. This is not a problem in a closed kitchen where the two rooms are independent. In an open concept renovation, the kitchen designer and the homeowner need to think about the entire visible space as one design project, not two separate rooms. This sometimes adds to the design and material cost but produces a significantly better result.
If you are considering opening up your kitchen, our renovation guide walks through the full planning process and what to expect at each stage.
Kitchen Layout for Vancouver Condos: Working Within Tight Constraints
The typical Vancouver condo kitchen runs between 60 and 90 square feet — a small fraction of the kitchen space in a detached home. Developer-installed condo kitchens are almost universally galley or linear (single-wall) configurations, optimized for the minimum functional footprint. Renovating a condo kitchen means working intelligently within these constraints.
The Linear (Single-Wall) Kitchen
In studio and one-bedroom condos, a single-wall kitchen — all appliances and cabinets on one wall — is common. It is the most space-efficient configuration in terms of floor area consumed, making it ideal for multi-purpose spaces where the kitchen shares a room with the living area. The trade-offs are limited counter space, a long work distance between the refrigerator and the range, and minimal storage. Counter extension solutions — a fold-down counter, a rolling butcher block cart, or a narrow breakfast bar on the open side — can significantly improve usability.
What Can Be Changed in a Condo Kitchen
In high-rise concrete construction, the structural walls are generally the concrete core and the exterior walls. The wall between the kitchen and the dining area is often a lightweight partition that can be removed or opened with strata approval and a building permit. Many Vancouver condo owners have successfully opened the kitchen to the dining area to create a more functional combined space with a peninsula or breakfast bar as the divider.
Plumbing in condos is constrained. Moving the sink to a different wall typically requires running a new drain line through the floor slab — possible in some buildings, not possible in others, and always requiring strata approval and engineering review. In most condo kitchen renovations, the sink stays in its existing location.
Moveable Islands in Small Condo Kitchens
A fixed island is rarely appropriate for a condo kitchen under 100 square feet. A rolling butcher block island or a narrow freestanding cart (20–24 inches wide) on locking casters provides the prep surface benefit of an island without permanently committing floor space. When the island is not needed, it rolls to a wall or out of the kitchen entirely. For Vancouver condo dwellers who entertain occasionally but do not cook daily, a moveable island is often the right solution.
Vancouver Special Kitchen Layout: The Renovation Opportunity
The Vancouver Special — the split-level detached home built in large numbers across East Vancouver, Burnaby, and surrounding municipalities between the 1960s and 1980s — has a distinctive floor plan. The living room and formal dining room occupy the front of the main floor; the kitchen occupies the rear, typically opening toward the backyard. A wall (and often a door) separates the kitchen from the dining room.
Vancouver Special kitchens are typically 120–160 square feet, larger than most condo kitchens but often enclosed in a way that feels dated by today’s open-concept preferences. The kitchen is usually L-shaped or U-shaped as built, with the primary window looking out to the backyard.
The Wall Between Kitchen and Dining Room
The single renovation decision that most dramatically transforms a Vancouver Special kitchen is removing or opening the wall between the kitchen and the dining room. In many Vancouver Specials, this wall is a non-load-bearing partition — it can be removed completely with a building permit and a straightforward demolition and finishing package. The result is a combined kitchen-dining space that feels dramatically larger, admits natural light from the front of the home, and creates the social kitchen experience that contemporary homeowners prefer.
Important structural note: In some Vancouver Specials, the rear portion of the main floor — including walls adjacent to the kitchen — may be load-bearing. This is particularly true of the rear exterior wall and walls that carry loads from the upper floor. Always have a structural engineer assess the wall before removal. The assessment itself ($300–$600) is a worthwhile investment before budgeting the renovation.
Layout Options After Wall Removal
Once the kitchen-dining wall is removed in a Vancouver Special, the combined space is typically large enough to support:
- An L-shaped kitchen with a full dining table area — the most common outcome, with the L on the rear and side walls and the dining area in what was the former dining room
- An L-shaped kitchen with a peninsula defining the kitchen boundary and providing breakfast seating
- A U-shaped kitchen if the combined width is sufficient (often 12–14 feet after wall removal)
The Vancouver Special open concept renovation is one of the most cost-effective transformations available in Metro Vancouver’s renovation market. The structural work is usually straightforward, and the change in liveability is dramatic. See our home renovation services page for more on whole-home transformation projects.
Work Zones in Modern Kitchen Design: Beyond the Work Triangle
The work triangle was developed in an era when kitchens were used by one cook performing a limited range of tasks. Modern households cook differently — multiple cooks, more complex meals, coffee preparation, children making snacks, partners working at the kitchen counter on a laptop while one person cooks. The work triangle is still useful as a diagnostic tool, but contemporary kitchen design has evolved toward the concept of work zones.
A zone-based kitchen organizes the space into dedicated functional areas, each with the storage, counter space, and equipment needed for its specific task:
| Zone | Primary Components | Storage Priority |
|---|---|---|
| Prep Zone | Counter surface, cutting boards, knives | Knives, cutting boards, mixing bowls, small appliances |
| Cooking Zone | Range/cooktop, hood fan, oven | Pots, pans, oils, spices, utensils |
| Clean Zone | Sink, dishwasher | Dish soap, sponges, cleaning supplies, dish towels |
| Storage Zone | Refrigerator, pantry | Dry goods, canned goods, bulk storage |
| Coffee/Bar Zone | Coffee maker, kettle, small fridge | Coffee, tea, mugs, glassware |
Landing Zones: The Detail That Separates Good Layouts from Great Ones
Every major appliance needs a landing zone — a stretch of counter immediately adjacent to the appliance where items can be placed when moving to or from it. The refrigerator needs at least 15 inches of counter on the door-opening side (the side where the door swings open, not the hinge side). The range needs at least 12 inches of counter on each side. The microwave or oven needs landing space below or beside it. The dishwasher needs space beside the sink to stage dirty dishes and receive clean ones.
Failing to design landing zones is one of the most common kitchen layout mistakes. A kitchen can have generous total counter space but still function poorly if the counter is not in the right locations relative to the appliances.
Designing for Two Cooks
Two-cook kitchens require wider aisles (48 inches minimum), two sink locations (primary + prep sink on island or peninsula), and non-overlapping prep zones. The zone layout approach is particularly effective here: if each cook has their own prep zone with dedicated storage and counter space, they can work simultaneously without colliding. This typically requires a kitchen of at least 150 square feet with either a U-shape or an L-shape plus island.
Permit Requirements for Kitchen Layout Changes in Vancouver
Kitchen renovations that change only the finishes — replacing countertops, cabinets, and appliances in the same locations — typically do not require a building permit in the City of Vancouver or surrounding Metro municipalities. But as soon as you change the layout, permit requirements engage quickly. Understanding which changes trigger which permits is essential before planning begins.
| Work Type | Permit Required | Approx. Permit Cost |
|---|---|---|
| Load-bearing wall removal | Building permit + engineer | $600–$1,500 + engineering |
| Non-load-bearing wall removal | Building permit | $300–$800 |
| Plumbing relocation (sink move) | Plumbing permit | $200–$400 |
| New electrical circuit (island) | Electrical permit | $150–$350 |
| Hood fan exterior venting (new penetration) | Building permit (usually) | $200–$500 |
| Gas line for range (new location) | Gas permit | $200–$400 |
Structural Wall Removal: Always Permit
A load-bearing wall removal in Vancouver always requires a building permit, a structural engineer’s drawings, and an inspection. There are no exceptions, and attempting to remove a load-bearing wall without permits and engineering creates both safety and resale risks. When the home is eventually sold, a home inspector will identify the change, and the absence of permits and engineering will be a material defect that affects the transaction.
Plumbing Relocation
Moving a kitchen sink to a different wall requires relocating the drain line, the supply lines, and potentially the vent stack. In detached homes with accessible crawlspaces or basements, this is a manageable plumbing job. In condos on upper floors, drain relocation through a concrete slab may be impossible or prohibitively expensive. A plumbing permit is required whenever the drain line moves, and the work must be inspected before the wall is closed.
Island Electrical Requirements
A kitchen island with a sink requires an electrical circuit for the garbage disposal and any under-counter outlets. The BC Electrical Code requires GFCI-protected outlets within two feet of any sink, and kitchen islands require at least one outlet on the island countertop. This work requires an electrical permit and inspection. Budget for a licensed electrician to run a new circuit from the panel to the island location.
VGC manages all permit applications as part of our renovation contracts. You do not need to navigate the City of Vancouver or Metro municipal permit process independently. Contact us to discuss your project scope and permit requirements.
More Kitchen Renovations Guides

Kitchen Backsplash Installation in Vancouver: Tile Options, Costs, and Design Guide

Galley Kitchen Renovation in Vancouver: Making the Most of a Narrow Kitchen Layout

Kitchen Lighting Renovation in Vancouver: Under-Cabinet, Pendants, and Recessed Lighting Guide
IKEA vs. Custom Cabinets in Vancouver: Which is the Better Choice for Your Kitchen?
Quartz vs. Granite Countertops in Vancouver: Which is Better for Your Kitchen?
Ready to start your renovation?
Frequently Asked Questions: Kitchen Layout Vancouver
What is the minimum kitchen size for an island?
The practical minimum is a kitchen that is at least 12 feet wide and 12 feet long. This allows a modest island (approximately 3 feet by 4 feet) with the minimum 36-inch aisle clearance on three sides and a countertop run on the fourth side. For a comfortable, functional island with seating, a 14-foot by 12-foot kitchen is a more realistic minimum. Anything smaller than 12×12 and you should strongly consider a peninsula instead — you get similar functionality with less space consumed.
Is a galley kitchen or L-shaped kitchen more efficient?
A galley kitchen is generally more efficient on a steps-taken-per-task basis. Because both work surfaces face each other, the cook can pivot from one to the other without walking. However, efficiency also depends on the specific dimensions. A galley that is too narrow (under 42 inches of aisle) or too long (over 16 feet per run) loses its efficiency advantage. An L-shaped kitchen with a well-placed work triangle can be equally efficient for most cooks, with the additional benefit of a more open feel in one or two directions.
Where should the refrigerator go in a small kitchen?
In a small kitchen, place the refrigerator at the end of a cabinet run rather than in the middle. This minimizes the interruption to the counter workspace and allows the fridge door to swing fully open without hitting a countertop or adjacent cabinet. Leave at least 15 inches of counter on the door-opening side of the refrigerator as a landing zone for groceries and items retrieved from inside. In a galley kitchen, place the refrigerator at one end of the run (near the entry) rather than in the middle of the wall.
Island vs. peninsula: which is better for open concept?
For most open-concept Vancouver homes in the 10×12 to 12×14 foot kitchen range, a peninsula is the better choice. It provides the boundary-defining function of an island, offers seating on the living-room side, provides more storage than an equivalent island, and requires about 42 inches less floor space in one direction. A true island is better when the kitchen is large enough (14×14 or larger) and you want traffic flow on all four sides — useful in entertainment-focused homes where guests circulate through the kitchen area.
What does “10×10 kitchen” mean in a renovation quote?
A 10×10 kitchen is the industry standard benchmark for comparing cabinet pricing. It represents an L-shaped kitchen with two 10-foot runs of cabinets (20 linear feet total) — neither large nor small, just a standardized reference point. When a cabinet manufacturer or retailer quotes a price “per 10×10 kitchen,” they are giving you a price for that standardized layout, which allows apples-to-apples comparison across brands. Your actual kitchen may be larger or smaller, and the quote will scale accordingly. Always ask whether the quote you receive is for the 10×10 standard or for your actual kitchen dimensions.
What height should a peninsula seating area be?
You have two standard options: counter height (36 inches) with an 18-inch overhang, or bar height (42 inches) with a 12-inch overhang. Counter height uses standard kitchen chairs or short counter stools and feels more comfortable for eating meals. Bar height requires bar stools and gives a slightly more casual, bar-like feel. For families with young children, counter height is generally more practical. For entertainment-focused households, bar height creates a livelier social space. Make sure the overhang dimensions match the height: too little overhang at counter height means knees hit the cabinet face.
How much aisle space do I need between an island and the counter?
The absolute minimum is 36 inches, measured from the edge of the island to the front edge of the countertop on the opposite side. This allows one person to walk through without turning sideways. The NKBA recommended minimum for a working aisle is 42 inches, which allows a person to stand at the counter and another to pass behind. For a two-cook kitchen, design for 48 inches. The 42-inch standard is also required to fully open most appliance doors (dishwasher, oven) without blocking the aisle — below 42 inches, you may find yourself stepping aside to open your own dishwasher.
Can I remove the wall between my kitchen and living room?
Possibly — but you need to determine whether the wall is load-bearing before assuming it can be removed. In Vancouver detached homes, a structural engineer can assess the wall for $300–$600. If the wall is non-structural, removal requires a building permit but is otherwise a straightforward renovation. If it is load-bearing, a beam must be installed to transfer the load, which adds engineering, permit, and structural costs but is still very achievable. In condos, the process requires strata approval in addition to permits, and the wall may be a concrete structural element that cannot be removed at all.
What is the biggest kitchen layout challenge in a Vancouver Special?
The biggest challenge is the enclosed kitchen at the rear of the home, separated from the dining area by a wall that may or may not be load-bearing. The kitchen is functional but feels cut off from the rest of the main floor. The renovation opportunity — removing or opening that wall — is often the single highest-impact change available in a Vancouver Special renovation. Once the wall comes down and the kitchen connects to the dining and living area, the entire home feels different. The structural assessment of that wall is the first step in planning any Vancouver Special kitchen renovation.
Is the kitchen work triangle still relevant?
Yes — as a diagnostic tool, not a rigid design rule. If you apply the work triangle to a kitchen layout and one of the legs is over nine feet or under four feet, it is a reliable signal that the layout will be inconvenient to use. But modern kitchen design extends beyond the triangle to work zones, which better accommodate multiple cooks, coffee stations, and the variety of tasks a contemporary kitchen handles. Use the triangle to identify problems; use zone thinking to design the solution.
What layout is best for one cook vs. two cooks?
For a single cook, the galley and compact L-shape are most efficient — every surface is within easy reach and no space is wasted on wide aisles. For two cooks, the priorities shift: wider aisles (48 inches), two prep zones, and ideally two sink locations. This points toward a U-shaped kitchen, an L-shape with a large island, or a large L-shape with a peninsula. The key for two-cook kitchens is ensuring the prep zones and cooking zones do not overlap — each cook should be able to work without crossing through the other’s space.
How much does a kitchen layout change cost in Vancouver?
A kitchen layout change — moving appliances, reconfiguring the cabinet arrangement, potentially relocating the sink — adds cost on top of the standard renovation budget. Rough ranges for common changes: moving a sink to a new wall ($1,500–$4,000 for plumbing work), removing a non-load-bearing wall ($2,000–$5,000 including patching and finishing), removing a load-bearing wall ($8,000–$20,000 including engineering and beam), adding an island to an existing L-shaped kitchen ($5,000–$15,000 depending on size and finish). These are in addition to the cost of new cabinets, countertops, and appliances.
Can I add an island to my existing kitchen?
Yes, if the kitchen is large enough. Measure your available floor space, then subtract 42 inches on each of the three or four sides where the island will need a clear aisle. If the remaining space accommodates an island of at least 24×48 inches (minimum usable size), an island is feasible. You will also need to add electrical outlets on the island (code requirement) and, if the island includes a sink, plumbing. If the floor space does not work, consider a peninsula attached to one end of the existing counter run — it will give you many of the same benefits with a smaller footprint.
What kitchen layout works best in older Vancouver character homes?
Pre-war Vancouver character homes in neighbourhoods like Strathcona, Mount Pleasant, Riley Park, and Kitsilano were typically built with narrow, purpose-built kitchen rooms 8–10 feet wide and 12–16 feet long. This is the ideal galley kitchen dimension. If the original kitchen was galley-shaped, a renovation that stays within the galley layout and focuses on modernizing the cabinets, countertops, and appliances is often the most cost-effective approach. If the kitchen connects to a butler’s pantry or breakfast room, opening that wall can enable an L-shape or add significant counter and storage space without a major structural intervention.
Do I need a permit to replace my kitchen cabinets?
No — replacing kitchen cabinets and countertops in the same locations, without moving any plumbing or electrical, does not require a building permit in Vancouver or Metro municipalities. You are replacing finishes, not changing the structure or the systems. However, if your renovation includes moving the sink, adding a new electrical circuit (for an island or new outlets), relocating the gas line for the range, or removing any wall — all of those elements do require the appropriate permits. A reputable contractor will identify which elements of your project require permits during the planning phase and will pull those permits on your behalf.
How do I get started with a kitchen layout renovation in Vancouver?
The first step is an on-site assessment with a contractor who can look at your actual kitchen, identify which walls are structural, determine where plumbing and electrical are located, and give you honest feedback on which layouts are feasible in your specific space. Bringing inspiration photos and a rough idea of your priorities (more storage vs. open concept vs. seating vs. two-cook capacity) to that first meeting will make the conversation productive. From there, a designer or experienced contractor can sketch layout options and provide preliminary cost ranges before you commit to anything.
Contact VGC to schedule a kitchen layout consultation. We work throughout Metro Vancouver and specialize in the full range of Vancouver home types — condos, Vancouver Specials, character homes, and detached two-storey homes.
Choosing the Right Kitchen Layout for Your Vancouver Home
The right kitchen layout is the one that fits your home’s structural reality, matches your cooking habits, and works within your renovation budget. There is no universally correct answer — a galley kitchen that functions perfectly in a Kitsilano character home would be the wrong choice in a large Vancouver Special where removing one wall unlocks a dramatically better U-shaped or L-plus-island configuration.
The decisions that matter most are made before anyone picks a cabinet door style or countertop material:
- Is your kitchen structurally open to reconfiguration, or do load-bearing walls and concrete constrain you?
- Do you cook alone, or with a partner? One cook or two changes the aisle and zone requirements significantly.
- Do you prioritize social cooking in an open concept, or maximum efficiency in a dedicated kitchen room?
- Is storage the primary constraint, or counter space?
- What is your realistic budget — and how much of it goes to structural layout changes versus finishes?
Answering these questions first — before committing to any layout — produces kitchens that work well for decades rather than kitchens that look good in the renovation photos but frustrate their owners every time a meal is prepared.
VGC has renovated kitchens across Metro Vancouver in every home type and every layout configuration. Our process starts with the layout and the structural realities of your home before we talk about finishes. If you are planning a kitchen renovation and want experienced guidance on what is possible in your specific space, get in touch with our team. You can also review our complete renovation planning guide and explore our full renovation services before your first consultation.
Get a Free Renovation Quote
Metro Vancouver’s trusted general contractors. Free consultations across Vancouver, Burnaby, Richmond, North Shore & beyond.
Get Your Free Quote →Ready to start your project? Vancouver General Contractors (VGC) provides free, fixed-price quotes for homeowners across Metro Vancouver. Learn more about our kitchen renovation Vancouver services or request a free quote today.
VGC serves Vancouver and surrounding areas. View all renovation services in Vancouver →
Comments are closed