
Renovation Contingency Fund Vancouver: How Much, What It Covers & Why You Need It (2026)
You’ve budgeted carefully. You’ve gotten quotes, chosen your contractor, and you know exactly what your Vancouver renovation is going to cost. Then demolition day arrives — and behind the drywall is a mass of knob-and-tube wiring, grey poly-B pipes, and a bearing wall your drawings said didn’t exist.
This is not a horror story. This is a Tuesday in Vancouver.
A renovation contingency fund is the financial buffer that stands between a minor surprise and a project-ending crisis. It is not pessimism — it is the single most important number in your renovation budget. This guide explains exactly how much you need, what it covers, and how to manage it so that when the surprises come (and they will), you’re ready.

These percentages apply to the total renovation budget, including contractor fees, materials, permits, and design costs
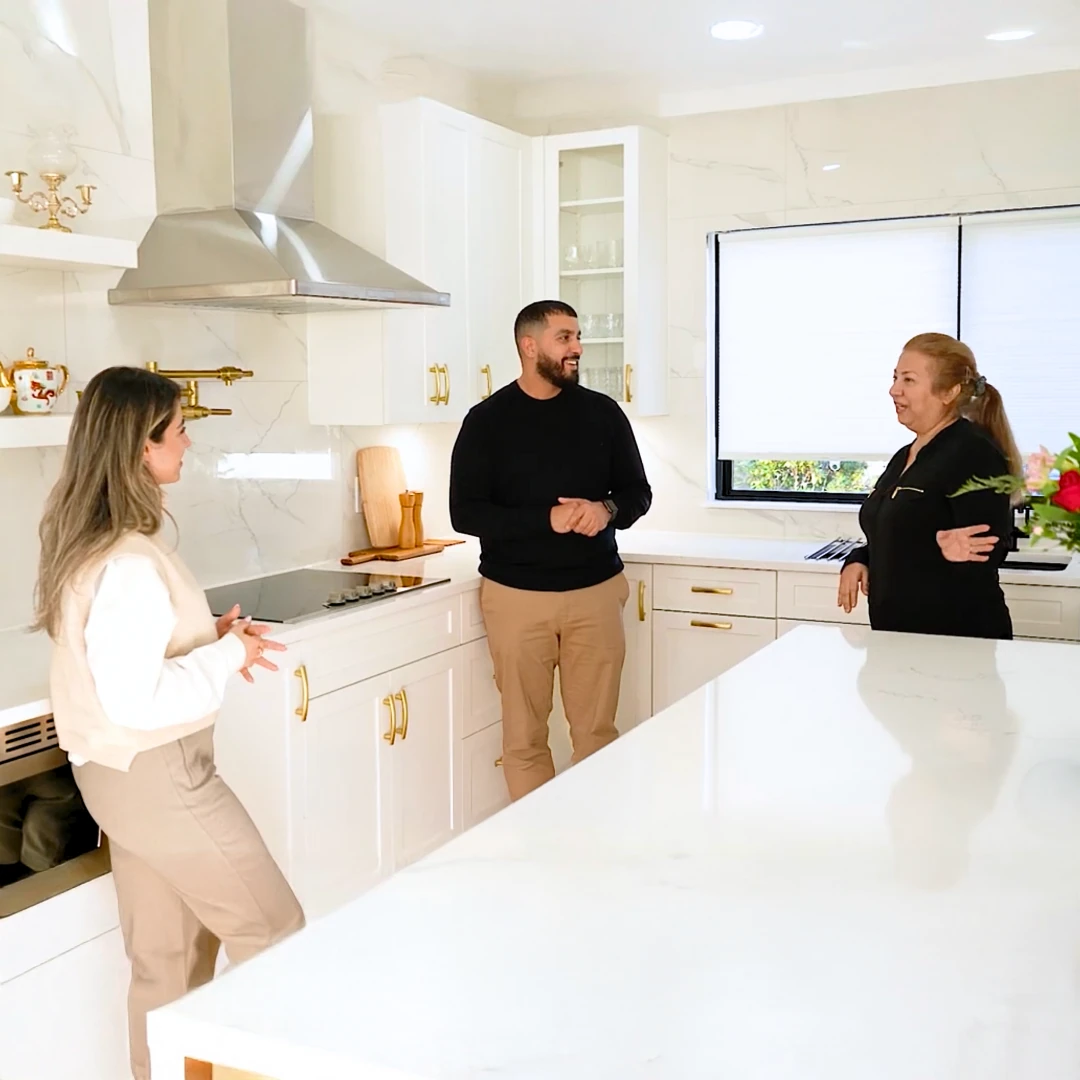
Vancouver General Contractors
What Is a Renovation Contingency and Why Vancouver Homeowners Need One
A renovation contingency is a dedicated financial reserve — typically 10 to 20 percent of your total project budget — set aside exclusively to cover unexpected costs that arise during construction. It is not part of your contractor’s quote. It is not folded into your renovation loan. It sits in a separate, accessible account and exists for one purpose: absorbing the surprises that no one could have predicted from the outside.
In most North American cities, a 10 percent contingency is considered standard advice. In Metro Vancouver, that number is often inadequate — and experienced contractors will tell you so plainly. Here is why.
Vancouver’s housing stock skews old. A large proportion of the detached homes in Vancouver proper, Burnaby, New Westminster, North Vancouver, and the older parts of Coquitlam and Surrey were built before 1970. Many were built before 1950. These homes were constructed under building codes that have since been entirely rewritten, with materials that are now known to be hazardous, using techniques that do not meet modern structural or energy efficiency standards. Every renovation in an older Vancouver home is, in part, an archaeological excavation. You do not know what you will find until you start removing finishes.
Compounding this, Vancouver has among the highest renovation costs in Canada. Labour rates for licensed trades — electricians, plumbers, structural engineers — are substantially higher here than in most other Canadian cities. Material costs track closely with labour. When a surprise arises, the cost to address it in Vancouver is higher than the same surprise would cost in Winnipeg or Halifax. Your contingency fund must reflect local pricing, not national averages.
Permit complexity adds another layer. Metro Vancouver municipalities vary considerably in their permitting requirements, inspection timelines, and mid-project change order processes. An inspector may require additional work not in the original scope before issuing a framing sign-off. Engineered drawings may be required for structural elements discovered mid-project. These are real costs that arrive mid-construction, when you have no leverage to defer them.
From a contractor’s perspective, a client without a contingency fund is a liability — not because we expect to find problems, but because when we do, a client with no financial buffer faces an impossible choice: spend money they don’t have, or stop the project in a half-demolished state. Neither outcome is good for anyone. The clients who navigate renovations most smoothly are consistently the ones who set aside a proper contingency before the first hammer swing, and who understand that using it is not a failure — it is the system working exactly as designed.
If you are planning a renovation and want to understand the full scope of what you are getting into, start with our Vancouver renovation guide for a comprehensive overview of the process from planning through completion.
How Much Contingency to Set Aside: A Vancouver-Specific Framework
The right contingency percentage depends primarily on two factors: the age of the home and the complexity of the renovation scope. Older homes carry more unknowns. More invasive renovations expose more of the building’s structure and systems. The intersection of these two factors determines your risk profile.
Here is a practical framework developed from real Vancouver project experience:
| Home Age | Recommended Contingency | Primary Risk Factors |
|---|---|---|
| Built after 2000 | 10% | Minor code updates, permit revision fees, finish substitutions |
| 1980–2000 | 12–15% | Poly-B plumbing (1978–1995), aluminum wiring (some), asbestos in older end of range |
| 1960–1980 | 15–18% | Galvanized pipe, knob-and-tube in parts, asbestos highly probable, 60-amp panels |
| Pre-1960 | 18–25% | All of the above plus rotted framing, undersized structure, foundation issues |
| Heritage / character homes | 20–30% | Heritage permit conditions, specialized materials, structural complexity |
These percentages apply to the total renovation budget, including contractor fees, materials, permits, and design costs. If your kitchen renovation is budgeted at $80,000 and your home was built in 1955, your contingency should be $14,400 to $20,000 — sitting in a liquid account before you sign the contract.
Scope complexity matters as much as home age. A cosmetic renovation — new flooring, paint, fixtures, no wall moves — has limited exposure to structural and mechanical surprises because little of the building’s hidden infrastructure is disturbed. A structural renovation — removing bearing walls, lowering a basement, adding a suite — penetrates deep into the building’s skeleton and systems. The more you open up, the more you expose. Adjust your contingency accordingly:
- Cosmetic renovation only (paint, flooring, fixtures): Use the lower end of your age-based range
- Kitchen or bathroom gut renovation (new plumbing, electrical, layout): Use the middle of your range
- Structural work (wall removal, addition, basement development): Use the upper end or exceed it
- Full home renovation (multiple trades, full systems replacement): Consider the range a floor, not a ceiling
One additional factor worth noting: if your home has never been renovated since original construction, your contingency risk is higher than a home that was substantially updated in the 1990s or 2000s. A home that received a major renovation 20 years ago likely had its worst problems addressed already. A home that has never been touched is a time capsule.
What Renovation Contingencies Actually Cover: Real Costs in Vancouver
Abstract percentages are useful for budgeting. But it helps to understand specifically what kinds of surprises your contingency is designed to absorb, and what those surprises cost in the current Vancouver market. The following represents a realistic breakdown of the most common contingency line items we encounter on Metro Vancouver renovation projects.
| Contingency Item | Typical Vancouver Cost Range | Notes |
|---|---|---|
| Asbestos abatement — floor tile and adhesive | $3,000–$8,000 | Per room; vinyl floor tiles 1950s–1980s commonly contain chrysotile |
| Asbestos abatement — pipe insulation | $8,000–$20,000 | Friable; requires encapsulation or removal by WorkSafeBC-registered firm |
| Asbestos abatement — ceiling texture (popcorn) | $5,000–$15,000 | Sprayed acoustic ceilings pre-1990 almost universally contain asbestos |
| Knob-and-tube wiring removal | $8,000–$20,000 | Full home rewire; partial rewire per affected area $3,000–$8,000 |
| Aluminum wiring remediation (pigtailing) | $2,500–$6,000 | Full replacement more costly; CO/ALR pigtailing widely accepted in BC |
| 60-amp panel upgrade to 200-amp | $2,500–$5,000 | Often required when adding circuits for modern appliances |
| Galvanized pipe replacement (supply lines) | $8,000–$18,000 | Full home; partial replacement per zone $3,000–$7,000 |
| Poly-B pipe replacement | $5,000–$15,000 | Full home repiping in PEX or copper |
| Rotted framing members (studs, joists, plates) | $2,000–$12,000 | Highly variable; bathroom walls most common location |
| Undersized beam replacement | $5,000–$15,000 | Includes engineer, temporary support, beam supply and install |
| Mold remediation | $3,000–$15,000 | Depends on extent and location; bathroom and crawlspace most common |
| Unexpected concrete (thickness, rebar) | $1,500–$6,000 | Affects basement work; extra cutting and disposal costs |
| Permit change orders and revision fees | $500–$3,000 | Inspector-required scope additions; permit amendment fees |
| Sewer scope and repair | $1,500–$25,000+ | Camera scope $150–$350; root intrusion or collapsed pipe requires excavation |
Notice that several of these items can stack. A pre-1960 Vancouver home undergoing a full kitchen and bathroom renovation might encounter asbestos floor tile, knob-and-tube wiring, galvanized supply lines, and rotted framing around the tub enclosure simultaneously. Each item is manageable independently. Together, they can add $30,000 to $50,000 to a project budget — which is exactly why the contingency percentages for older homes are as high as they are.
It is also worth understanding that these costs are not contractor markups or surprises engineered to extract more money. They are code requirements, safety obligations, and structural necessities that existed in the walls long before you bought the home. No responsible contractor can leave knob-and-tube wiring in walls they’ve opened, or reframe around rotted structural members. These items must be addressed, and the only question is whether you have funds available to address them without crisis.
Asbestos: The Most Common Contingency Trigger in Vancouver
Of all the potential surprises in a Vancouver renovation, asbestos is the most common and the one most homeowners are least prepared for. If your home was built before 1990 — and a significant proportion of Metro Vancouver homes were — you should operate under the assumption that asbestos-containing materials are present somewhere in the building until proven otherwise. This is not alarmism. It is the practical reality of Vancouver’s housing stock.
Asbestos was used extensively in Canadian construction from the 1940s through the late 1980s. It was valued for its fire resistance, insulating properties, and binding strength. It appeared in dozens of building products: floor tiles and their adhesive, ceiling texture (commonly called “popcorn ceiling”), pipe insulation, attic insulation (vermiculite), exterior stucco, roof shingles, drywall joint compound, and even some interior plaster mixes. The asbestos itself is not the problem — asbestos fibres become a health hazard when disturbed and made airborne (the technical term is “friable”). A floor tile in good condition, left undisturbed, poses minimal risk. The same tile cut with a saw or chipped during demolition releases microscopic fibres.
Under WorkSafeBC regulations, any renovation work that will disturb suspect materials in a building constructed before 1990 requires an asbestos assessment before work begins. This is not optional — it is a legal requirement. The assessment involves a qualified professional collecting samples and having them analyzed by an accredited laboratory. The process takes two to five business days and costs $300 to $600 depending on the number of samples required. It is one of the best investments you can make before starting a renovation, because it converts an unknown contingency item into a known cost.
Here is where asbestos most commonly hides in Vancouver homes:
- Vinyl floor tiles (9×9 inch or 12×12 inch): The tiles themselves and especially the black mastic adhesive beneath them. Found in kitchens, bathrooms, laundry rooms, and basements. Pre-1980 vinyl tiles should be assumed positive until tested.
- Acoustic ceiling texture (popcorn/stucco ceilings): Sprayed-on textured ceilings installed before 1990 almost universally contain asbestos. This is perhaps the single most common asbestos location in Vancouver homes.
- Pipe insulation: The grey or off-white plaster-like material wrapped around older heating pipes and ducts. Highly friable if damaged; one of the higher-risk abatement scenarios.
- Vermiculite attic insulation: Shiny, granular, grey-brown material. Most Canadian vermiculite was sourced from a mine in Libby, Montana that was heavily contaminated with tremolite asbestos. If you have vermiculite attic insulation, assume it contains asbestos.
- Exterior stucco: Some pre-1980 stucco mixes contain asbestos fibres for strength. This matters primarily if you are re-siding or cutting through exterior walls.
When asbestos is found, abatement must be performed by a WorkSafeBC-registered abatement contractor. This is not negotiable — unlicensed removal is illegal and genuinely dangerous. When selecting an abatement contractor, verify their WorkSafeBC registration directly (the WorkSafeBC website has a searchable contractor registry), ask for a detailed written scope of work, and confirm that post-abatement air quality testing is included. Reputable firms will provide a clearance certificate on completion.
The abatement process involves sealing the work area with negative air pressure containment, removing the material using wet methods to suppress fibres, double-bagging and labelling all waste as hazardous material, and transporting it to an approved disposal facility. Depending on the material and location, abatement can take anywhere from half a day (a single bathroom floor) to several weeks (whole-home pipe insulation removal).
The key takeaway: spend the $300 to $600 on testing before you start. If asbestos is found, you have a known cost and can get abatement quotes, adjust your contingency, and schedule the work properly. If no asbestos is found, that money was the best insurance premium you ever paid.
Electrical Surprises: Knob-and-Tube, Aluminum Wiring, and Undersized Panels
Electrical surprises are the second most common contingency trigger in older Vancouver homes, and they carry consequences beyond cost: insurance implications, code compliance, and genuine safety risk. Understanding what you might find before you start — and what it costs to address — is essential planning for any renovation in a home built before 1980.
Knob-and-tube wiring was the standard residential wiring method from roughly 1900 to the mid-1950s. It consists of single insulated wires run through ceramic knobs (which hold the wire away from framing) and ceramic tubes (which protect the wire where it passes through framing). There is no ground wire, and the insulation is cloth or rubber that degrades over 70+ years. Knob-and-tube is not inherently dangerous when installed correctly and left undisturbed — but it creates serious problems in renovation contexts.
Most property insurers in BC will not issue or renew a policy on a home with knob-and-tube wiring, or will charge significantly elevated premiums. More critically, knob-and-tube wiring relies on free air circulation around the wires for heat dissipation — adding insulation over it (which virtually every renovation in a pre-1950s home will involve) creates a fire hazard and likely violates your insurance policy. The combination of these factors means that if you open walls in a pre-1950s Vancouver home and find knob-and-tube, you almost certainly need to address it. A licensed electrician pre-inspection ($200–$400) before renovation planning can confirm what’s there and give you a remediation quote before you commit to a project budget.
Aluminum wiring was used in residential construction from approximately 1965 to 1975, primarily as a cost-saving measure during a period of high copper prices. It is identifiable by its silver colour (copper is orange/brown). Aluminum wiring itself is not inherently dangerous, but aluminum and copper expand and contract at different rates, causing connections at outlets, switches, and panels to loosen over time — creating heat and fire risk. The standard BC solution is CO/ALR pigtailing: installing special aluminum-rated wire nuts at every device location to make a safe aluminum-to-copper connection. This is less expensive than full replacement and is code-acceptable. A full home pigtailing typically costs $2,500 to $6,000; full replacement is significantly more.
60-amp electrical panels were standard for homes through the 1960s and remained common in the early 1970s. A modern home needs 100-amp service as a minimum, and 200-amp is strongly recommended for homes with electric heat, EV chargers, or modern kitchen appliances. When a renovation adds circuits — a kitchen renovation nearly always adds circuits — an undersized panel must be upgraded before the work can be inspected and approved. Panel upgrades typically cost $2,500 to $5,000, including BC Hydro reconnection fees.
GFCI and AFCI requirements apply to renovated bathrooms, kitchens, garages, and outdoor circuits under current BC Electrical Code. If your renovation touches these spaces, GFCI protection is required on all outlets — even if the existing wiring did not have it. This is relatively low cost ($200–$600 per space) but must be factored in.
| Electrical Issue | Common in Homes Built | Typical Vancouver Cost | Notes |
|---|---|---|---|
| Knob-and-tube rewire (full home) | Pre-1955 | $8,000–$20,000 | Insurance may require before renewal |
| Knob-and-tube rewire (partial zone) | Pre-1955 | $3,000–$8,000 | Renovation area only |
| Aluminum wiring pigtailing | 1965–1975 | $2,500–$6,000 | CO/ALR devices at every outlet/switch |
| Panel upgrade 60A → 200A | Pre-1970 | $2,500–$5,000 | Includes BC Hydro service upgrade |
| GFCI/AFCI compliance | Any age | $200–$600 per space | Required in renovated wet areas |
Plumbing Surprises: Galvanized Pipes, Poly-B, and Drain Stack Problems
Plumbing surprises in older Vancouver homes fall into three main categories: deteriorated supply lines, problematic pipe materials with insurance implications, and aging drain systems. Each has different risk profiles, cost ranges, and urgency levels. Understanding them before you start a renovation — rather than discovering them mid-project — is one of the highest-value things you can do to manage your contingency risk.
Galvanized steel supply pipes were standard in Canadian residential construction from the 1930s through the 1960s. Galvanized pipe is steel pipe coated with zinc to prevent corrosion. It works well when new. Over 40 to 70 years, the interior of galvanized pipe corrodes, builds up mineral deposits, and eventually restricts flow to a trickle or fails entirely. Most homes with original galvanized supply lines built in the 1940s or 1950s are now reaching or past the end of those pipes’ functional life expectancy. Signs of galvanized pipe problems include low water pressure, discoloured water (rust-coloured when first turned on), and visible external corrosion. A full-home galvanized repipe in PEX or copper typically costs $8,000 to $18,000 depending on home size and accessibility. If your renovation opens walls in a home with galvanized supply lines and exposes these pipes, your plumber will flag them — and you will need to decide whether to address them now or defer to a later project.
Poly-B (polybutylene) pipe is a grey plastic supply pipe used widely in Canadian residential construction from 1978 to approximately 1995. It was popular because it was inexpensive and easy to install. It was withdrawn from use after it became clear that the pipe degrades over time when exposed to chlorinated water (which all Metro Vancouver municipal water contains), becoming brittle and prone to sudden failure. Poly-B pipe can fail catastrophically and without warning — the first sign of a problem is often a burst pipe and significant water damage. Most BC insurers will now either refuse to insure a home with poly-B, charge high premiums, or require a declaration of its presence. A full-home poly-B replacement in PEX or copper typically costs $5,000 to $15,000. If your renovation opens walls and poly-B is present, your plumber is required to flag it — and it is worth having the conversation about full replacement rather than piecemeal repairs, as partial repairs do not address the underlying degradation of the remaining pipe.
Cast iron drain stacks in homes built before the 1970s are reaching the end of their lifespan. Interior cast iron corrodes from the inside out due to hydrogen sulphide produced by organic waste. A drain camera inspection (sewer scope, $150 to $350) before a major renovation can reveal the condition of the drain stack and identify sections with significant corrosion, root intrusion, or offset joints. This is especially important if your renovation involves any bathroom or kitchen work, where disturbing drain connections can compromise an already-deteriorated system. Drain stack replacement costs $3,000 to $12,000 depending on height and accessibility; sewer line issues requiring excavation can run $8,000 to $25,000 or more.
| Plumbing Issue | Common in Homes Built | Typical Vancouver Cost | Insurance Impact |
|---|---|---|---|
| Galvanized supply repipe (full home) | Pre-1965 | $8,000–$18,000 | No direct impact; failure causes claims |
| Poly-B supply repipe (full home) | 1978–1995 | $5,000–$15,000 | Many insurers require or surcharge |
| Cast iron drain stack replacement | Pre-1975 | $3,000–$12,000 | No direct impact |
| Sewer camera inspection | Any pre-1980 | $150–$350 | Identifies problems before they become claims |
| Sewer line repair/replacement | Pre-1970 | $8,000–$25,000+ | Major water/sewer claims avoided |
The investment in pre-renovation plumbing assessment is almost always worth it. A sewer scope costs $150 to $350 and takes an hour. Discovering mid-renovation that your drain stack needs replacement — when the walls are open and the plumber is already on site — is significantly less disruptive and expensive than discovering it after the renovation is complete and all new finishes are installed.
Structural Surprises: Bearing Walls, Beams, Floors, and Foundations
Structural surprises are the most psychologically alarming contingency items — and often among the most expensive. They also tend to emerge in the middle of projects that seemed straightforward on paper. A kitchen renovation becomes complicated when the wall you planned to remove turns out to be bearing a floor beam above. A basement bathroom addition becomes complicated when the existing floor joists are undersized for the new load configuration. A bathroom renovation becomes complicated when the subfloor around the tub is structurally compromised by years of water infiltration.
Bearing wall misidentification is more common than it should be, particularly in older homes where structural logic was not always documented or intuitive. Bearing walls carry the load of the structure above them down to the foundation. Non-bearing walls are partition walls that carry only their own weight. Removing a bearing wall without proper temporary support and replacement structure (a beam sized to carry the transferred load) can cause serious structural failure. The correct process — structural engineer assessment, permit, beam sizing, temporary shoring, beam installation, inspection — adds $5,000 to $15,000 to a scope that assumed a non-bearing wall. If there is any doubt about whether a wall is bearing before a renovation starts, $400 to $800 for a structural engineer walkthrough is money extremely well spent.
Undersized beams are a frequent discovery in homes that have been previously renovated by owners or unlicensed contractors. A beam that was substituted for a proper engineered specification, or a span that was increased without recalculating the beam size, can show up as a sagging floor, a sticking door, or visible deflection in the ceiling. Replacing or sistering an undersized beam requires temporary support of the structure above, removal of the existing beam, supply and installation of the correct member (often an LVL or steel beam at longer spans), and re-inspection. Costs typically run $5,000 to $15,000.
Sagging floors in older Vancouver homes can have multiple causes: failed blocking between joists, damaged or rotted joists, settlement of the foundation, or inadequate original framing for the span. A pre-renovation structural inspection can identify sagging (measured in inches of deflection) and give you a repair scope before the project starts. Repairs range from adding blocking and sister joists ($2,000 to $6,000) to replacing a section of floor system ($5,000 to $15,000).
Foundation cracks fall into two categories: settlement cracks (common, cosmetic, non-structural) and structural cracks (less common, serious). Settlement cracks are horizontal or diagonal cracks from normal soil movement over decades. Structural cracks — typically horizontal cracks in poured concrete or block walls — indicate lateral pressure from soil and require professional assessment and often remediation. If your renovation involves basement work and you discover significant foundation cracking, stop and get a structural engineer assessment before proceeding.
The investment in a pre-renovation structural inspection ($400 to $800 for a licensed structural engineer) for any project involving wall removal, basement development, or addition work pays for itself many times over. It converts potential contingency items into known costs that can be properly scoped, permitted, and budgeted before construction begins.
Permits, Inspections, and Mid-Project Change Orders
Permit-related contingency costs are less dramatic than asbestos or structural surprises, but they are consistent and predictable in their unpredictability. Understanding how permit change orders arise — and why — helps you budget for them more accurately and reduces the frustration when they occur.
The most common permit-related contingency scenario is the mid-inspection scope addition. A building inspector conducting a framing inspection observes conditions not addressed in the original permit drawings and requires remediation before issuing sign-off. This might be a fire separation requirement between a new suite and the main floor, a structural requirement triggered by the inspector’s assessment of load path, or a plumbing or electrical requirement in an adjacent area exposed during renovation. These are legitimate safety requirements — inspectors are not inventing scope to cause problems — but they are costs that were not in your original budget and must be funded from somewhere. Permit change order costs typically run $500 to $3,000 for scope additions; significant inspector-required structural changes can exceed this.
Development cost levies and permit fee adjustments can also arrive as surprises. Some Metro Vancouver municipalities calculate development cost levies at permit submission based on the gross floor area added or created. If your project creates new living space (a suite, a basement finishing, an addition), the levy may be substantially higher than estimated before permit submission — particularly if the municipality has updated its schedule since your pre-application estimate. The only reliable way to get a firm levy number is to submit the application. Fees can range from hundreds of dollars to tens of thousands depending on municipality and scope.
Engineered drawing requirements are another mid-project permit cost. If renovation work exposes structural conditions not addressed in the original drawings — a non-standard framing configuration, an unusual load path, a foundation condition — the building inspector may require stamped engineer drawings before proceeding. These typically cost $800 to $2,500 for a residential application and can cause project delays while the drawings are prepared and reviewed.
Reducing permit contingency requires thorough pre-application work: detailed drawings that address likely inspector questions, pre-application meetings with the municipality’s building department for complex projects, and honest scope declarations that don’t try to minimize the work to reduce permit fees. Pre-application meetings are free or low-cost and can significantly reduce mid-project permit surprises by surfacing requirements before construction begins.
Managing Your Contingency Fund: Access, Tracking, and Decision Rules
Setting aside a contingency percentage is necessary but not sufficient. How you hold, access, and manage the fund matters enormously. A contingency that is not accessible when needed, or that gets spent on upgrades before the project is complete, provides no protection when the surprises arrive.
The best contingency vehicle for most Vancouver homeowners is a pre-approved HELOC (Home Equity Line of Credit). A HELOC secured against your home equity provides immediate access to funds at a lower interest rate than personal credit, with no requirement to draw the full amount until needed. Pre-approving the HELOC before your renovation starts means the credit is available the day you need it — not three weeks later after a rushed application process. HELOC approval involves an appraisal, income verification, and bank approval, all of which take time. Do not wait until mid-renovation to start this process.
Do not fold your contingency into your renovation mortgage or construction draw loan. Funds locked into a staged draw structure are not available on short notice. When an asbestos abatement contractor needs to be paid on completion — and abatement firms typically do require prompt payment — you need real, immediate access to funds. Keep contingency separate and liquid.
Track contingency usage in real time. Maintain a simple running log of every change order: the date, the issue discovered, the approved cost, and the updated contingency balance. Update this log every time a change order is signed. This gives you an accurate picture of your remaining buffer throughout the project and allows you to make informed decisions about scope adjustments before you run out of contingency rather than after.
Apply a clear decision rule about what contingency is for. Contingency exists for code-required scope additions, health and safety remediation, and structural necessities discovered during construction. It does not exist for upgrades you decided to add mid-project because the walls were open. Cosmetic upgrades — upgrading tile while you have a plumber on site, adding pot lights because the ceiling is already open — can be considered if contingency remains at the end of the project. But mid-project upgrades funded from contingency reduce your buffer against the surprises that may still come. The discipline rule is: contingency is spent on problems, not opportunities.
Unused contingency is not contractor money. Your contingency fund is yours. It is never part of the contract price. If a project completes without triggering contingency items, you keep the full balance. Some homeowners apply unused contingency to a final cosmetic upgrade or furnishing budget. Others simply retain it against future maintenance needs. Either is appropriate — but it is yours to decide, not the contractor’s to claim.
When Contingency Runs Out: Hard Choices and Smart Options
Despite proper planning, some renovations encounter surprises that exceed even a generous contingency. A pre-1940 home undergoing full renovation can reveal layered problems that individually were estimated but in combination exceed the reserve. When contingency runs out mid-project, you face a set of choices — none of them comfortable, but some significantly better than others.
Stopping the project partway through is almost always the most expensive option. A half-demolished kitchen with exposed wiring, open walls, and no plumbing is a home that is neither liveable nor safe. Stopping work creates costs that compound: temporary living arrangements, secure storage for materials already purchased, contractor remobilization fees when work resumes, and in some cases permit extension fees if the project exceeds the permit’s validity period. If you are considering stopping, get a very clear picture of the costs of stopping versus the costs of completing before making that decision.
Borrowing more is often the most practical solution if the situation is temporary. A HELOC extension, a personal line of credit draw, or a bridge loan can carry the project through completion. The interest cost on a short-term draw is typically far less than the cost of stopping and remobilizing. If your original contingency was drawn from a HELOC, discuss with your bank whether the limit can be temporarily increased — if your home equity has increased since the original appraisal, this may be straightforward.
Deferring scope to a Phase 2 is a legitimate strategy when there are genuinely separable parts of the project. If your whole-home renovation encountered significant surprises in the kitchen and bathrooms, perhaps the basement development or the exterior work can be deferred to a separate project with a new budget and timeline. This works when the deferred scope is truly independent — when it can be separated cleanly without leaving the primary scope incomplete or the building exposed.
Value engineering the remaining scope means substituting lower-cost specifications for items not yet purchased or installed. Downgrading tile, fixtures, appliances, or millwork to entry-level or mid-range selections can free up meaningful budget. This is a legitimate tool and one experienced contractors are practiced at applying quickly when needed. Have this conversation openly with your contractor — they know which substitutions preserve function and aesthetics and which compromise the result.
The most important principle when contingency runs short is this: have the conversation with your contractor immediately and transparently. Contractors who work on a fixed-price or cost-plus basis both need accurate financial information from their clients to make good decisions about sequencing, substitution, and timing. A client who conceals financial stress until they cannot pay is in a far worse position than a client who says early: “We are nearing our limit — let’s talk about options.” Good contractors have navigated this situation before and can help develop workable solutions if they know the constraint exists.
How to Reduce Contingency Risk Before Construction Starts
The most effective way to manage contingency risk is to convert unknowns into knowns before the project begins. A set of targeted pre-renovation investigations — costing roughly $1,000 to $2,500 total — can transform a large uncertain contingency into a smaller, more precisely defined reserve. Here is a practical pre-renovation investigation protocol for an older Vancouver home:
- Asbestos assessment ($300–$600): Required by WorkSafeBC for pre-1990 homes. Collect samples of all suspect materials in areas to be disturbed. If positive results come back, get abatement quotes before finalizing your renovation contract. Known abatement cost is far better than unknown contingency.
- Licensed electrician pre-inspection ($200–$400): Have a licensed electrician assess the panel, identify wiring type throughout the home, and provide a written scope of any required upgrades. This takes two to three hours and gives you an electrical contingency budget that is grounded in a professional assessment rather than a guess.
- Drain camera scope ($150–$350): Particularly valuable for homes built before 1975 with cast iron drain systems, or any home where the sewer service has not been recently inspected. A licensed plumber or drain cleaning company can scope the main drain stack and sewer line and provide a written report on condition.
- Structural engineer walkthrough ($400–$800): Essential for any project involving wall removal, addition, basement development, or structural alteration. A licensed structural engineer can assess existing conditions, confirm or correct assumptions about bearing walls and beam sizing, and identify any foundation concerns. Their written assessment may also become part of your permit application.
Combined, these four inspections cost $1,050 to $2,150 and can save tens of thousands of dollars in mid-project surprises. More importantly, they give you the information needed to negotiate your renovation contract with accurate scope — which means your fixed-price quote is more accurate, and your contingency estimate is based on known risk rather than general uncertainty.
Working with an experienced general contractor also significantly reduces contingency risk. Experienced contractors develop pattern recognition for the problems that older homes present. An experienced Vancouver contractor who has worked in many pre-1960 homes has seen knob-and-tube, galvanized pipe, and asbestos enough times that they include reasonable allowances in their scoping process and flag likely problem areas before demolition. This is one of the core value propositions of working with a professional general contractor versus attempting to coordinate trades independently as an owner-builder. If you want to discuss your specific project and what pre-renovation investigations make sense, contact our team for a consultation.
Finally, a detailed, comprehensive scope of work in your renovation contract is itself a form of contingency risk management. Vague contracts create disputes about what is included and what constitutes an extra. Clear contracts with detailed specifications — materials, dimensions, finishes, processes — leave less room for disagreement about scope and reduce the likelihood of contractor-initiated change orders for items that a thorough pre-renovation discussion would have resolved. Our home renovation services page covers how we approach scoping and contracting for Vancouver renovation projects.
More Cost Guides Guides

Real Wood vs. Engineered Hardwood Flooring in Vancouver: Which Lasts Longer?

Solid Surface vs. Laminate Countertops for Vancouver Kitchens: Budget Comparison

Tile vs. Hardwood Flooring in a Kitchen: Which is Better for Vancouver Homes?

Vinyl vs. Fiber Cement Siding in Vancouver: Which Handles BC's Climate Better?

Asphalt vs. Metal Roofing in Vancouver: Cost, Lifespan, and Performance Compared
Ready to start your renovation?
Renovation Contingency Vancouver: Frequently Asked Questions
How much contingency do I need for a bathroom renovation in Vancouver?
For a bathroom renovation in Vancouver, budget 10 to 20 percent of your total project cost as contingency, with the exact percentage depending on your home’s age. A bathroom in a post-2000 home warrants 10 percent. A bathroom in a pre-1960 home warrants 18 to 25 percent. Bathrooms are higher-risk renovation spaces because they concentrate plumbing, electrical, and waterproofing systems, and because water infiltration over decades frequently causes rotted framing around the tub and shower enclosure. A $35,000 bathroom renovation in a 1955 home should carry a $6,300 to $8,750 contingency minimum. The most common bathroom contingency triggers are rotted subfloor and framing, galvanized or poly-B supply lines, and knob-and-tube wiring in the walls.
What happens if my contractor finds asbestos mid-renovation?
If asbestos-containing material is discovered or suspected mid-renovation, work in that area must stop immediately under WorkSafeBC regulations. Your contractor is legally required to stop and cannot proceed until the material is assessed and, if necessary, abated. This is non-negotiable regardless of project timeline or budget pressure. Your contractor should notify you immediately, identify which materials are suspect, and either arrange for or assist you in arranging an asbestos assessment. If asbestos is confirmed, a WorkSafeBC-registered abatement contractor must be engaged. Project delays of one to two weeks for assessment and abatement scheduling are typical. The cost is funded from your contingency. This is exactly the scenario contingency funds exist for — the discovery is not the contractor’s fault, and the appropriate response is rapid professional remediation, not pressure to proceed around the problem.
Can I test for asbestos myself?
You can collect samples yourself and send them to an accredited laboratory for analysis — this is legal and is less expensive than hiring a qualified professional to collect the samples. However, there are important caveats. Sample collection disturbs the material, which releases fibres; collection should be done in full PPE (P100 respirator, Tyvek suit, nitrile gloves) with the area sealed and ventilated. Improper collection can create a hazard where none existed. For renovation planning purposes, hiring a qualified asbestos consultant ($300 to $600) is generally worthwhile because they know how many samples are needed, where to collect from, and how to interpret results in the context of your renovation scope. For a simple two-sample test out of curiosity, DIY collection with professional lab analysis ($30 to $60 per sample) is reasonable. For a renovation project, professional assessment is the recommended approach.
How do I find a licensed asbestos abatement contractor in Vancouver?
The definitive source is the WorkSafeBC contractor registry, searchable at worksafebc.com. Search for “asbestos abatement” contractors registered in BC. Verify that the specific firm you are considering is currently registered — registration must be maintained annually. Ask any abatement contractor for their WorkSafeBC registration number and verify it directly. In addition to registration verification, ask for references from recent projects of similar scope, confirm that their scope includes post-abatement air quality testing and a clearance certificate, and get at least two to three quotes. Price variations between abatement contractors can be significant. Avoid any contractor who offers to remove asbestos without proper containment or documentation — improper removal creates liability for you as the homeowner.
What does the poly-B insurance problem actually mean?
Many BC property insurers now treat poly-B piping as a high-risk condition. In practice, this manifests in several ways: some insurers refuse to write new policies on homes with known poly-B; others issue policies but include a poly-B exclusion (meaning water damage from poly-B failure is not covered); others charge elevated premiums. When you sell a home, disclosure of poly-B is typically required, and buyers may require replacement as a condition of purchase. The practical implication for renovation planning is this: if your home has poly-B and you are opening walls for a renovation, it is worth having your plumber assess the pipe condition and provide a replacement quote. Replacing poly-B while walls are already open costs significantly less than a standalone repiping project, and it eliminates the insurance complication. The cost of a burst poly-B pipe and resulting water damage — typically $20,000 to $80,000 or more in a finished home — far exceeds the cost of proactive replacement.
Knob-and-tube versus aluminum wiring — which is worse?
They present different risks and have different remediation paths. Knob-and-tube is generally considered the higher-risk condition from an insurance and insurability standpoint — most BC insurers will not cover a home with known knob-and-tube, and the interaction with insulation creates a genuine fire hazard. Aluminum wiring is a connection safety issue, not a wire-in-wall issue — the wiring itself is not the problem, the connections at devices are. Aluminum wiring is addressable through CO/ALR pigtailing without full rewiring, which is significantly less expensive than knob-and-tube remediation. However, aluminum wiring in panels and at outlets must be properly managed by a licensed electrician; improperly managed aluminum wiring connections are a fire risk. In terms of project impact: knob-and-tube in a renovation zone typically requires full rewiring of that zone before work can proceed; aluminum wiring requires pigtailing at all devices in the renovation zone. Both are addressable — knob-and-tube is simply more expensive.
How do I pre-approve a HELOC to use as a contingency fund?
Contact your bank or mortgage broker at least four to six weeks before your renovation start date. A HELOC application requires a property appraisal (typically $300 to $500, sometimes waived by the bank), income and employment verification, a credit check, and formal underwriting approval. Most HELOCs in Canada allow borrowing up to 65 percent of the home’s appraised value less the outstanding mortgage balance. Once approved, a HELOC costs nothing unless you draw on it — there are typically no draw fees and you only pay interest on the amount actually used. Pre-approval means the credit line is established and available; you draw only what you need when you need it. This is significantly more efficient than applying for a personal loan mid-renovation under time pressure. Discuss the size of the HELOC with your bank relative to your project budget — a HELOC sized to cover both your renovation budget and your contingency gives you maximum flexibility.
Does contingency money belong to the contractor?
No. Contingency is your money, held separately from the renovation contract. It is never quoted by or owed to your contractor. Your contractor’s payment is defined entirely by the signed contract and any approved written change orders. Contingency is drawn only when a specific unexpected cost arises, a change order is prepared describing the scope and cost, and you approve and sign it. At no point does your contractor have a claim on unspent contingency. If a project completes without contingency items arising, you keep the entire contingency balance. This is an important principle to understand and to communicate clearly — some homeowners confuse the contingency with a final payment holdback, which is a separate concept. Your contingency is your financial reserve; the holdback (typically 10 percent of the contract price held until substantial completion) is a payment mechanism within the contract.
How should I track change orders during a renovation?
Every change order should be in writing before the work is performed, except in genuine emergencies where stopping work would cause damage (a burst pipe discovered during renovation, for example). A proper change order includes: a description of the issue discovered, the proposed scope of work to address it, the cost (labour and materials), the impact on project timeline if any, and signatures from both you and your contractor. Maintain a change order log — a simple spreadsheet works well — that tracks the date, change order number, description, approved cost, and running total of change orders against your contingency balance. Review this log with your contractor at each site meeting. Never approve verbal change orders that will be documented “later.” The discipline of written change orders protects both you and your contractor by ensuring that scope and cost are agreed before the work is done.
What happens if I fire my contractor mid-renovation?
Terminating a contractor mid-renovation is one of the most expensive and disruptive things a homeowner can do, and should be a last resort reserved for situations involving genuine abandonment, fraud, or persistent safety violations. The practical consequences include: the original contractor may have a lien claim against your property for work performed but not yet paid; a new contractor will charge higher rates than the original to inherit someone else’s partially completed project (they carry all the liability for the existing work quality); materials may be on backorder or custom-ordered by the original contractor in their account; and project documentation, subcontractor relationships, and permit history must be transferred. If you are considering terminating a contractor due to dissatisfaction with progress or quality, exhaust every alternative first: a direct conversation, a formal written notice of default with a cure period, and if necessary a mediator. Reserve termination for genuine non-performance, not schedule frustrations or minor disputes.
Is my contingency tax deductible for a rental property renovation?
This depends on whether the renovation costs qualify as current expenses (deductible in the year incurred) or capital improvements (depreciated over time via CCA). The portion of renovation costs that is repair and maintenance — returning something to its original condition — is generally a current expense for rental properties and deductible against rental income. Asbestos abatement, for example, may qualify as a current expense if it is required maintenance rather than an upgrade. Capital improvements that add value or extend the useful life of the property are added to the adjusted cost base and depreciated over time. Contingency items that are discovered-and-remediated problems (rotted framing repair, pipe replacement, wiring updates) may qualify as current expenses. Work with a CPA who specializes in Canadian real estate to categorize your renovation expenses correctly — the distinction between current expense and capital expenditure is a matter of tax law and individual circumstance, not a general rule that applies equally to every renovation item.
How long does asbestos abatement take?
Duration depends entirely on the type of material, the volume, and the location. A single bathroom floor tile abatement (removing vinyl tile and mastic from one bathroom floor) typically takes one to two days: half a day for setup and containment, one day for removal, half a day for cleanup and air quality testing. Popcorn ceiling abatement in a 1,500 square foot home takes three to five days. Pipe insulation abatement is the most time-consuming scenario: depending on linear footage and accessibility, it can take one to three weeks. After abatement is complete, a post-abatement air quality test (clearance testing) must confirm that fibre levels have returned to background before the area can be re-occupied and other trades can resume work. This takes 24 to 48 hours for the test results to return. Budget for abatement to add one to three weeks to your project timeline in most scenarios, and discuss sequencing with your contractor so that other work can proceed in unaffected areas during the abatement period.
Can I stay in my home during asbestos abatement?
For minor, well-contained abatement work (a single bathroom floor, a small ceiling area), remaining in the home is often possible if the work area is properly sealed and you are not in proximity to the containment zone. For more extensive abatement — whole-home pipe insulation removal, full basement ceiling abatement — temporary relocation is strongly recommended. Your abatement contractor should provide specific guidance based on your home’s layout, the location of the work, and the HVAC configuration. The containment requirement (negative air pressure, sealed barriers) is designed to prevent fibre migration to other areas of the home — but HVAC systems can distribute fibres through the home if not properly isolated. Ask your abatement contractor for a specific recommendation about occupancy during the project, and take that recommendation seriously. Short-term accommodation costs are a far better outcome than airborne fibre exposure.
What if a major structural problem is discovered after permits are already issued?
A structural problem discovered after permit issuance — but before it was disclosed in the permit drawings — requires a permit amendment. This means stopping the affected work, engaging a structural engineer to assess the condition and design a solution, preparing amended drawings, submitting the amendment to the building department, and receiving revised approval before proceeding. This process typically takes two to four weeks and costs $1,500 to $4,000 for the engineering and permit amendment fees, plus the cost of the structural remediation itself. The important principle is that proceeding without amending the permit is not an option — inspectors will catch undisclosed structural work, and unpermitted structural modifications create serious problems at sale or refinancing. Budget for permit amendments as a contingency line item in any project where structural conditions are uncertain.
When can unused contingency become an upgrade budget?
The right time to consider applying unused contingency to upgrades is when the project has passed the point where major surprises are still likely to emerge. For a kitchen and bathroom renovation, this is typically after rough-in inspections are passed — meaning all walls are open, all systems have been inspected, and no significant surprises have been triggered. If at that point you have 70 percent or more of your contingency intact, you can reasonably have a conversation with your contractor about discretionary additions: additional pot lights, upgraded fixtures, a tile upgrade, built-in storage. Be conservative: “likely no more surprises” is not the same as “no more surprises.” Retain at least 30 to 40 percent of your original contingency through to substantial completion. After the final inspection and certificate of occupancy, any remaining contingency is entirely yours to apply however you choose.
Get a Free Renovation Quote
Metro Vancouver’s trusted general contractors. Free consultations across Vancouver, Burnaby, Richmond, North Shore & beyond.
Get Your Free Quote →Ready to start your project? Vancouver General Contractors (VGC) provides free, fixed-price quotes for homeowners across Metro Vancouver. Learn more about our Vancouver renovation costs services or request a free quote today.
Comments are closed