
How Long Does a Renovation Take in Vancouver? Complete Timeline Guide (2026)
You’ve decided to renovate. Maybe it’s a new kitchen, a basement suite to help with the mortgage, or a full home transformation. The first question most Vancouver homeowners ask isn’t about cost — it’s about time. How long is this actually going to take?
The honest answer is: longer than you think, and for reasons that are largely specific to Vancouver. Between City of Vancouver permit timelines, trade availability, material lead times, and the realities of weather on the West Coast, renovation projects here run on a different clock than anywhere else in Canada. This guide gives you the real numbers — not the optimistic pitch you might hear at the first contractor meeting.
Whether you’re planning a home renovation, a full home transformation, or just trying to understand what you’re getting into, this complete timeline guide covers every project type, every phase, and every factor that can — and regularly does — push your project past its original completion date.
 Burnaby” class=”wp-image-12767″ />
Carrying costs add up fast. If you're borrowing to renovate, every extra week means more interest
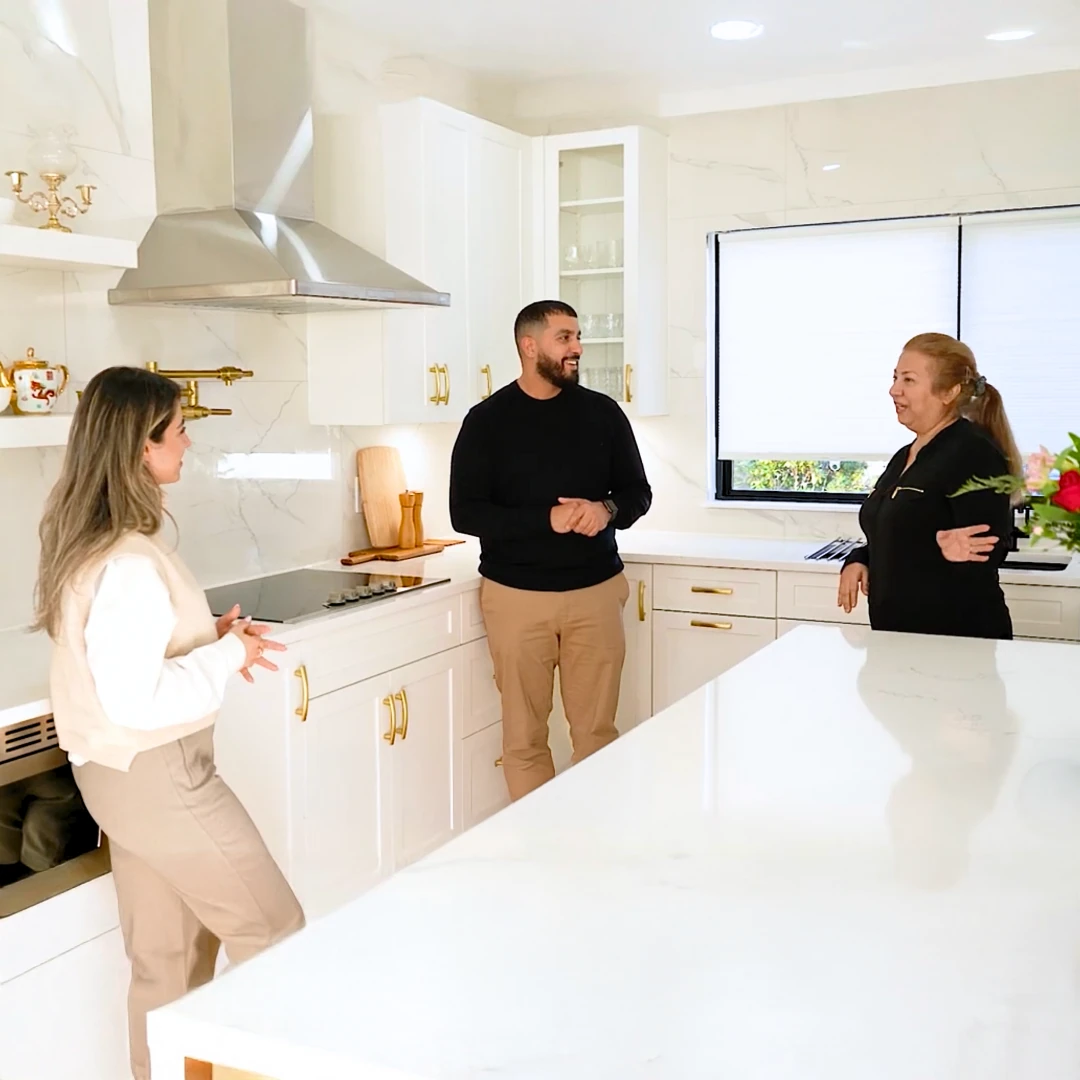
Vancouver General Contractors
Why Renovation Timelines Matter More Than You Think
Most homeowners focus on the renovation budget. Fewer think carefully about the timeline — and that’s a costly mistake. Time, in a renovation context, is money in ways that aren’t always obvious at the planning stage.
Carrying costs add up fast. If you’re borrowing to renovate, every extra week means more interest. On a $150,000 renovation financed at current rates, a two-month delay can cost $2,500–$4,000 in additional carrying costs alone. If you’re also paying rent or a hotel while you’re displaced, that number escalates quickly.
Temporary housing is expensive and exhausting. A full home gut renovation in Vancouver means living somewhere else. Extended hotel stays run $150–$300 per night in Metro Vancouver. Monthly furnished rentals are $3,500–$6,000 per month depending on size and neighbourhood. Even staying with family has real costs — storage unit rentals, eating out, disrupted routines. A project that runs six weeks over schedule can add $8,000–$15,000 in unexpected living expenses.
Contractor idle time costs you too. When a project stalls — because a permit is delayed, an inspection isn’t booked, or materials haven’t arrived — your contractor may move other jobs forward or pull crew elsewhere. Getting them back on a predictable schedule once the delay resolves isn’t always fast. A one-week material delay can translate to a two-to-three-week production delay on your actual jobsite.
What homeowners consistently underestimate. The pre-construction phase — design, engineering, permits — is almost always underestimated. It’s invisible work that happens before the first wall comes down, and it commonly takes three to six months for major projects in Vancouver. Homeowners who start getting contractor quotes in January often discover they can’t break ground until May or June. By the time permits are approved, it’s mid-summer and trades are fully booked.
Why Vancouver is different from the rest of Canada. City of Vancouver permit processing times are among the longest in the country. Trade labour shortages in the Lower Mainland are persistent. Many premium materials — European tile, custom cabinetry, specific fixtures — are sourced through supply chains with 8–20 week lead times. Vancouver’s wet winters limit when certain exterior work can proceed. All of these factors compound. A project that might take four months in Calgary or Edmonton can realistically take six to eight months in Vancouver from first planning meeting to final walkthrough.
Vancouver Renovation Timelines by Project Type
The table below reflects realistic timelines for Metro Vancouver including design, permitting, and construction. These are based on projects that proceed without major complications — hidden structural issues, significant change orders, or extended permit delays can add weeks or months to any category.
| Project Type | Construction Phase | Total Timeline (Design to Complete) | Permit Required? |
|---|---|---|---|
| Bathroom renovation (mid-range) | 3–5 weeks | 4–8 weeks | Usually yes (plumbing/electrical) |
| Kitchen renovation (mid-range) | 4–8 weeks | 8–16 weeks | Yes (electrical, often plumbing) |
| Basement finishing (no suite) | 6–10 weeks | 10–18 weeks | Yes |
| Legal basement suite | 8–14 weeks | 16–26 weeks | Yes (full building permit) |
| Main floor addition (rear) | 5–8 months | 8–14 months | Yes (development + building permit) |
| Second storey addition | 4–7 months | 8–13 months | Yes (development + building permit) |
| Full home renovation | 6–12 months | 10–18 months | Yes (multiple permits) |
| Laneway house (new build) | 8–14 months | 14–22 months | Yes (development + building + utility) |
A few clarifications on this table. “Total timeline” starts from the first design meeting and ends at final occupancy or project closeout. The gap between construction phase and total timeline is primarily occupied by design, engineering (where required), and permitting. For projects under the City of Vancouver’s jurisdiction, that gap is routinely six to twelve months for anything beyond simple cosmetic work.
These are Metro Vancouver averages. Projects in areas with simpler zoning (some Burnaby or Richmond properties), or projects where the homeowner has done design work in advance, can move faster. Projects in heritage-designated zones, on slopes requiring geo-tech review, or in flood-plain areas will almost always be longer.
The Pre-Construction Phase: What Happens Before Demo Day
The pre-construction phase is the invisible part of every renovation — and the part that catches the most homeowners off-guard. Nothing has happened visibly in your home, but weeks and months of work are accumulating before the first hammer swings.
Design and planning (2–6 weeks). Even a straightforward bathroom renovation requires design decisions: layout, fixture selection, tile choices, lighting, ventilation. A kitchen renovation compounds this significantly — cabinet layouts, appliance specs, countertop materials, plumbing relocations, electrical panel capacity, and permit drawings all need to be resolved before you can apply for permits. For additions or suite conversions, a design professional (interior designer, designer-builder, or architect) typically needs 4–8 weeks to produce permit-ready drawings.
Engineering (3–6 weeks, where required). Any project involving structural changes — removing bearing walls, adding a storey, building an addition, underpinning a basement — requires a structural engineer’s drawings and schedules. In Vancouver, engineers are busy, and turnaround for a full structural package commonly runs 3–5 weeks from engagement. If geotech (soil analysis) is required, add another 3–6 weeks. This phase is non-negotiable for these project types; the City will not accept a permit application without it.
City of Vancouver permit application (3–14 weeks). See the detailed section below. For simple permits — like a straightforward bathroom renovation — the City offers over-the-counter review and same-day or next-day approval. For anything requiring a full building permit review, including suites, additions, and structural changes, expect 6–14 weeks from submission to permit issuance, depending on application completeness and project complexity.
Material ordering and lead times. This step is often overlooked until it causes a crisis. Many renovation materials have significant lead times that must be accounted for before construction begins, not after. Custom cabinetry (Canadian-made) runs 6–10 weeks. European tile ordered through specialty suppliers runs 8–16 weeks. Stone countertop fabrication after template takes 2–3 weeks. Specific plumbing fixtures — especially imported brands — can run 4–12 weeks. Smart planning means ordering materials as soon as the design is locked, often while permits are being reviewed, so they arrive close to the time they’re needed on site.
Vancouver Permit Timelines: What to Realistically Expect
The City of Vancouver’s Development and Building Services Centre processes building permits. Understanding their timelines is essential to planning any renovation — they are frequently the longest single variable in a project’s total duration.
| Permit Type | Typical Processing Time | Notes |
|---|---|---|
| Simple plumbing/electrical (no structural) | Same day to 1 week | Often over-the-counter approval |
| Bathroom renovation (minor layout change) | 1–3 weeks | May qualify for expedited review |
| Kitchen renovation (electrical/plumbing work) | 2–6 weeks | Longer if gas work involved |
| Basement suite (legal secondary suite) | 6–10 weeks | Requires full plans, fire separation review |
| Rear addition (under 10% lot coverage increase) | 8–12 weeks | May require development permit first |
| Development permit (larger additions) | 10–20 weeks | Required before building permit can be issued |
| Laneway house | 16–28 weeks (combined DP + BP) | City has specific laneway guidelines |
| Heritage property (any exterior change) | Add 4–10 weeks | Heritage review committee involved |
What slows permits down. The single biggest cause of permit delays is an incomplete application. If your drawings are missing information — structural details, energy compliance documentation, fire separation specifications — the City will issue a deficiency notice and your application goes back in the queue. Each deficiency round can add 3–6 weeks to your timeline. Getting the application right the first time, using an experienced designer who regularly submits to the City of Vancouver, is the most effective way to avoid this.
Heritage review adds meaningful time for properties on Vancouver’s Heritage Register or in heritage conservation areas. The heritage review committee meets on a schedule, and their involvement in even modest exterior changes can add six to ten weeks to your permit timeline. Know your property’s heritage status before planning any exterior alterations.
Engineering review at the City — which happens for structural permit applications — adds 2–4 weeks on top of standard review. This is separate from your private engineer’s involvement; the City’s own engineers review the submitted structural drawings and may raise queries that require your engineer to respond.
Expedited review options. The City of Vancouver offers a Priority Processing Program for certain project types, where applicants can pay a fee (typically $500–$2,000 depending on project size) to have their application reviewed within a shorter timeframe. This is worth considering for straightforward projects that need to move quickly. However, it does not guarantee approval — it guarantees faster review. Your drawings still need to be complete and code-compliant.
WETT certificates and fireplace renovations. If your renovation involves modifying, removing, or adding a wood-burning fireplace or wood stove, a WETT (Wood Energy Technology Transfer) inspection certificate will likely be required. WETT-certified inspectors examine the installation and issue a certificate confirming code compliance. This is a separate process from your building permit — budget 1–2 weeks to schedule and receive this certificate, and factor it into your permit application timeline.
The Construction Phases: A Week-by-Week Look
Once permits are in hand and materials are on order, construction begins. Understanding each phase — and its typical duration — helps you track progress realistically and catch problems early.
Demolition (1–3 days for most renovations). Demo is the fastest, most satisfying phase. Walls come down, fixtures are removed, flooring is ripped up. For a standard kitchen or bathroom, demo is typically one to two days. For a full floor gut, budget three to five days including debris removal and haul-away. Hidden conditions — asbestos-containing materials (common in Vancouver homes built before 1990), knob-and-tube wiring, wet rot, structural surprises — can extend this phase significantly and trigger change orders. Asbestos abatement alone can add five to ten days and $3,000–$15,000 depending on the scope and material type.
Rough-in trades (1–3 weeks). After demo, plumbers, electricians, and HVAC (mechanical) trades complete their rough-in work — new drain lines, supply lines, electrical circuits, ductwork — before walls are closed. This phase requires coordination because trades need to work in sequence: plumbing rough-in typically precedes electrical, and both must be complete before insulation and drywall. In Vancouver, the sequencing of trades is a scheduling challenge because independent subtrades are rarely available on exact demand. Your general contractor’s trade relationships and scheduling discipline have a direct impact on how smoothly this phase runs.
Inspections (1–3 days each, booked 5–10 business days out). City of Vancouver inspectors must sign off on rough-in work before walls can be closed. Framing inspection, electrical rough-in inspection, plumbing rough-in inspection — each requires a separate booking and a separate visit. The City books inspections 5–10 business days out during busy periods. This means a rough-in phase that’s complete on a Friday may not get its inspection until the following week or the week after. Plan for inspection holds in your schedule — they are not exceptional situations, they are the normal reality of permitted renovations in Vancouver.
Finishing trades (tile, drywall, flooring) (2–4 weeks). Once rough-in inspections are passed, walls are insulated and drywalled, tile work begins in wet areas, and flooring goes down. This is often the longest phase for kitchens and bathrooms. Custom tile installations — large-format tile, heated floors, intricate patterns — take significantly longer than standard installations. Drywall finishing (taping, mudding, sanding) is a multi-day process with drying time between coats. Hardwood flooring installation and refinishing adds its own drying/curing constraints.
Final trades (cabinets, counters, fixtures) (1–3 weeks). Cabinet installation is typically one to three days for a standard kitchen, followed by a 2–3 week wait for countertop templating and fabrication. Countertops go in, then fixtures (sinks, faucets, toilets, shower hardware), then appliances. This phase requires careful sequencing — counters can’t be templated until cabinets are installed, plumbers can’t set fixtures until counters are in, appliances can’t be positioned until all surrounding work is complete.
Finishing touches (painting, hardware, cleanup) (1–2 weeks). Final painting, trim installation, door hardware, light fixtures, mirror and accessory mounting — the punch list phase. This phase takes longer than most homeowners expect because it involves many small tasks, each of which requires scheduling a visit from the appropriate trade. Touch-up painting alone commonly requires two visits — a first coat after walls are complete, a second coat after fixtures are installed to cover any scuffs. Budget a full week for a kitchen or bathroom, two weeks for a multi-room project.
What Causes Renovation Delays (And How to Prevent Them)
Most renovation delays are predictable and preventable — not inevitable. Understanding the common causes helps you and your contractor address them proactively before they push your completion date.
Incomplete permit drawings. The most common cause of pre-construction delays. When a permit application contains errors, omissions, or non-compliant details, the City issues a deficiency notice. The application is paused while corrections are made and resubmitted. Each round can add 3–6 weeks. Using a designer or design-builder who regularly submits permits to the City of Vancouver — and has an established relationship with permit staff — dramatically reduces this risk.
Inspector availability. Inspections can’t proceed until they’re booked, and bookings are subject to City availability. During busy periods (spring and summer), booking an inspection can take 7–10 business days. Multiply this across the four to six inspections a typical renovation requires (framing, rough-in electrical, rough-in plumbing, insulation, final electrical, final building), and you can easily have three to four weeks of your project’s timeline occupied by inspection waits. Planning your construction sequence carefully to minimize the number of separate inspection holds can help.
Material back-orders and lead times. The renovation supply chain has become less predictable since 2020. European tile from suppliers in Italy, Spain, or Portugal can have lead times of 8–16 weeks. Custom cabinetry, stone countertops from specific quarries, and imported fixtures frequently run longer than initially quoted. The solution is to order early — ideally as soon as the design is locked, while permits are being reviewed — and to have your contractor confirm lead times in writing before finalizing your construction start date.
Trades sequencing issues. When a plumber is delayed by three days, it doesn’t just push plumbing rough-in back three days — it may push the electrician’s visit back a week (because they can’t run wire until the plumbing is done), which pushes the drywall start back further, which cascades through every subsequent trade. Poor sequencing coordination by a general contractor is one of the most common causes of projects running significantly over schedule. Ask your contractor specifically how they manage trade sequencing on a project like yours.
Hidden conditions discovered during demo. Vancouver’s housing stock is old. Homes built before 1990 frequently contain asbestos (in floor tiles, drywall compound, insulation, roof materials), knob-and-tube or aluminum wiring, galvanized plumbing, improper structural modifications made by previous owners, and water damage concealed behind finishes. When demo reveals these conditions, work stops while the conditions are assessed, priced, permitted (sometimes), and remediated. Budget a 10–15% contingency on your timeline, not just your cost, to absorb these discoveries.
Change orders mid-project. Every change order — a different tile selection, a relocated outlet, an added light fixture, a layout revision — introduces a delay. Even a small change requires time to price, approve, and schedule. If the change affects permits (a structural revision, a relocated kitchen drain), it may require resubmission to the City. Change orders are budget busters, but they’re also schedule busters. Make decisions before construction starts, not during. A good contractor will push hard for this during the pre-construction phase precisely to avoid change-order-driven delays.
Weather for exterior work. Vancouver gets approximately 160 days of significant rainfall per year, concentrated between October and April. Exterior work — framing a new addition, roofing, foundation waterproofing, concrete flatwork — is weather-dependent. Concrete poured at temperatures below 5°C requires special measures (heated enclosures, accelerators) or must be delayed. Framing and roofing in steady rain creates moisture problems that can affect the structure for years. Projects with significant exterior components should plan construction phases around Vancouver’s weather calendar.
Kitchen Renovation Timeline: Week-by-Week Breakdown
A mid-range kitchen renovation in Vancouver — new cabinets, counters, tile backsplash, updated plumbing and electrical — typically takes 6–8 weeks of active construction once permits are in hand and materials are ordered. Here’s what a well-run 6-week kitchen renovation looks like week by week.
Before Week 1: Pre-construction (4–12 weeks). Design finalized, permit applied for and received (2–6 weeks from application), cabinets ordered (delivery confirmed for Week 5), countertop material selected and on order (to be templated after cabinet install), appliances ordered (delivery Week 6), tile and fixtures ready on site or confirmed for delivery Week 3.
Week 1: Demo and rough-in. Day 1–2: Cabinet removal, appliance removal, flooring removal, demo of any walls being reconfigured. Day 3–4: Plumber completes rough-in for new drain and supply locations (if layout is changing). Day 4–5: Electrician runs new circuits — dedicated 20A circuits for refrigerator, dishwasher, microwave, and additional counter receptacles required by code. Any gas line work (range or gas cooktop) completed by gas fitter. End of week: Rough-in inspection booked (typically a 5–7 business day wait in Vancouver).
Week 2: Drywall and inspections. Day 1–3: Inspection wait (City books 5–7 business days, often landing early-mid Week 2). Day 3–4: Inspection passed, drywall hung, taped and mudded — first coat. Day 5: Second mud coat applied (must dry 24 hours). Note: If inspection is delayed to end of Week 2, drywall work shifts into Week 3. This is the most common single-week compression in kitchen renovations.
Weeks 3–4: Tile, drywall finishing, and painting. Week 3: Drywall sanded and primed. Flooring installed (if tile: set and grouted over 3 days with cure time). Week 3–4: Backsplash area prepared, tile set and grouted (2–3 days installation, 2 days cure). Week 4: Final drywall coat and sand on any remaining areas. Paint — first coat throughout kitchen. Any pot-lights or recessed fixtures roughed in by electrician where accessible.
Week 5: Cabinet installation. Cabinet delivery and installation is typically 1–2 days for a standard kitchen. Cabinet installers level, secure, and trim cabinets. Upper and lower runs are complete. Hood fan installed (if ductwork was run in Week 1). End of Week 5: Countertop fabricator does template measurement — this is a critical milestone. Fabrication from template typically takes 10–14 days, pushing counter installation to end of Week 6 or beginning of Week 7.
Week 6: Appliances, fixtures, and finishing. Countertops arrive and are installed (Days 1–2 of this week, if fabrication timeline was met). Plumber sets sink, faucet, and connects dishwasher (Day 2–3). Electrician completes final connections — receptacles, under-cabinet lighting, range hood (Day 3). Appliances delivered and set (Day 3–4). Touch-up painting (Day 4–5). Hardware installed on cabinets. Final paint coat. Backsplash grouting touch-ups. Final cleaning. City final inspection booked. If countertops are delayed even one week, Week 6 becomes Week 7, and the project extends accordingly. This is the most common kitchen renovation overrun scenario in Vancouver.
Bathroom Renovation Timeline: Week-by-Week Breakdown
A standard 5-piece bathroom renovation in Vancouver — full gut, new tile, new fixtures, new vanity — runs 4–5 weeks of construction. Here’s a realistic week-by-week look at a 4-week bathroom renovation.
Before Week 1: Pre-construction (3–8 weeks). Design and tile selection finalized. Permit applied for and received (simple bathroom permits are typically 2–4 weeks). Vanity, toilet, shower fixtures, and accessories ordered — confirm all lead times before setting a construction start. Tile delivered to site. Shower glass measured (if custom frameless glass, this is templated after tile is complete — budget 2–3 weeks for fabrication from template).
Week 1: Demo, rough-in, and backer board. Day 1: Full demo — tile, drywall or cement board, flooring, fixtures, vanity. Day 2: Plumbing rough-in — drain location adjusted if required, supply lines for new layout. Electrician adds any new circuits (GFCI, exhaust fan circuit, heated floor circuit if applicable). Day 3: Framing repairs if required, new walls if layout changed. Cement board (backer board) installed on all wet walls and floor. Day 4–5: Waterproofing membrane applied to shower area — this is a multi-coat process with drying time between coats. Rough-in inspection booked.
Week 2: Tile work. Day 1–2: Inspection (City books 5–7 business days — inspection typically falls Week 2 if booked end of Week 1). Day 2–3: Floor tile set (2 days installation + overnight cure). Day 3–4: Shower tile set — large-format tiles or complex patterns take longer than small-format tile. Day 4–5: Grout applied, grouting of all tiled surfaces. Note: Grout needs 24–48 hours cure before fixtures can be installed and 72 hours before shower can be wet. Do not rush this phase; premature fixture installation compresses the grout and causes cracking.
Week 3: Vanity, toilet, shower fixtures, and painting. Day 1: Vanity and medicine cabinet installed. Day 1–2: Plumber sets toilet, connects vanity plumbing (faucet, drain, supply lines). Day 2: Shower valve and trim installed, shower head and hand shower set. Day 2–3: Electrician completes final connections — GFCI outlets, exhaust fan wiring, heated floor thermostat wiring. Day 3–4: Drywall finishing on non-wet-area walls, painting. Day 4–5: Touch-up grout, caulk all seams (vanity-to-tile, tub/shower-to-tile, wall-to-floor). Caulk cures 24–48 hours before shower use.
Week 4: Shower glass, accessories, and final. Day 1: Shower glass templated (if frameless custom glass — fabrication takes 2–3 weeks, so glass may not arrive until Week 6–7 of the project. Plan ahead or use a standard pre-made enclosure). Accessories mounted — towel bars, toilet paper holder, robe hooks. Mirrors hung. Light fixtures installed. Day 2–3: Touch-up painting, final caulk lines. Day 3–4: Final cleaning. Final electrical inspection if required. Final building inspection booked. Day 4–5: Project walkthrough with homeowner, punch list identified and addressed. Note: Custom frameless shower glass is the most common item that extends bathroom projects beyond 4 weeks. If shower glass isn’t templated until tile is grouted and cured (end of Week 2 at the earliest), and fabrication takes 2–3 weeks, glass arrival and installation commonly pushes into Week 5–6.
Basement Suite Timeline: Phase-by-Phase Breakdown
A legal basement suite conversion is one of the most popular renovation projects in Vancouver — and one of the most underestimated in terms of timeline. The permitting process alone can take two to four months. Here’s a realistic breakdown of a 10-week construction phase for a suite conversion, with the pre-construction phase detailed separately.
Phase 1: Design and permit (6–14 weeks before construction begins). A legal suite in Vancouver requires a full building permit. The permit application must include architectural drawings showing suite layout, egress windows, fire separation between suites (typically a 1-hour fire assembly), mechanical ventilation, and in some cases, structural details for the egress window enlargement. If the property hasn’t had an electrical panel upgrade in recent years, the City may require a panel upgrade as part of the suite permit. Budget 2–4 weeks for design drawings and 6–10 weeks for City of Vancouver permit review. In total, the design-to-permit phase for a basement suite commonly runs 3–4 months.
Phase 2: Demolition (3–4 days). Existing partitions removed, old flooring stripped, ceiling drywall removed to expose joists (required for electrical and mechanical rough-in and fire separation installation), any existing bathroom fixtures removed. If asbestos is found in floor tiles or drywall compound (common in pre-1990 Vancouver homes), abatement must occur before demo continues — add 5–10 days and $3,000–$8,000 for typical basement abatement scope.
Phase 3: Rough-in trades (2 weeks). This is the most complex phase of a basement suite. New sub-panel installed by electrician. Plumbing rough-in for suite kitchen and bathroom — new drain lines (possibly breaking concrete slab if a floor drain or new bathroom below existing drain level), new supply lines. Mechanical ventilation rough-in (HRV or exhaust-only ventilation meeting code requirements). Any structural work for egress window enlargement. Framing for new partitions. Egress windows installed. At the end of rough-in, three inspections are booked: structural/framing, rough-in electrical, rough-in plumbing. These may be booked on the same day or on separate days.
Phase 4: Inspections (1 week). Rough-in inspections are booked 5–10 business days out. Budget a full week for the inspection process — booking time, the inspections themselves, and any minor deficiencies identified and corrected.
Phase 5: Fire separation, insulation, and drywall (1.5–2 weeks). Fire-rated drywall assemblies are constructed between the suite and the main dwelling — typically Type X drywall with specific screwing and taping requirements. Insulation installed in exterior walls and floor/ceiling assemblies for sound and thermal performance. Drywall hung throughout the suite, taped, and finished — three coats of compound with drying time between. This phase is driven by drying time and cannot be rushed without causing quality problems.
Phase 6: Flooring and painting (1 week). Suite flooring installed — typically LVP (luxury vinyl plank) for moisture resistance. Painting throughout. Closet shelving installed.
Phase 7: Kitchen and bathroom finishing (2 weeks). Suite kitchen: cabinet installation, countertop template and fabrication (10–14 days), appliance delivery and installation, plumbing and electrical final connections. Suite bathroom: vanity, toilet, shower/tub, tile surround or fibreglass unit, exhaust fan. This phase follows the same pattern as the standalone kitchen and bathroom timelines above — countertop lead times and inspection availability are the primary variables affecting duration.
Phase 8: Final inspection and occupancy (1 week + City processing). Final building inspection covers fire separations, egress windows, smoke alarms (interconnected between suites as required), mechanical ventilation, and overall code compliance. Once passed, the City issues an occupancy approval. The suite can be legally rented from this point. Total construction timeline from demo to occupancy approval: 8–12 weeks for a straightforward suite conversion. Add the 6–14 week pre-construction phase and the total project timeline is typically 5–7 months from first design meeting to first tenant.
Seasonal Timing: When to Start Your Vancouver Renovation
Timing your renovation start strategically can meaningfully affect both your experience during construction and the total duration of your project. Vancouver’s climate and the local construction industry’s seasonal rhythms create real differences between starting in January versus July.
January–March: The best time to start planning (and book trades). The renovation industry slows significantly between November and February. Contractors have more availability, trades are easier to schedule, and material lead times from suppliers are typically shorter. Starting your design process in January with a goal of breaking ground in April or May positions you perfectly for the ideal exterior construction window. This is also the best time of year to negotiate pricing — demand is lower and contractors are more motivated to fill their pipeline.
April–June: Ideal for projects with exterior components. Spring in Vancouver brings drier conditions and moderate temperatures — ideal for framing, roofing, concrete work, and foundation work. If your renovation includes any exterior element (addition, laneway, re-roofing as part of a larger project), starting construction in April through early June gives you the best weather window. Trades are becoming busier but not yet at summer peak. This is generally the best window for major renovation starts.
July–August: Trade availability becomes a real challenge. Summer is peak construction season in Vancouver. General contractors are fully booked, subtrades are stretched across multiple projects simultaneously, and scheduling delays become more frequent simply because everyone is busy. Permit processing times at the City also tend to lengthen in summer months as application volumes increase. If you’re starting a project in July or August, expect longer waits at every stage — trades, inspections, material deliveries — and budget your timeline accordingly.
September–October: Good window for interior-only projects. Trades begin to free up as some larger exterior projects complete. Interior renovations (kitchens, bathrooms, basement suites with no exterior egress changes) are insulated from weather and can proceed efficiently in fall. This is a solid window for starting interior work if you missed the spring season.
November–December: Challenges for exterior work, fine for interiors. Vancouver’s rainy season is in full effect. Concrete poured below 5°C requires expensive heated enclosures or accelerating admixtures. Framing in persistent rain creates moisture content issues in lumber that can affect structural performance and drywall adhesion later. Excavation in saturated soil is more complex and expensive. For projects with significant exterior phases, starting November through February is generally inadvisable. For interior work, however, this is perfectly fine and often advantageous due to better trade availability and pricing.
Heating during cold-weather construction. Any renovation involving open building envelopes (removed exterior walls, open roofs during re-framing) during cold or wet weather requires temporary heating. Propane torpedo heaters or electric construction heaters are commonly used. This adds cost ($500–$2,000 per month depending on size) and requires someone to monitor them — typically adding contractor management time. Factor this into your budget if exterior work phases will occur during October through March.
Living Through a Renovation: What’s Realistic
One of the most practical questions for any homeowner is whether to stay in the home during construction or move out. The answer depends on the scope of work, your tolerance for disruption, the presence of children or pets, and your budget for temporary housing.
When you should move out. Full gut renovations — projects where multiple rooms are under construction simultaneously, where structural work is happening, where there’s no functional kitchen or bathroom — require you to move out. This isn’t a preference; it’s a safety and practicality requirement. Construction dust containing drywall compound, old insulation, or legacy materials (potentially including asbestos fibres during demo) is a genuine health hazard. The absence of a functional kitchen or bathroom makes daily life unmanageable for anything more than a few days.
Also plan to move out if: the renovation involves asbestos abatement anywhere in the living space; exterior walls will be open for more than a day or two; structural work is happening that affects load-bearing elements; or the project is expected to take more than three to four weeks of intensive construction activity.
When staying is feasible. A bathroom renovation in a home with a second functional bathroom: staying is possible. A kitchen renovation where a temporary kitchen setup can be established: staying may be workable, though dusty and inconvenient. A basement suite conversion where the main floor is fully functional and separate: staying is usually fine. A single-room renovation (bedroom, office) that doesn’t affect common areas: generally fine to stay.
Temporary kitchen setup costs. If you’re staying through a kitchen renovation, budget $500–$2,000 for a temporary kitchen setup: a plug-in induction cooktop ($100–$300), a small countertop convection oven or microwave ($80–$300), a folding table for prep surface, and a dedicated space in another room (dining room, basement, covered garage) for this setup. A mini-fridge ($150–$400) if the main refrigerator will be inaccessible. The real cost of staying through a kitchen reno is the inconvenience and the increase in food delivery and restaurant spending — budget an extra $500–$1,500 per month for this.
Pet and child safety during construction. Construction sites are genuinely hazardous environments — exposed fasteners, open electrical boxes, uneven subfloors, dust, tools, heavy materials. If you have young children or pets, establish a clear physical separation between the construction zone and living areas from the start of the project. Plastic sheeting barriers help with dust but not with access. A dedicated construction entrance (separate from the family entrance) reduces cross-contamination and daily friction with the crew. Discuss this with your contractor before construction begins — a good contractor will have a protocol for occupied-home renovations.
For a comprehensive overview of what to expect throughout the renovation process, see our complete renovation planning guide or reach out to our team to discuss your specific project timeline.
More Cost Guides Guides

Solid Surface vs. Laminate Countertops for Vancouver Kitchens: Budget Comparison
Tile vs. Hardwood Flooring in a Kitchen: Which is Better for Vancouver Homes?

Vinyl vs. Fiber Cement Siding in Vancouver: Which Handles BC's Climate Better?

Asphalt vs. Metal Roofing in Vancouver: Cost, Lifespan, and Performance Compared
Heat Pump vs. Gas Furnace in Vancouver: The Complete 2026 Cost and Performance Comparison
Ready to start your renovation?
Frequently Asked Questions: Vancouver Renovation Timelines
How long does it take to get a building permit in Vancouver?
It depends on the project. Simple permits — minor plumbing or electrical work, small structural changes — can be processed in days or over-the-counter. Full building permits for basement suites, additions, or major renovations typically take 6–14 weeks from submission to permit issuance. Development permits (required for some additions that exceed certain lot coverage thresholds) can take 10–20 weeks, and must be obtained before the building permit can be issued. The biggest variable is application completeness — an incomplete submission can double your permit timeline through multiple deficiency rounds.
Why do renovations always seem to take longer than quoted?
Several compounding factors are at work. Contractors often quote optimistic timelines in competitive bidding situations. Hidden conditions discovered during demo add unplanned work. Change orders — even small ones — ripple through the schedule. Inspection waits (5–10 business days in Vancouver during busy periods) accumulate across a project’s multiple required inspections. Material lead times that seemed adequate at the start of a project extend due to supply chain issues. Trade scheduling gaps — when the drywaller can’t come until next Tuesday, and then the tile installer can’t follow until the following week — compound into weeks of lost production time. Build in a 25–30% timeline buffer on your planning, especially for first-time renovations.
Can I speed up the City of Vancouver permit process?
Yes, to a degree. The City of Vancouver offers a Priority Processing Program for certain project types, where a fee buys faster review (not guaranteed approval). More significantly, submitting a complete, accurate, and well-prepared application is the single most effective way to minimize permit processing time. Working with a designer or architect who regularly submits to the City and understands current requirements reduces the risk of deficiency notices that restart your timeline. Checking with the City’s Development and Building Services Centre about their current processing times before finalizing your project schedule is also recommended — times fluctuate and their website publishes current averages.
How much time should I budget for a kitchen renovation from start to finish?
For a mid-range kitchen renovation including permits, material ordering, and construction, budget 8–16 weeks total from design finalization to project completion. The construction phase itself typically runs 5–8 weeks. The pre-construction phase (design decisions, permit application, material lead times) commonly runs 6–10 weeks. These phases overlap — you’re applying for your permit and ordering materials while design is being finalized — but the critical path from first design meeting to project completion rarely comes in under 10 weeks for a permitted kitchen renovation in Vancouver.
Is summer or winter better for starting a renovation in Vancouver?
For interior-only renovations (kitchens, bathrooms, basements), the season matters less for production pace, but winter offers better trade availability and potentially better pricing. For renovations with exterior components, late spring through early summer (April–June) is ideal — dry weather, moderate temperatures, and trades not yet at peak summer demand. Summer starts (July–August) face maximum trade competition; contractors are busiest and scheduling is hardest. Winter starts for exterior work (November–February) face weather limitations that add cost and complexity.
How do I keep my renovation on schedule?
Get a detailed schedule from your contractor before construction starts — not a vague “6 weeks,” but a week-by-week breakdown showing which trades are booked for which weeks, when inspections are expected, and when materials are scheduled to arrive. Review this schedule weekly during the project. Book inspections as early as possible — don’t wait until rough-in is complete to book the inspection; book it 5–7 days before you expect rough-in to be done. Make all design decisions before construction starts to avoid change orders. Order materials with confirmed lead times well ahead of when they’re needed. And establish one primary point of contact with your contractor for schedule updates — daily or twice-weekly check-ins during active construction phases prevent small delays from compounding into large ones.
What should I do if my contractor is falling behind schedule?
First, have a direct conversation about the specific cause of the delay — is it a trade scheduling issue, a material delay, an inspection wait, or a production problem on their end? The response to each is different. Request a revised schedule showing how they plan to recover the lost time. If the delay is due to inspection waits or material lead times, those are largely outside the contractor’s control. If it’s due to reduced crew presence, competing projects, or poor coordination, that’s a conversation about expectations and contract obligations. Most renovation contracts include a completion date — if the project is running more than 10–15% over the original schedule without a documented cause, you have grounds to discuss remedies including liquidated damages if those were part of your contract.
How long do renovation inspections take in Vancouver?
The inspection itself — once the inspector arrives — typically takes 20–60 minutes depending on scope. The wait to schedule an inspection is the significant variable: during busy periods (April through August), City of Vancouver inspections book out 7–10 business days. A renovation requiring four separate inspections (framing, rough-in electrical, rough-in plumbing, final) accumulates 3–5 weeks of scheduled inspection wait time throughout the project lifecycle. Contractors can request expedited inspections for certain critical-path situations, but availability is not guaranteed. This is a structural feature of the Vancouver construction permit system that experienced local contractors plan around.
When should I order materials to avoid delays?
Order as early as possible — ideally immediately after design decisions are locked, even if construction is still weeks away. For items with long lead times (custom cabinetry, European tile, stone countertops, imported fixtures), order during the permit review period so materials arrive close to when they’re needed. Confirm lead times in writing with your supplier and include a buffer — quoted lead times are often optimistic. For countertops specifically, the templating step can’t happen until cabinets are installed, so plan for the countertop fabrication period (typically 10–14 days from template) to occur mid-construction. Have all other materials — tile, paint, hardware, fixtures — on site or confirmed for imminent delivery before construction starts.
Does a basement suite add significant time compared to a simple basement finishing project?
Yes, meaningfully. A basic basement finishing project (no suite, no kitchen, no separate entrance) adds roughly 2–4 weeks of construction compared to a legal suite, but the permitting difference is much larger. A suite requires a full permit with fire separation review, egress window compliance, mechanical ventilation, and often an electrical panel upgrade — adding 4–8 weeks of permit review compared to a simpler basement finishing permit. The suite also adds a kitchen and full bathroom to the scope, which are the two most trade-intensive and inspection-heavy parts of any renovation. The total timeline difference between a basic basement finish and a full legal suite is typically 3–5 months when pre-construction is included.
How do I track renovation progress effectively?
Establish clear milestones with your contractor at the project outset: demo complete (Day X), rough-in inspections passed (Week Y), drywall complete (Week Z), cabinet installation (Week N). Visit the site regularly — at least twice a week during active construction phases — and compare what you see to the agreed milestone schedule. Request weekly written progress updates (even a brief email) from your contractor noting what was completed, what’s next, and any emerging issues. Maintain a shared log of open items and change orders. Use photos (your own, taken at each visit) to document progress and any conditions that might be disputed later. Good communication during construction is the most effective schedule management tool available to a homeowner.
Do change orders always affect the timeline?
Almost always, yes — though the impact ranges from days to weeks depending on the nature of the change. A simple substitution (different tile, different fixture) that doesn’t affect rough-in or structure may add just a few days for the new material to be ordered and delivered. A layout change that affects plumbing or electrical rough-in may require updated permit drawings, a City resubmission, additional trade work, and new inspections — adding 3–6 weeks to the project. Layout changes discovered after rough-in is complete are the most costly in both time and money, as completed work must be redone. The industry standard for change order timeline impact is 1.5x to 2x the direct time required for the change itself, accounting for resequencing and coordination overhead.
How long does a full home renovation typically take in Vancouver?
A full home renovation — complete gut of a typical Vancouver house, including kitchen, bathrooms, basement, new flooring and finishes throughout — typically runs 6–12 months of active construction, with a 3–6 month pre-construction phase. Total elapsed time from first design meeting to move-in is commonly 10–18 months. Projects at the upper end of this range typically involve structural changes, additions, or heritage properties. Projects at the lower end have straightforward designs, experienced project teams, and no significant hidden conditions. If your contractor is quoting you a full home reno in 3–4 months, ask hard questions about their capacity, subcontractor relationships, and what specific assumptions support that timeline.
What’s the fastest way to renovate without cutting corners?
Speed in renovation comes from preparation, not from rushing construction. The projects that complete fastest are those where: every design decision is made before demo day; all materials are on site or confirmed for delivery before they’re needed; permits are secured well in advance; inspections are booked proactively; and the general contractor has established relationships with subtrades who can be mobilized on short notice. An experienced contractor with strong trade relationships can meaningfully compress timelines compared to a less-connected operator — not because they work faster, but because they sequence work more efficiently and have less trade scheduling downtime between phases.
What permits does a second-storey addition require in Vancouver?
A second-storey addition in Vancouver typically requires both a Development Permit and a Building Permit, plus structural engineering drawings. The Development Permit assesses the project against zoning bylaws — floor space ratio (FSR), lot coverage, height limits, and neighbourhood compatibility. This phase takes 10–20 weeks and must be approved before the Building Permit can be issued. The Building Permit review takes an additional 6–12 weeks. Combined with design and engineering (2–4 months), the pre-construction phase for a second storey addition commonly runs 8–14 months before construction begins. The construction phase itself — structural reinforcement of the existing main floor, new framing, roofing, insulation, mechanicals, and finishing — typically runs 4–7 months. Total project duration from concept to completion is commonly 14–20 months.
How can VGC help me plan a realistic renovation timeline?
Vancouver General Contractors works with homeowners throughout Metro Vancouver on renovations of every scale, from bathroom updates to full home transformations and additions. Our team can provide a detailed, project-specific timeline assessment based on your scope, your property’s characteristics, and current permit and trade availability. We build detailed construction schedules, have established relationships with the subtrades and inspectors who matter for your project, and communicate proactively throughout the build so you’re never guessing about where your project stands. Start with a consultation with our team or explore our home renovation services to understand how we approach Vancouver renovation projects.
Get a Free Renovation Quote
Metro Vancouver’s trusted general contractors. Free consultations across Vancouver, Burnaby, Richmond, North Shore & beyond.
Get Your Free Quote →Ready to start your project? Vancouver General Contractors (VGC) provides free, fixed-price quotes for homeowners across Metro Vancouver. Learn more about our Vancouver renovation costs services or request a free quote today.
Comments are closed