
Small Kitchen Renovation Vancouver: Costs, Layout Ideas & Space Solutions (2026)
Vancouver’s Small Kitchen Reality: Why Size Doesn’t Mean Simple
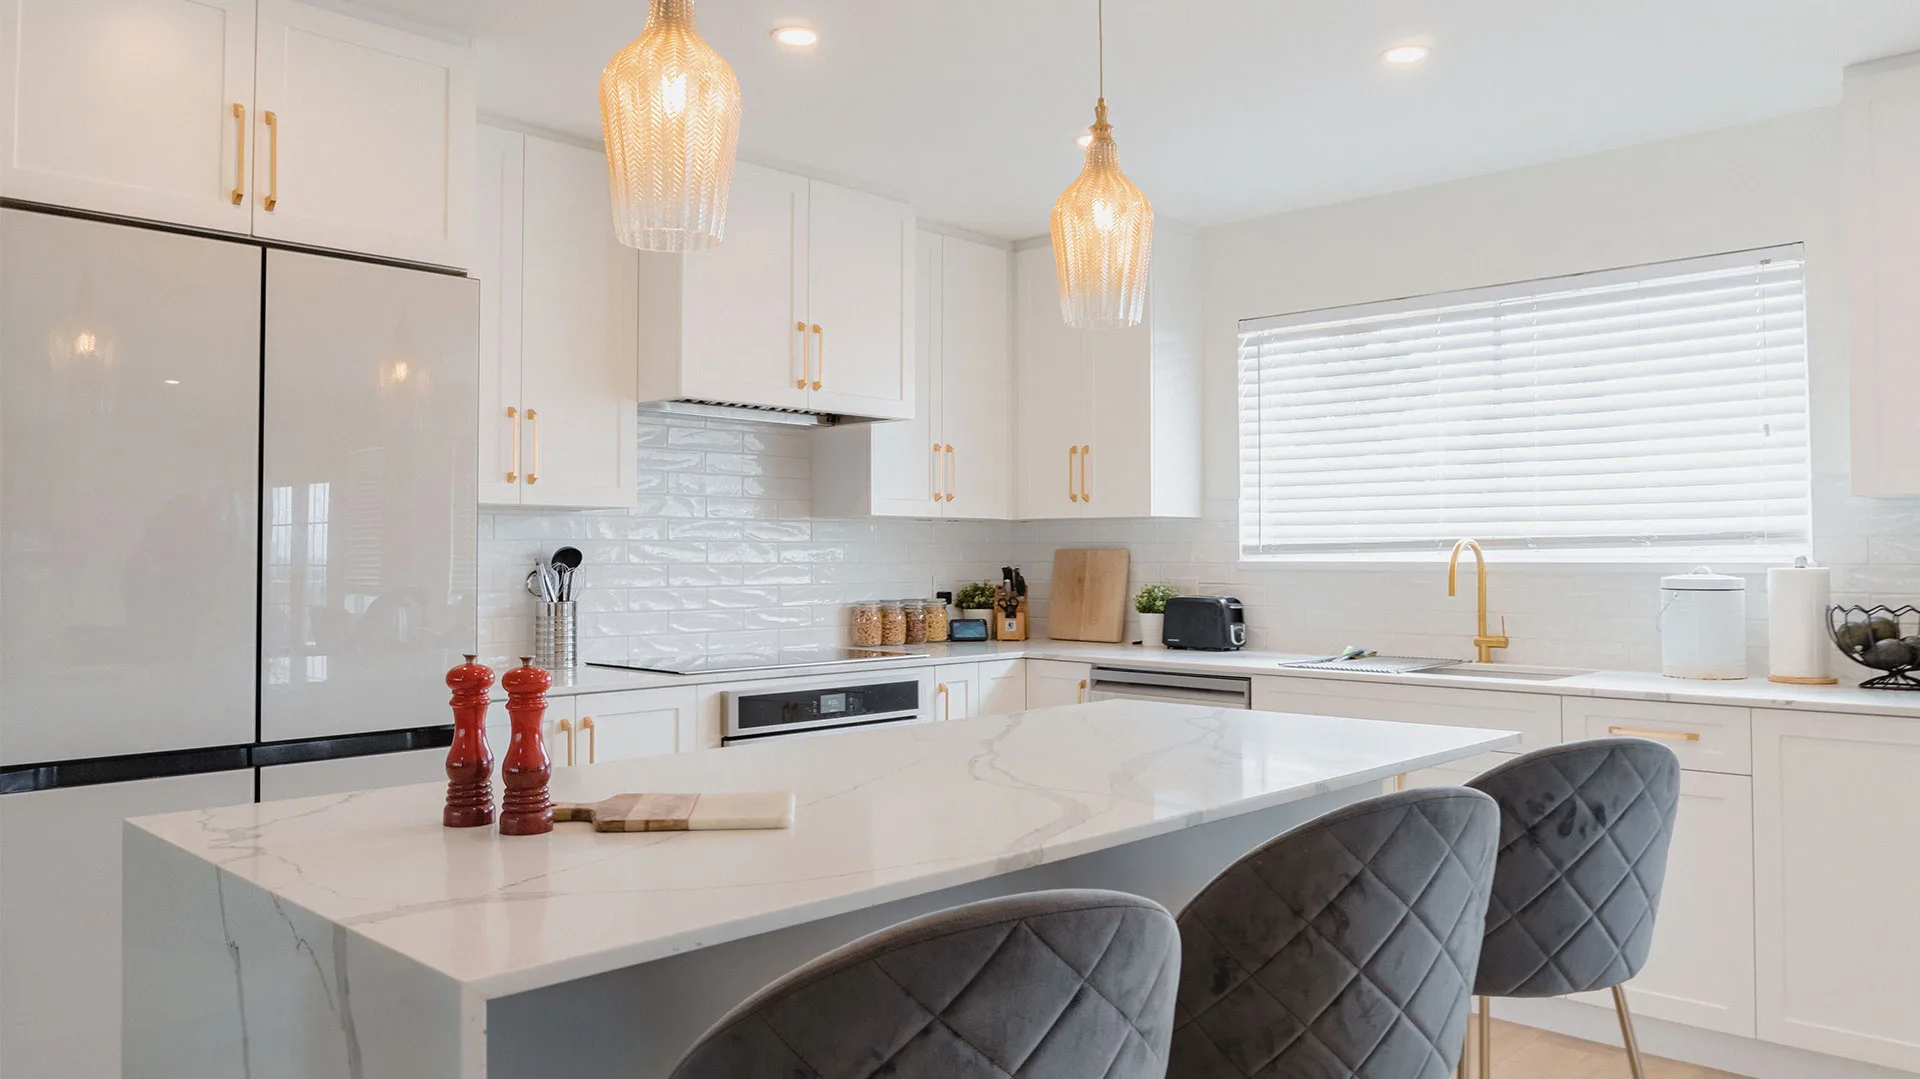
If you own a pre-1980 home in Vancouver — a bungalow in Kitsilano, a character house in Mount Pleasant, a strata unit in the West End — there is a good chance your kitchen was designed for a different era of cooking. Most of these kitchens run between 80 and 130 square feet, often in galley or L-shaped configurations that prioritize corridor circulation over counter real estate. They were built when dishwashers were optional, refrigerators were small, and the kitchen was a service room rather than the social heart of the home.
Today’s small kitchen renovation in Vancouver is a completely different exercise. Homeowners want open shelving, quartz counters, integrated appliances, and often a connection to the living or dining room that the original floor plan never contemplated. That ambition collides with tight square footage, aging plumbing, knob-and-tube wiring, and load-bearing walls in all the inconvenient places.
The result is a paradox that surprises most homeowners: small kitchens cost more per square foot to renovate than large ones. The plumber charges the same call-out fee whether your kitchen is 90 sq ft or 200 sq ft. The electrician runs the same permit process. The cabinet installer has to be just as precise in a narrow galley — arguably more so, because there is no margin for error when every inch is claimed. Add the complexity of custom millwork to fit non-standard dimensions, and a well-executed small kitchen renovation in Vancouver regularly lands between $35,000 and $75,000.
One cost that catches homeowners off guard is permit fees. The City of Vancouver charges a building permit fee based on project value
Vancouver General Contractors
This guide breaks down what that money buys, which layout decisions make the biggest practical difference, and where experienced contractors consistently see homeowners leave value on the table — or spend money on things that do not actually help in a tight space. If you are planning a small kitchen renovation in Vancouver, start with our renovation guide to understand the full scope of the process before diving into specifics.
Small Kitchen Renovation Costs in Vancouver: The Full Breakdown
Cost ranges in Vancouver reflect a specific combination of high labour rates, Metro Vancouver material costs, City of Vancouver permit fees, and the realistic scope of work required to transform a kitchen that was last touched in 1975 or 1988. These are not national averages — they reflect what local contractors actually invoice.
| Renovation Tier | Typical Scope | Cost Range (2026) |
|---|---|---|
| Galley Refresh | New cabinet doors and hardware, laminate counters, basic tile backsplash, appliance swap. No layout changes, no plumbing moves. | $15,000–$28,000 |
| Mid-Range Small Kitchen | New semi-custom cabinets, quartz counters, tile backsplash, under-cabinet lighting, new fixtures, permit for electrical. Layout stays, but full gut to drywall. | $35,000–$55,000 |
| High-End Compact Kitchen | Full custom cabinetry, premium counters (quartz or stone), integrated appliances, reconfigured layout, possible wall opening, all trades permitted. | $55,000–$80,000 |
| Structural + Kitchen Combined | LVL or steel beam to open to dining/living, custom cabinetry, full electrical upgrade, plumbing reroute. | $75,000–$120,000+ |
What drives cost up in tight spaces specifically:
- Custom cabinetry — standard 12″, 15″, 18″ and 24″ cabinet modules rarely fit precisely in kitchens with non-standard wall lengths, angled corners, or soffits. Custom millwork adds 40–80% over stock pricing but is often the only way to use every available inch.
- Complex tile work — full-height backsplashes, herringbone patterns, or large-format tiles in a galley require more cuts per linear foot. Labour for tile in a small kitchen can run $18–$28 per square foot installed depending on pattern complexity.
- Plumbing moves — relocating a sink even 24 inches to accommodate a new layout adds $2,500–$5,000 in labour and materials. This cost is the same in a 90 sq ft kitchen as in a 200 sq ft one.
- Electrical upgrades — pre-1980 kitchens often have insufficient circuits for modern appliances. Adding dedicated 20-amp circuits for refrigerator, dishwasher, microwave, and small appliance outlets typically runs $3,500–$6,000 including permit and inspection.
- Limited access for trades — in a galley kitchen, trades often cannot work simultaneously. Sequencing adds days to the schedule and drives up project management overhead.
One cost that catches homeowners off guard is permit fees. The City of Vancouver charges a building permit fee based on project value. For a $50,000 kitchen renovation with structural work, expect $1,200–$2,000 in permit fees alone, plus inspection time. Electrical and plumbing permits are separate. Budgeting 4–6% of total project cost for permits, inspections, and engineering is realistic for any Vancouver kitchen renovation involving walls or structural changes.
Layout Options for Small Vancouver Kitchens
Layout is where small kitchen renovations either succeed or fail. The wrong layout in a tight space creates daily friction — a refrigerator door that blocks the range, a prep area that forces you to turn sideways, an aisle so narrow that two people cannot coexist in the kitchen at the same time. Getting this right is more important than countertop material selection or cabinet finish.
Galley Kitchen: Most Efficient Per Square Foot
The galley is the most space-efficient kitchen layout per square foot when executed well. Two parallel runs of cabinets and counter, with a work aisle between them, create the shortest possible triangle between refrigerator, sink, and range. For a 7–10 foot wide kitchen, a galley with a 42-inch aisle is the benchmark. Below 36 inches of clear aisle space, the kitchen becomes uncomfortable for a single cook and unusable for two.
The debate between 42″ and 36″ aisle width matters significantly in a true galley. A 42″ aisle allows a full dishwasher door to open without blocking the opposite counter. A 36″ aisle is workable but tight — a dishwasher door will partially block passage when open. If your galley is constrained to 36″, consider a drawer dishwasher rather than a standard pull-door unit, which reduces door swing clearance by 4 inches.
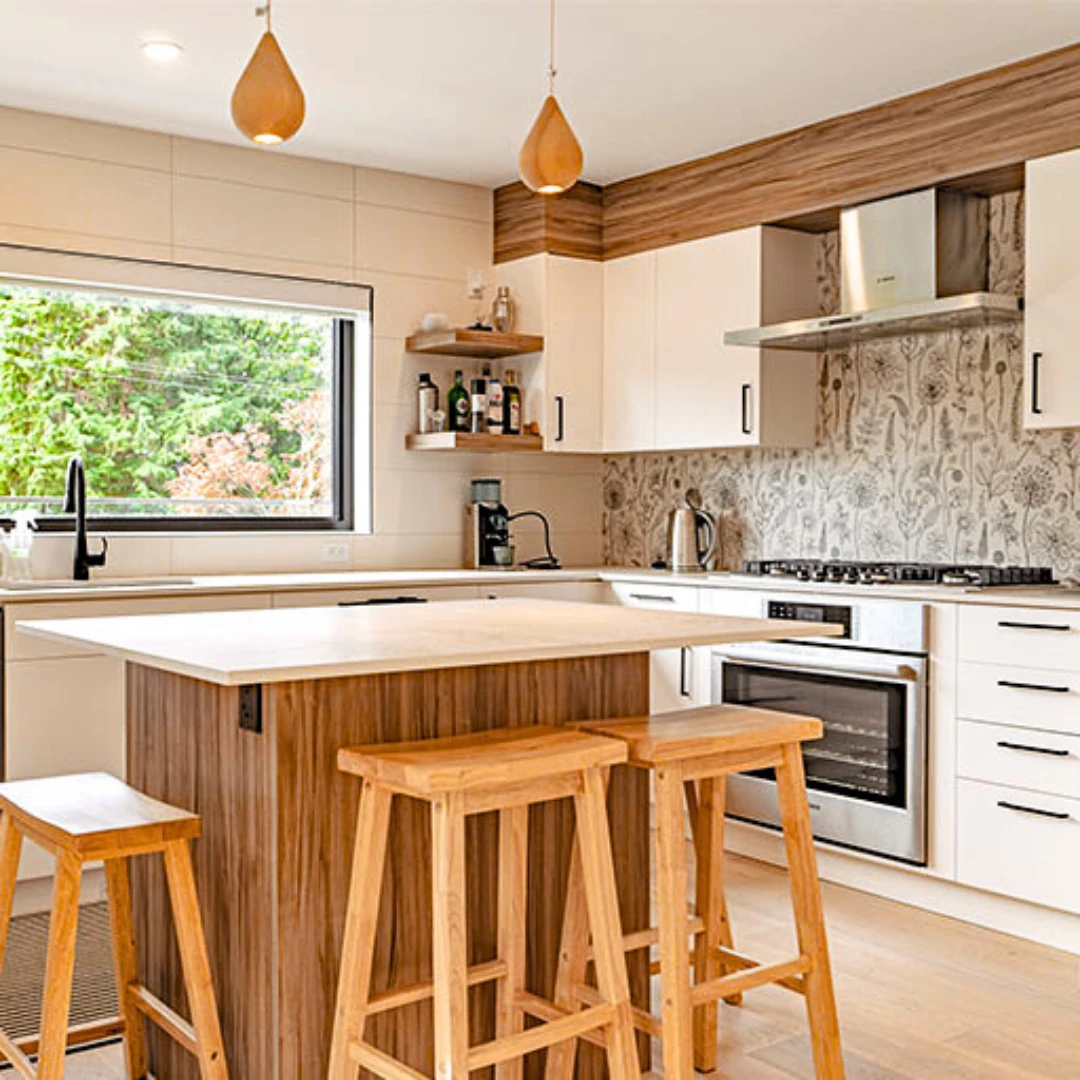
L-Shaped Kitchen
The L-shape works well when the kitchen has a corner available, typically 8 feet on one wall and 6–8 feet on the return wall. It opens one end of the kitchen to dining or living space without requiring structural changes in most cases. The corner itself is always a challenge — blind corners waste space unless addressed with a pull-out organizer or lazy Susan. L-shaped kitchens work best when the range and sink are on the same run, with the refrigerator at the end of the L where it is accessible from both kitchen and dining area.
U-Shaped Kitchen
A U-shaped kitchen requires at least 8 feet of clear interior space to function without feeling like a submarine corridor. In practice, this means the room itself needs to be at least 10–11 feet wide to accommodate two 24-inch deep counter runs on parallel walls with a 42-inch aisle in between. Many Vancouver small kitchens cannot accommodate a true U-shape without removing a wall, which changes the cost calculus significantly. When a U-shape fits, it provides maximum storage and counter space — but it encloses the cook and limits social interaction with adjacent rooms.
Peninsula vs. Island: Why Peninsula Usually Wins
In a small kitchen, a peninsula almost always outperforms an island. A peninsula is connected to the main cabinet run, which means it shares plumbing, electrical, and structural support with the existing layout. It also provides a natural division between kitchen and dining space without requiring the 36–48 inches of clear circulation on all four sides that a true island demands. An island in a kitchen under 150 sq ft typically creates more obstruction than utility — it blocks the work triangle, interrupts natural traffic flow, and often ends up as a landing zone rather than a functional prep surface.
A peninsula with seating on the dining-room side, typically 12–15 inches of overhang for knee clearance, is one of the most effective space-maximizing moves in a small Vancouver kitchen renovation. It adds 8–12 linear feet of counter space, creates informal seating for two to three people, and defines the kitchen boundary without a wall.
Open to Dining vs. Keeping It Closed
Whether to open the kitchen to the adjacent dining or living room is one of the most consequential decisions in a small kitchen renovation. Opening the space almost always makes the kitchen feel larger. It improves sightlines, brings in borrowed light, and enables social cooking. But it also eliminates the wall space that was carrying upper cabinets — and in a small kitchen, upper cabinet storage is often irreplaceable. Every linear foot of wall removed is six to eight cubic feet of storage gone. The open-concept look requires a serious commitment to keeping the kitchen tidy, since it is now visible from the main living area at all times.
Opening Up to the Living and Dining Area: Structural Costs and Trade-offs
Opening a wall between a small Vancouver kitchen and the adjacent living or dining room is one of the most transformative — and most expensive — single moves in a kitchen renovation. The appeal is obvious: a 90 sq ft closed kitchen becomes part of a 350 sq ft combined living-dining-kitchen space. The complications are structural, regulatory, and practical.
Step one is always a structural engineering assessment. In a pre-1980 Vancouver home, most walls running perpendicular to the floor joists above are load-bearing. Removing or modifying them without engineering review is both dangerous and a permit violation. A structural engineering consultation in Vancouver typically runs $800–$1,500 and produces stamped drawings that the City of Vancouver requires before issuing a building permit for structural work.
Beam Costs by Span
| Span | Beam Type | Installed Cost (2026) |
|---|---|---|
| 8 feet | LVL (Laminated Veneer Lumber) | $5,000–$9,000 |
| 10–12 feet | LVL beam | $9,000–$14,000 |
| 12–16 feet | Steel I-beam | $14,000–$22,000 |
These costs include the engineer, the beam and hardware, posts or columns to carry load down to the foundation, associated drywall, painting, and permit. They do not include the kitchen cabinetry or counters that get redesigned around the new opening. Steel costs more than LVL but spans longer with less beam depth, which is important when preserving ceiling height is a priority.
Beyond the visual openness, removing a wall changes kitchen functionality in ways that are not always positive. The wall between the kitchen and dining room in a typical Vancouver character home carries 8–16 linear feet of upper cabinets. At 30 inches tall, those cabinets contain 80–130 cubic feet of storage. Removing them means that storage has to be recaptured elsewhere — ceiling-height uppers on the remaining walls, a dedicated pantry column, or a combination of open shelving and deep lower drawers. This is entirely achievable, but it must be planned explicitly rather than assumed.
Ventilation is the other consideration. A range hood in a closed kitchen vents through a defined duct path to exterior. In an open kitchen, cooking odours, steam, and grease migrate freely to the living area. A properly designed exhaust system — 400–600 CFM minimum for a small open kitchen — becomes more important, not less, when the kitchen opens up. Ductwork routing in older Vancouver homes adds $1,200–$2,500 to the hood installation in many cases.
For homeowners who want the visual benefit of open concept without the full structural cost, a pass-through window cut through a non-bearing partition wall is a $2,500–$5,000 compromise that dramatically improves light and connection without removing the full wall or the upper cabinet storage above it.
Custom vs. Semi-Custom vs. Stock Cabinetry for Small Kitchens
Cabinet selection in a small kitchen is a decision with consequences that compound over the lifetime of the renovation. In a large kitchen, stock cabinetry in standard 3-inch increment widths can be pieced together with filler strips and the result looks intentional. In a small kitchen — particularly a galley with non-standard wall lengths or an L-shape with awkward corner dimensions — stock modules often create dead space, awkward gaps, or compromised functionality that becomes a daily irritant.
IKEA SEKTION: The Benchmark Budget Option
IKEA’s SEKTION system is the best-value cabinet option for small Vancouver kitchens with straightforward dimensions. The cabinet boxes are robust for the price, the interior accessories (pull-outs, drawer inserts, lazy Susans) are well-designed, and the SEKTION system’s variety of door fronts allows for a custom-looking finish at a fraction of the cost. Budget $8,000–$15,000 for IKEA SEKTION including professional installation in a small kitchen. Installation by an experienced IKEA kitchen installer — not a general handyman — is critical; the SEKTION system requires precise installation to function correctly, and errors are expensive to correct after counters and appliances are in place.
IKEA’s limitations in small kitchens: the system works in 3-inch width increments (9″, 12″, 15″, 18″, 21″, 24″, 30″, 36″). A wall that is 127 inches long requires at minimum 3.5 inches of filler strip, which is workable but never looks as intentional as a cabinet sized precisely to the wall. IKEA also does not offer tall pantry cabinets beyond 90 inches, which limits ceiling-height integration in kitchens with standard 96-inch ceilings.
Semi-Custom Cabinetry
Semi-custom cabinets are factory-built in custom sizes (typically in 1-inch increments) to order, with a wider range of door styles, interior configurations, and finish options than stock. Canadian suppliers like Aristokraft, Cabico, Tedd Wood, and Miralis all have Vancouver dealer networks. Semi-custom for a small kitchen typically runs $18,000–$35,000 for cabinet supply alone, with installation adding $3,500–$6,000. The advantage over stock is precision fit; the advantage over full custom is lead time — typically 6–10 weeks versus 10–16 weeks for custom — and cost.
Full Custom Cabinetry
Full custom cabinetry — built by a local millwork shop to exact specifications — is often the right answer for small Vancouver kitchens with non-standard dimensions, complex layouts, or high-end finish requirements. Custom millwork allows ceiling-height cabinets precisely fitted to the room, integrated panels on appliances, and interior configurations that stock or semi-custom cannot accommodate. Cost ranges from $35,000 to $65,000 and up for supply alone. Lead times run 10–20 weeks. The investment is justified when the kitchen layout genuinely requires it, or when the renovation is intended as a long-term investment in a property where the kitchen is a primary selling feature.
The honest guidance: for a galley kitchen in a Kitsilano character house that will be sold within 5–7 years, IKEA SEKTION with a premium door front and quality hardware delivers excellent ROI. For a long-term family home with awkward dimensions or a strata unit where every inch matters, semi-custom or full custom is the better 15-year investment. To discuss which approach makes sense for your specific kitchen, contact our team for a no-obligation assessment.
Storage Maximization: Making Every Cubic Foot Work
Storage is the defining challenge of a small kitchen renovation, and the solutions that actually work in practice are more specific than generic advice about decluttering. Here is what experienced Vancouver contractors and designers deploy consistently in tight spaces.
Ceiling-Height Upper Cabinets
Standard upper cabinets are 30 or 36 inches tall, leaving a soffit gap between the cabinet top and the ceiling that collects dust and serves no functional purpose. In an 8-foot ceiling kitchen, ceiling-height uppers — typically 42 inches tall or floor-to-ceiling custom — add 20–40% more upper cabinet storage compared to standard height. The top shelves require a step stool for daily use, which is an acceptable trade-off for most kitchens. Seasonal items, infrequently used appliances, and large serving pieces store well at this height without disrupting daily workflow.
Pull-Out Pantry Columns
A single 9-inch or 12-inch pull-out pantry column beside the refrigerator or at the end of a cabinet run can replace the function of a full pantry cabinet. Fully extended, a 90-inch tall pull-out pantry column provides 40–60 linear feet of accessible shelf space in a 9–12 inch footprint. These require a full-extension slide mechanism rated for the weight of canned goods — a quality Blum or Hafele mechanism, not a budget import. Budget $800–$1,600 per pull-out column for hardware alone in semi-custom or custom applications.
Corner Solutions
Corners in L-shaped and U-shaped kitchens are where storage goes to waste without intentional design. The main options each have specific best applications:
- Lazy Susan (spinning carousel) — Most accessible, easiest to install, works with stock cabinets. Loses usable depth in the back corners of the rotation arc. Best for kitchens where budget limits custom solutions and access is prioritized over maximum storage efficiency.
- Pull-out corner cabinet (LeMans or similar) — Two kidney-shaped shelves on a pivot mechanism that swing out when the door opens. Better use of corner depth than a lazy Susan, but requires a larger cabinet opening and quality mechanism. Hardware cost: $600–$1,200.
- Blind corner optimizer — A set of pull-out shelves that slide out from the blind side of an L-shaped corner cabinet. Works with standard blind corner cabinets. Less elegant than a full pull-out mechanism but more reliable long-term and less expensive.
- Corner drawers — Two diagonal or angled drawers that meet at the corner. The best ergonomic solution — everything is visible and reachable from above. Requires custom cabinetry and a skilled installer. Premium cost but superior daily function for users who cook regularly.
Toe-Kick Drawers
The 4-inch toe-kick recess at the base of every lower cabinet run is often completely unused. Toe-kick drawers — thin, full-width drawers that slide out at floor level — are ideal for storing baking sheets, cutting boards, cookie sheets, and flat items that otherwise consume an entire base cabinet. Each linear foot of toe-kick accommodates one drawer. A 6-foot run of toe-kick drawers adds significant flat-storage capacity for zero additional footprint. The mechanism requires a touch-latch or push-to-open system since there is no room for a conventional pull handle. Cost: $300–$600 per drawer section including installation in custom work.
Open Shelving: The Honest Trade-off
Open shelving is photographed constantly and lived with less comfortably than its social-media presence suggests. The genuine benefit in a small kitchen is visual lightness — open shelves do not visually terminate the wall the way closed upper cabinets do, and the kitchen can feel more expansive. The real cost is maintenance: open shelves in a kitchen collect grease and dust rapidly, and everything stored on them must be both organized and attractive enough to display permanently. For homeowners who cook daily, one or two open shelves for frequently used items alongside primarily closed cabinetry is the practical compromise that delivers the visual benefit without the maintenance burden.
Counter Space Strategies for Small Kitchens
Counter space in a small kitchen is not infinite, but it can be strategically extended beyond what the initial layout suggests. These are the moves that experienced Vancouver designers deploy consistently in tight spaces.
Extending Counters Over the Dishwasher
In a galley or L-shaped kitchen, the dishwasher is typically positioned beside the sink with a standard 24-inch cabinet adjacent. Extending a continuous counter surface over the dishwasher creates an uninterrupted landing zone adjacent to the sink that has no seam or edge to catch debris. This is standard practice in well-designed small kitchens and costs nothing extra in a full renovation context — it is a detail of counter layout, not an additional expense.
Breakfast Bar Peninsula
A peninsula extending from one end of the main cabinet run — with seating on the dining room side — is frequently the single most effective counter space addition in a small kitchen renovation. A peninsula 48 inches long and 24 inches deep adds 8 square feet of counter surface, eliminates the need for a separate dining table in many Vancouver condos, and provides a natural division between kitchen and living space. The overhang on the seating side (12–15 inches) creates knee clearance for counter-height seating at 36 inches or bar-height seating at 42 inches. Counter-height seating is more comfortable for most adults and allows use of standard dining chairs with a slight rise.
Fold-Down Counters
A fold-down counter panel — wall-mounted on heavy-duty piano hinges with folding legs — is a practical solution for kitchens where space is needed for occasional baking or food prep but a permanent counter extension is not possible. Folded up against the wall, the unit projects 2–3 inches. Folded down, it provides a 24-inch deep working surface of any desired length. Hardware for a quality fold-down counter system runs $200–$400; the panel itself in butcher block or similar material adds another $200–$500. Total installed cost: $800–$1,500 depending on finish.
Undermount Sink
Replacing a drop-in sink with an undermount model meaningfully improves counter usability in a small kitchen. An undermount sink eliminates the raised rim that catches water and debris at the counter edge, making it possible to sweep prep scraps directly into the sink bowl from the counter surface. This is a small functional improvement with a surprisingly large daily impact. The cost difference between drop-in and undermount installation in a full renovation is minimal when counters are already being replaced — typically $200–$400 in additional labour for the undermount clip and sealant work.
Appliances Sized for Small Kitchens
Appliance selection in a small kitchen is not about compromise — it is about choosing the right size for the space. Most appliances now exist in configurations designed specifically for compact kitchens, and the performance gap between compact and standard sizes has narrowed significantly in the past decade.
Refrigerators: Counter-Depth vs. Standard
A standard 30-inch refrigerator is 32–34 inches deep, protruding 8–10 inches beyond a 24-inch deep counter. In a galley kitchen, this projection directly reduces the effective aisle width. A counter-depth refrigerator (24 inches deep plus door) sits flush with the counter face, recovering 4–6 inches of aisle space and visually integrating with the cabinetry. Counter-depth refrigerators cost 25–40% more than standard-depth equivalents for the same interior capacity. In a galley with a 42-inch target aisle, a counter-depth refrigerator is worth every dollar of the premium. Brands with strong counter-depth lines available through Vancouver appliance retailers include Fisher and Paykel, KitchenAid, Samsung, and LG.
For extreme space constraints — a studio or one-bedroom condo kitchen — Fisher and Paykel’s drawer refrigerator (RF170, two drawers) allows refrigeration to be distributed under a counter rather than taking wall space with a conventional box. This is a niche application but genuinely useful in a kitchen where every vertical foot of wall space carries cabinetry.
24-Inch vs. 30-Inch Range
A 24-inch range is not merely a smaller version of a 30-inch range — it is a purpose-built appliance that allows a full additional 6 inches of base cabinet beside it. In a galley kitchen where the range and a 24-inch base cabinet on one side total 54 inches, swapping a 30-inch range for a 24-inch unit and adding a 6-inch pull-out spice cabinet creates meaningfully more useful storage. Quality 24-inch ranges from Blomberg, SMEG, and Fagor perform comparably to 30-inch ranges for small-to-medium household cooking volumes and are available through Vancouver appliance dealers.
Dishwasher Options for Tight Aisles
The standard 24-inch pull-door dishwasher requires 24 inches of clearance in front of the door when open — in a galley with a 42-inch aisle, this means the dishwasher door reaches 66 inches into the kitchen, well past the center of the aisle. A drawer dishwasher (Fisher and Paykel DD60, single or double drawer) requires only 20 inches of door clearance when open, which is significantly more galley-friendly. Double drawer units ($1,200–$1,800) also allow running a single drawer for small loads, which is more energy-efficient for smaller households. The trade-off is reduced interior capacity per load compared to a full-size tub.
Microwave Placement
Over-the-range (OTR) microwaves free up counter space but create ergonomic problems in low-ceiling kitchens and place a heavy appliance at or above eye level — a safety issue when removing hot liquids. Microwave drawers (Sharp, Bertazzoni, Miele) install under the counter in a base cabinet location, freeing the wall above the range for a dedicated, properly-sized range hood. A proper range hood in a small kitchen performs measurably better than an OTR microwave’s built-in fan, and dedicated hoods can be specified for appropriate CFM rather than the typically undersized fans in OTR units. Microwave drawer cost: $600–$1,400 for the unit, plus a standard base cabinet rough opening.
Induction Cooktop Plus Wall Oven vs. Full Range
Separating the cooking surface from the oven is a space-planning strategy that works well in small kitchens with adequate wall space for an oven column. An induction cooktop set into the counter can be positioned anywhere counter space is available and is the safest cooktop technology for homes with children. A 30-inch or 24-inch single wall oven in a tall cabinet column provides the same oven capacity as a range while freeing the base cabinet below the cooktop for storage. The combined cost is typically $2,000–$4,000 more than an equivalent range, but the layout flexibility often justifies the premium in constrained floor plans where the range location is forced by an existing gas line or ventilation path.
Lighting in Small Kitchens: The Brightness Formula
Lighting is frequently the most underbudgeted element of a small kitchen renovation and one of the highest-impact in terms of how the finished space feels. A small kitchen with excellent lighting feels generous; the same kitchen with inadequate lighting feels cramped regardless of how well the cabinetry and counters are executed.
Under-Cabinet LED Strips
Under-cabinet lighting is the single most functional lighting investment in a kitchen. It illuminates the primary work surface — the counter — at exactly the right angle, eliminating the shadow cast by the cook’s body standing between the ceiling light and the work surface. LED strips in 3000K (warm white) colour temperature are the current standard for kitchen under-cabinet applications. A fully under-cabinet-lit small kitchen with quality strips and dimmer control runs $400–$800 for supply and installation, including the low-voltage transformer and dimmer switch. This requires a dedicated switched circuit, which should be factored into the electrical scope at permit stage.
Pot Lights on Dimmer
The brightness formula for a small kitchen is 50 lumens per square foot as ambient light baseline, achieved with dimmable LED pot lights on a single switch. For a 100 sq ft kitchen, 5,000 lumens of dimmable ambient light is the minimum — typically 6–8 four-inch LED pot lights at 650–700 lumens each. Position pot lights 18–24 inches from walls and cabinet faces to maximize counter illumination from above. Connecting pot lights to a dimmer (Lutron Caseta or equivalent) allows the kitchen to transition from task-lighting intensity during cooking to ambient brightness during dining. A permit is required for new pot light installation in Vancouver — the electrical permit covers inspection of the new circuit and fixture installation.
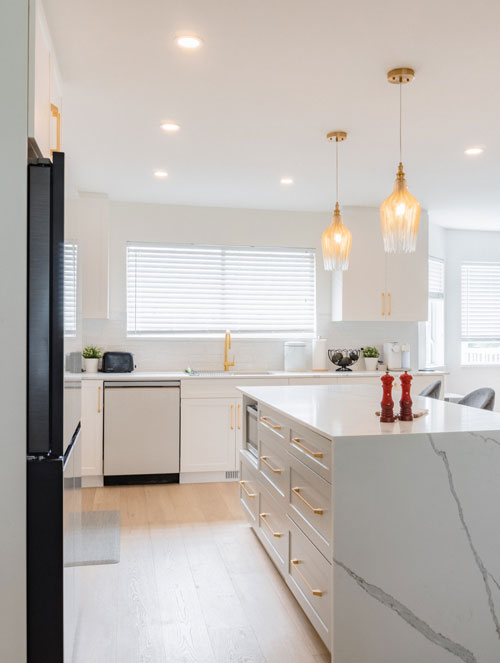
Pendant Lighting Over Peninsula
A peninsula in a small kitchen provides an opportunity for pendant fixtures that add visual interest and targeted task lighting for the seating area. Pendants over a peninsula should hang 30–36 inches above the counter surface. In a small kitchen with 8-foot ceilings, this means the pendant base needs to be at a fixed height — plan the rough-in location during electrical rough-in, not after drywall. One or two pendants over a 48-inch peninsula is proportional; three pendants over the same length looks crowded in a small space and reduces the clean sightlines that make small kitchens feel larger.
Tile and Backsplash: Visual Expansion Techniques That Actually Work
Tile selection in a small kitchen has a measurable impact on perceived space — though the impact is more subtle than the marketing language around it suggests. These are the approaches that experienced Vancouver kitchen designers reach for consistently.
Vertical Subway Tile
Standard subway tile installed horizontally is a neutral choice. The same tile installed vertically — a running bond or stacked vertical pattern — draws the eye upward and makes low ceilings feel taller. The practical trade-off is that vertical installation requires more cuts at cabinet and counter edges, which adds $2–$4 per square foot to labour cost compared to horizontal installation of the same tile. For a small kitchen with 8-foot or lower ceilings, this premium is often worth paying for the height illusion.
Large-Format Porcelain
Large-format tiles (12×24″, 18×36″, or larger slabs) have fewer grout lines per square foot, which reads as a cleaner, less busy surface in a tight space. In a small kitchen, the visual simplicity of a slab backsplash — porcelain or quartz — dramatically reduces visual noise compared to a grid of small tiles. The practical consideration is that large-format tiles require a perfectly flat substrate (cement board, not painted drywall) and a skilled tile setter; lippage (height variation between adjacent tile edges) is more visible with large tiles and requires greater precision in installation.
Full-Height Backsplash vs. Standard 18 Inches
A backsplash that runs from counter to underside of upper cabinets (typically 18 inches) is the standard. A full-height backsplash — running from counter all the way to the ceiling on walls without cabinets — is a design statement that works particularly well in kitchens with a single feature wall or an open shelf run. Full-height backsplash on the wall above the range, extending to the ceiling, creates a focal point and makes the kitchen feel taller. The cost premium over standard-height backsplash is primarily material; labour per square foot is the same.
Mirrored Backsplash: The Real Trade-off
Mirrored backsplash tiles are occasionally specified for small kitchens on the theory that reflectivity doubles the perceived depth of the space. In practice, mirrored backsplash in a kitchen shows water spots, grease smears, and fingerprints immediately and requires constant maintenance to look presentable. The visual benefit is real but short-lived without significant cleaning effort. A high-gloss white or light-coloured large-format tile achieves 70% of the light-reflection benefit with a fraction of the maintenance burden and is the more practical choice for a working kitchen.
Plumbing Considerations in Small Kitchen Renovations
Plumbing is one of the most significant cost variables in a small kitchen renovation, and the decisions around it cascade through the rest of the project design. Understanding the cost implications before finalizing a layout saves significant money and avoids redesigns mid-project.
Moving the Sink Location
The most common plumbing question in a small kitchen renovation is whether to move the sink. Moving a sink from its existing location — even 24–36 inches along the same wall — requires extending the drain line, relocating the hot and cold supply lines, and potentially re-routing the P-trap to meet the new drain location. In a concrete slab, this may require cutting concrete. In a wood-frame house with a crawl space below, it is more straightforward. The cost to move a kitchen sink 24–48 inches in a typical Vancouver wood-frame house: $2,500–$5,000 depending on access and rerouting complexity. Moving a sink across the kitchen to the opposite wall or to a peninsula: $5,000–$10,000 or more, including new drain line run and potential opening of walls or floors.
The honest guidance: keep the sink in its existing location unless there is a compelling functional reason to move it. The money saved ($2,500–$5,000) can be invested in cabinetry quality, counters, or lighting — all of which have higher daily impact than sink location for most users.
Island or Peninsula Sink Feasibility
A sink in a peninsula or island requires drain lines run under the floor to a central drain location — in a wood-frame home, this means opening the subfloor beneath the peninsula. The drain line must maintain the required slope (1/4 inch per linear foot) to the existing stack. In a small kitchen with limited floor area, the drain run distance may be manageable; in a kitchen on the second floor of a character house, it requires opening the ceiling of the floor below. Budget $3,500–$6,000 minimum for a peninsula or island sink plumbing rough-in, plus the fixture itself. This is a legitimate investment when the peninsula sink is a functional priority, but it should be planned at the layout stage and not added after cabinetry is ordered.
Under-Sink Water Filtration in Tight Spaces
Reverse osmosis or multi-stage under-sink filtration systems require a dedicated small tank (typically 3–4 gallons) under the sink, plus a dedicated filtered water tap on the counter. In a small kitchen where under-sink cabinet space is at a premium — often already occupied by the P-trap, garbage and recycling bins, and pull-out organizers — the filtration tank competes for real estate. A countertop or refrigerator-integrated filtration system may be more practical than a traditional under-sink RO unit. If under-sink filtration is desired, plan the cabinet layout explicitly around the tank dimensions before finalizing lower cabinet configuration.
Common Mistakes in Small Kitchen Renovations (And How to Avoid Them)
After completing dozens of small kitchen renovations across Vancouver, the same mistakes appear consistently. Knowing them in advance saves money, avoids redesigns, and produces a better-functioning kitchen at the end of the project.
- Buying a kitchen island for a space that cannot support it. Any kitchen under 150 sq ft with less than 42 inches of clearance on all sides of the proposed island is not a candidate for an island. A rolling butcher block that stores against the wall and wheels out when needed costs $300–$600 and provides the flexibility an island cannot.
- Choosing upper cabinet height based on what looks good in a showroom. Standard 30-inch uppers leave a dead soffit space in most Vancouver kitchens. Ceiling-height or 42-inch uppers take a few minutes longer to install and cost the same in a full renovation — there is no good reason not to use every vertical inch.
- Moving the sink for aesthetic reasons. Unless there is a functional layout reason to move it, keeping the sink in its original drain location saves $2,500–$5,000 that is better spent on cabinetry, counters, or lighting.
- Skipping the permit for electrical work. In a small kitchen renovation involving new circuits, the electrical permit is not optional. Unpermitted work creates problems at property sale, voids insurance claims in the event of a fire, and results in costly remediation. The City of Vancouver enforces this consistently.
- Installing an OTR microwave to save counter space and then living with inadequate ventilation. OTR fans are typically 150–200 CFM — far below the 400 CFM minimum recommended for a range in an enclosed kitchen. The result is a kitchen that fills with cooking odours and grease that gradually coats every surface. A microwave drawer plus a proper range hood costs more but functions properly.
- Choosing white cabinets for a small dark kitchen without addressing the lighting first. White cabinets in a kitchen without adequate ambient and task lighting still look dingy. Lighting investment returns more visual brightness per dollar than any cabinet colour choice.
- Failing to plan for the refrigerator door swing. In a galley kitchen, the refrigerator must be positioned so the door opens away from the primary work zone, not into it. A refrigerator with a reversible door hinge addresses this in some cases; French door models open symmetrically and may be preferable in constrained positions.
For a comprehensive overview of what to expect from any major home renovation in Vancouver — permits, timelines, contractor selection — see our home renovation guide.
More Kitchen Renovations Guides

Gas vs. Induction Range in Vancouver: Which is the Right Choice for Your Kitchen Renovation?

Shaker vs. Flat-Front Kitchen Cabinets in Vancouver: Style, Cost, and Resale Comparison
Undermount vs. Top-Mount Kitchen Sink in Vancouver: Pros, Cons, and Cost Comparison
Hardwood vs. LVP Kitchen Flooring in Vancouver: Which is Better?
Kitchen Renovation in Langley: Township and City Permit Guide for 2026
Ready to start your renovation?
Frequently Asked Questions: Small Kitchen Renovation Vancouver
What is the minimum kitchen size that makes a full renovation worthwhile in Vancouver?
There is no practical minimum — kitchens as small as 60–70 sq ft in Vancouver condos receive full renovations that dramatically improve functionality and resale value. The more relevant question is whether the layout can be meaningfully improved. A 70 sq ft galley with well-designed cabinetry, good lighting, and quality counters will function better than a 120 sq ft kitchen with a poor layout. The cost-to-value ratio remains strong for small kitchen renovations in Vancouver’s market regardless of absolute square footage.
Should I open my small kitchen to the living or dining area, or keep it closed?
It depends on two factors: whether the separating wall is load-bearing (which determines structural cost), and how much you cook. Open concept kitchens feel larger and are better for social cooking, but they permanently expose the kitchen to the rest of the living area and eliminate the upper cabinet storage on the removed wall. If you cook heavily and need maximum storage, a closed kitchen with a well-designed pass-through window is often the better functional choice. If you primarily want the space to feel larger and are willing to maintain visible tidiness, opening the kitchen is transformative. Budget $8,000–$22,000 for the structural work alone before kitchen renovation costs.
Is IKEA SEKTION actually good quality for a small kitchen renovation?
Yes, for kitchens with standard dimensions and a budget below $20,000 for cabinetry, IKEA SEKTION is a legitimate choice. The cabinet boxes are structurally sound, the interior accessory system is well-designed, and the door fronts (particularly Axstad, Voxtorp, and Bodbyn) look comparable to mid-range semi-custom options at a fraction of the cost. The important caveats: hire an experienced IKEA kitchen installer (not a general handyman), use quality hardware rather than the included pulls, and understand that the 3-inch increment sizing means some filler strips will be required in non-standard wall configurations.
Can I fit an island in my small kitchen?
Only if you have at least 42 inches of clear circulation on all sides of the island and the kitchen is at minimum 12 feet wide. In a kitchen under 150 sq ft, a fixed island almost always creates more obstruction than value. A peninsula connected to the main cabinet run delivers the same counter space benefit with better storage integration and without the clearance requirement. For kitchens that truly cannot accommodate either, a rolling butcher block cart stored against a wall and wheeled out for prep is the practical alternative.
What permits are required for a small kitchen renovation in Vancouver?
For a cosmetic renovation (new cabinet doors, counters, backsplash, appliance swap with no new circuits), no permit is typically required. For any electrical work involving new circuits — which is common when adding under-cabinet lighting, upgrading to a dedicated dishwasher circuit, or adding receptacles — an electrical permit is required from the City of Vancouver. For plumbing work involving drain line relocation or new supply lines, a plumbing permit is required. For any structural work (removing or modifying walls), a building permit with stamped engineering drawings is required. Vancouver’s online permit portal (permits.vancouver.ca) provides permit applications and fee schedules.
How long does a small kitchen renovation take in Vancouver?
Timeline varies significantly by scope. A galley refresh with no structural work and stock cabinets: 3–5 weeks of active construction after materials arrive. A mid-range renovation with semi-custom cabinets (6–10 week lead time), full gut, and electrical work: 10–16 weeks total from contract signing to completion. A high-end renovation with custom cabinetry (10–16 week lead time) and structural work: 18–26 weeks. The longest delays in Vancouver small kitchen renovations are typically material lead times and permit processing — the active construction in a small kitchen is often 3–6 weeks once materials are on-site and permits are in hand.
Galley vs. L-shaped: which layout is more efficient for a small kitchen?
For pure cooking efficiency — minimizing steps between refrigerator, sink, and range — a galley wins. The two parallel counter runs create the shortest possible work triangle, and the throughput of prep to cooking to plating is faster in a good galley than in any other layout. The trade-off is that a galley is a closed space: only one or two people can work in it comfortably, and there is limited opportunity for social connection to an adjacent dining area without opening a wall. An L-shaped kitchen is slightly less efficient for solo cooking but more social, allows corner storage solutions, and typically opens one end to a dining area naturally. For a family with multiple cooks and a social kitchen, the L-shape is the better daily experience despite slightly longer work triangle distances.
What are the best storage solutions for a small kitchen without changing the layout?
Without layout changes, the highest-impact storage additions are ceiling-height upper cabinets (if currently using standard 30-inch uppers), pull-out shelves inside existing lower cabinets (a retrofit upgrade costing $150–$300 per cabinet), toe-kick drawers for flat items, and a pull-out pantry column added at the end of an existing cabinet run if 9–12 inches of width is available. Inside existing corner cabinets, a lazy Susan or blind corner optimizer significantly improves access to corner storage that is currently poorly utilized. These additions in an existing kitchen without full renovation: $3,000–$8,000 depending on scope.
What appliance size should I choose for a small kitchen?
Prioritize counter-depth over standard-depth for the refrigerator — the 4–6 inch aisle recovery is significant in any galley or tight layout. For the range, consider whether a 24-inch unit plus an extra 6 inches of base cabinet serves you better than a standard 30-inch range. Drawer dishwashers are worth serious consideration in galleys under 40 inches wide. A microwave drawer under the counter frees the wall above the range for a properly-sized range hood, which meaningfully improves ventilation in a small enclosed kitchen. When in doubt, choose compact purpose-built appliances over standard models with unused capacity.
What is the ROI on a small kitchen renovation in Vancouver?
Kitchen renovations in Vancouver consistently show 60–80% cost recovery at resale, with well-executed renovations in strong neighbourhoods (East Van, Kitsilano, Mount Pleasant) sometimes reaching 80–100% in a strong market. A small kitchen that was clearly dated — original 1970s or 1980s finishes — is a buyer objection that suppresses offers; a renovated kitchen removes that objection and frequently moves a property faster even if the full renovation cost is not recovered dollar-for-dollar. For primary residences where the owners will live with the renovation for 5–10 years before selling, the functional benefit to daily life adds significant non-financial value that makes the investment straightforward to justify.
How much does it cost to renovate a galley kitchen in Vancouver?
A true galley refresh — new cabinet doors, hardware, laminate counters, basic tile, appliance swap, no structural or layout changes — runs $15,000–$28,000. A mid-range galley renovation with new semi-custom cabinets, quartz counters, tile backsplash, under-cabinet lighting, new fixtures, and full electrical upgrade: $35,000–$55,000. A high-end galley with full custom cabinetry, premium counters, integrated appliances, and all permitted trades: $55,000–$75,000. These ranges assume a galley of 80–110 sq ft in a typical Vancouver wood-frame house with accessible plumbing and wiring.
Can I renovate my kitchen while living in the house?
For small kitchens, living in the house during renovation is physically possible but significantly disruptive. A full gut renovation means no kitchen access for 4–8 weeks minimum. Most contractors recommend setting up a temporary kitchen in a dining room or basement — a microwave, electric kettle, and small refrigerator — and budgeting for more restaurant meals than usual during the active construction phase. Demo and rough-in phases (electrical, plumbing) are the most disruptive; cabinet installation and finish work are cleaner and more tolerable. The decision depends on individual tolerance for disruption and whether the house has a second bathroom with hand-washing access remote from the construction zone.
What countertop material is best for a small kitchen?
Quartz is the current standard for Vancouver kitchen renovations across all price points. It is non-porous (no sealing required), highly durable, available in colours and patterns that closely mimic stone, and consistent in quality from reputable manufacturers (Caesarstone, Silestone, Cambria). For a small kitchen, lighter quartz colours — whites, light greys, soft creams — visually expand the counter surface and reflect more light. Butcher block is a warm, cost-effective alternative ($60–$120 per sq ft installed versus $90–$150 for quartz) but requires annual sealing and is not suitable near the sink without a quartz or stainless insert. Laminate in premium finishes (Wilsonart, Formica’s high-end lines) delivers a compelling appearance at $30–$60 per sq ft and is the right choice for the galley refresh budget tier.
How do I make a dark small kitchen feel brighter?
In order of impact: (1) Add under-cabinet LED strip lighting — this single change dramatically brightens the primary work surface and costs $400–$800 installed. (2) Maximize ambient light with dimmable LED pot lights at the brightness formula of 50 lumens per square foot. (3) Choose light-coloured upper cabinets — white, soft grey, or light wood tones — to reflect ambient light rather than absorb it. (4) Use a lighter counter colour. (5) Install a large-format, low-grout-line backsplash in a light colour or high-gloss finish. (6) If there is a window above the sink, remove any treatment that blocks light. Lighting comes before any colour or material change — it is the foundation of brightness in a small kitchen.
What should I ask a contractor before hiring them for a small kitchen renovation in Vancouver?
Ask whether they are licensed as a general contractor in BC (Residential Builder Licence required for projects over $10,000), whether they carry $2 million general liability insurance, and for references from recent kitchen renovation projects in Vancouver specifically. Ask who will be the on-site project manager for your job, how they handle permit applications, and whether their subcontractors (electrician, plumber, tile setter) are licensed trades. Ask for a fixed-price contract with a detailed scope of work rather than a time-and-materials arrangement. Finally, ask what their process is for handling unexpected findings — asbestos in old drywall, knob-and-tube wiring, rot in subfloor — since small kitchen renovations in pre-1980 Vancouver homes encounter these regularly. A contractor who has a clear process for these situations is less likely to present surprise invoices mid-project.
Does asbestos need to be tested for in a small kitchen renovation in Vancouver?
Yes, if the home was built before 1990. Pre-1990 homes in Vancouver commonly have asbestos-containing materials in vinyl floor tiles, drywall joint compound, pipe insulation, and ceiling texture. Before any demolition work that disturbs these materials, BC regulations require asbestos assessment by a qualified professional. The assessment typically costs $400–$800 and includes bulk sample collection and laboratory analysis. If asbestos-containing materials are identified, abatement by a licensed asbestos abatement contractor is required before renovation work proceeds. Budget $1,500–$5,000 for asbestos abatement in a small kitchen if contaminated materials are found. Your contractor should include asbestos assessment in their pre-renovation process — be cautious of any contractor who does not mention it for a pre-1990 home.
Where can I get started planning my small kitchen renovation in Vancouver?
Start with a realistic assessment of your goals, budget, and timeline. Our renovation guide covers the full planning process for any kitchen or home renovation in Vancouver, including how to set a realistic budget, what to expect from the permit process, and how to evaluate contractor proposals. When you are ready to discuss your specific kitchen, contact our team for a consultation — we work with homeowners across Vancouver, Burnaby, North Vancouver, and the Lower Mainland on small kitchen renovations at every budget level.
Get a Free Renovation Quote
Metro Vancouver’s trusted general contractors. Free consultations across Vancouver, Burnaby, Richmond, North Shore & beyond.
Get Your Free Quote →Ready to start your project? Vancouver General Contractors (VGC) provides free, fixed-price quotes for homeowners across Metro Vancouver. Learn more about our kitchen renovation Vancouver services or request a free quote today.
VGC serves Vancouver and surrounding areas. View all renovation services in Vancouver →
Comments are closed