
10 Most Expensive Renovation Mistakes Vancouver Homeowners Make (2026)
Vancouver homeowners lose an average of $28,000 to renovation mistakes every year — not from bad luck, but from decisions made before a single tool is picked up. After decades of building and renovating homes across Metro Vancouver, we have seen the same expensive errors repeat themselves on job site after job site. The homeowner who saved $8,000 hiring the cheaper contractor ended up spending $47,000 to fix the damage. The couple who skipped permits discovered their $180,000 kitchen addition had to be disclosed as unpermitted when they sold — and knocked $65,000 off their asking price.
Budget overruns of 25–40% above the original estimate are the industry norm in Vancouver — not the exception. Vancouver’s aging housing stock, strict regulatory environment, compressed trades market, and premium material costs create a perfect storm for renovation disasters. The difference between a renovation that stays on budget and one that spirals into financial crisis almost always comes down to the decisions made in the planning phase, not the execution phase.
This guide covers the 10 most expensive renovation mistakes we see Vancouver homeowners make, the real dollar costs attached to each one, and exactly how to avoid them. We are not pulling punches — some of what follows will make you uncomfortable if you are mid-project and recognizing your own situation. That discomfort is worth it if it saves you tens of thousands of dollars and months of stress.
In British Columbia, any residential renovation project with a contract value over $10,000 legally requires the contractor to hold a valid licence with BC Housing's Licensing and Consumer Services
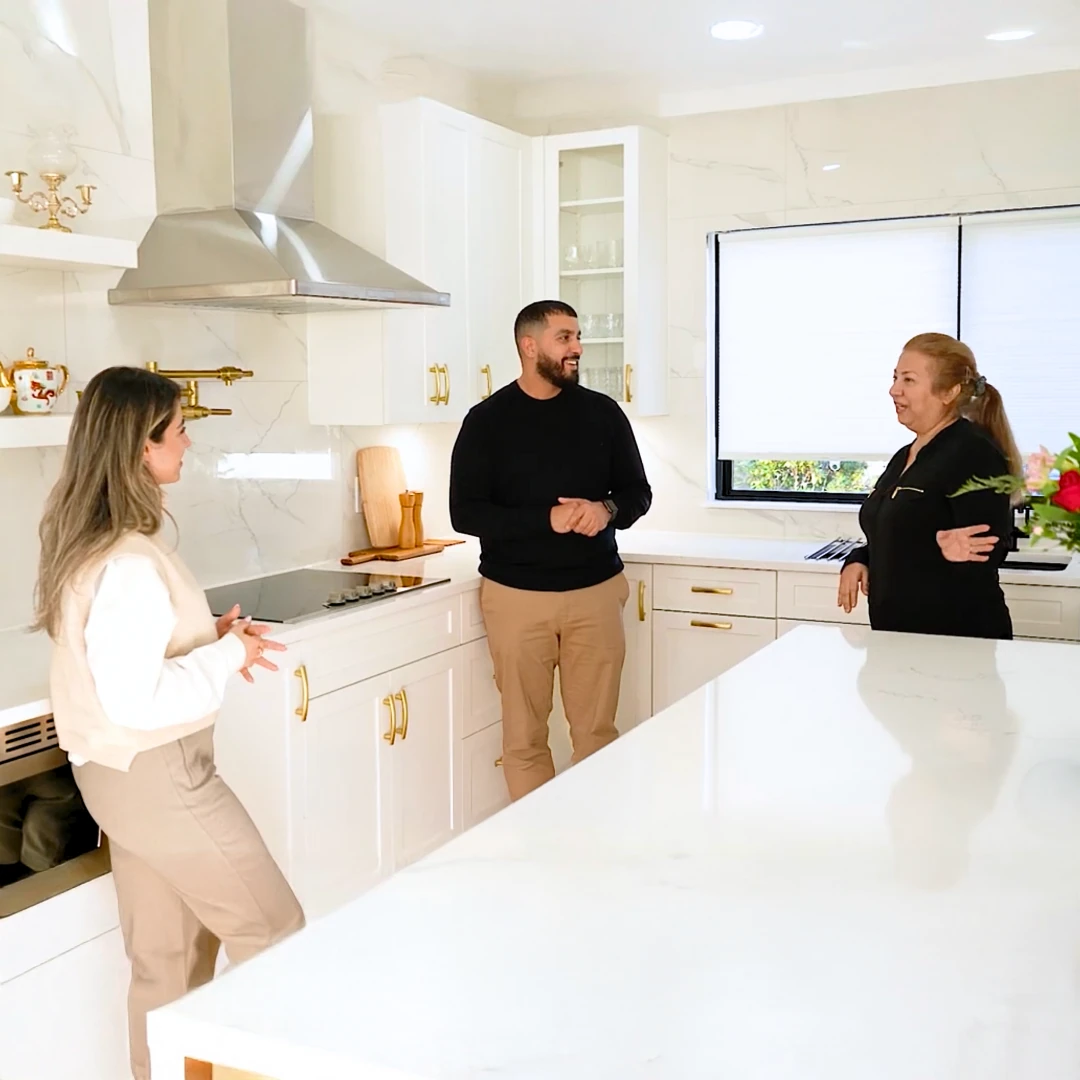
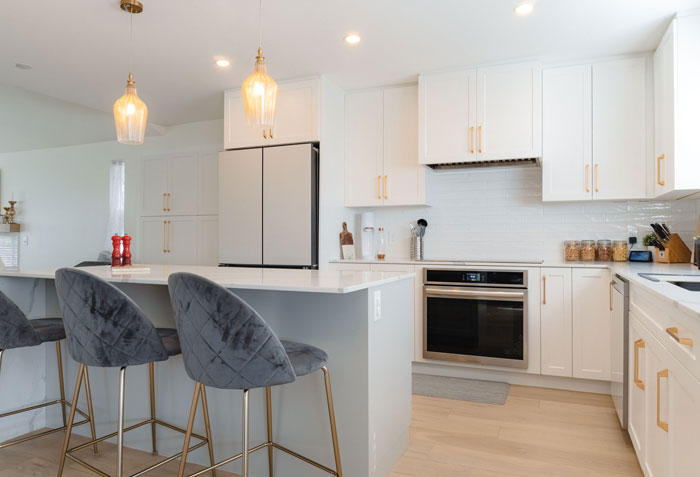
Vancouver General Contractors
Before you hire anyone, sign anything, or swing a sledgehammer, read this guide in full. You can also download our Vancouver Renovation Guide for a complete step-by-step checklist, or contact our team for a no-obligation estimate on your project.
Mistake #1: Hiring an Unlicensed Contractor
In British Columbia, any residential renovation project with a contract value over $10,000 legally requires the contractor to hold a valid licence with BC Housing’s Licensing and Consumer Services (LCS) branch. This is not a suggestion. It is provincial law under the Homeowner Protection Act. Yet a significant portion of renovation work in Metro Vancouver is performed by unlicensed operators who market themselves through Craigslist, neighbourhood Facebook groups, and word-of-mouth referrals.
The consequences of hiring an unlicensed contractor are severe and often irreversible:
- Insurance claim denial: If your home insurer discovers that work was performed by an unlicensed contractor — particularly after a fire, flood, or structural failure — they will deny your claim. A homeowner in East Vancouver discovered this after a faulty electrical connection (installed by an unlicensed handyman) caused a kitchen fire. Their $210,000 loss claim was denied entirely. The home insurer’s forensic investigator found the wiring did not meet code, was installed by an unlicensed person, and no permit had been pulled.
- Permit refusals: The City of Vancouver requires licensed contractors for permit applications on projects above the threshold. If your permit application lists an unlicensed contractor, it will be refused. If you discover mid-project that your contractor is unlicensed, you cannot legalize the work without starting the permit process from scratch — often requiring a licensed engineer to assess what has already been done.
- No recourse when things go wrong: Licensed contractors in BC carry mandatory liability insurance and participate in the Homeowner Protection Office warranty program for new construction. Unlicensed operators carry neither. When a licensed contractor causes $40,000 in water damage, you have a documented insurance pathway. When an unlicensed operator does the same and disappears, you have nothing but a small claims court filing that will recover a fraction of your losses — if anything at all.
- Resale complications: When you sell, your property disclosure statement and the due diligence process will uncover unpermitted or substandard work. Buyers’ lawyers and home inspectors are specifically trained to identify renovation red flags. Discovering unlicensed work during a sale negotiation typically results in a price reduction of 1.5–2x the cost to remediate the problem.
How to Verify a BC Housing Licence in 60 Seconds
Go to bchousing.org and click “Find a Licensed Residential Builder.” Enter the contractor’s business name or licence number. A valid licence will show as active, display the licence class, and confirm the company’s insured status. Ask every contractor for their licence number before the first meeting — any hesitation or inability to provide it immediately is a disqualifying red flag. Also request a current Certificate of Insurance naming you as an additional insured for the duration of the project.
At Vancouver General Contractors, every project is performed under a valid BC Housing licence with full liability insurance. We provide licence and insurance documentation as a standard part of our proposal package.
Mistake #2: Skipping Permits
The permit-skipping temptation is understandable. Permits take time. They require inspections. They cost money — a typical structural addition permit in Vancouver runs $2,500–$6,000 in city fees alone. And many contractors will offer to “save you the hassle” of permits in exchange for working faster and cheaper. This offer should be treated as an immediate disqualification.
Unpermitted work in Vancouver carries consequences that can easily cost 10–20 times the original permit fee:
| Consequence | Typical Cost Impact |
|---|---|
| Retroactive permit and legalization | $8,000–$30,000 depending on scope |
| Required demolition to expose work for inspection | $3,000–$15,000 (opening walls, ceilings) |
| Remediation if work fails inspection | $5,000–$25,000+ |
| Resale price reduction (buyer’s discount) | $20,000–$80,000+ on major additions |
| Insurance claim denial (fire, flood, structural) | Full loss value — potentially $200,000+ |
| City of Vancouver stop-work order + fines | $1,000–$10,000 in fines |
The three permit categories Vancouver homeowners most commonly skip are:
- Electrical: Any new circuit, panel upgrade, or service change requires an electrical permit and inspection by a BC Safety Authority electrical inspector. Homeowners routinely pay electricians to do panel work without permits — until their home insurer’s underwriter flags it during a policy renewal review or claim.
- Plumbing: Relocating drains, adding fixtures, or altering supply lines requires a plumbing permit. Unpermitted plumbing is the most common cause of denied water damage claims in older Vancouver homes.
- Structural: Removing walls (load-bearing or not), adding dormers, underpinning foundations, and building additions all require structural permits and engineer-stamped drawings. This is the category where retroactive legalization costs are highest — because exposing work for inspection after the fact requires significant demolition.
The City of Vancouver has increased permit enforcement activity significantly since 2022, including proactive inspections triggered by neighbour complaints, utility connection changes, and property sale listings that describe renovations not on file. Do not assume the risk of detection is low — it is not, and it is rising.
Mistake #3: Insufficient Contingency Budget
Every experienced renovation contractor will tell you the same thing: set aside a contingency fund. Most homeowners hear this and set aside 10%. Industry standard in Vancouver — given the age and condition of the housing stock — is 15–20% for homes built before 1990, and 20–25% for homes built before 1960. Here is why the gap between 10% and 20% matters so much in Vancouver specifically.
Vancouver’s housing market is dominated by older homes. The vast majority of detached homes in East Van, Kitsilano, Mount Pleasant, the West Side, and the North Shore were built between 1920 and 1980. These homes contain hidden conditions that do not appear in a pre-renovation inspection and cannot be priced before demo day. The most common — and most expensive — hidden conditions we encounter:
| Hidden Condition | Typical Vancouver Cost Range | Most Common In |
|---|---|---|
| Knob-and-tube wiring replacement | $14,000–$26,000 | Pre-1950 homes |
| Asbestos abatement (drywall compound, insulation, tiles) | $3,000–$12,000 | 1950–1985 homes |
| Foundation issues (cracks, settlement, drainage) | $15,000–$60,000 | Pre-1970 homes, slopes |
| Mold remediation (behind walls, under floors) | $5,000–$20,000 | Any age, wet areas |
| Rotted structure (sills, joists, sheathing) | $8,000–$35,000 | Older homes, additions |
| Inadequate electrical service (60-amp upgrade needed) | $6,000–$14,000 | Pre-1970 homes |
| Lead paint (abatement if disturbing surfaces) | $2,000–$8,000 | Pre-1978 homes |
| Undersized drain stack (cast iron replacement) | $4,000–$12,000 | Pre-1960 homes |
These are not rare occurrences. On renovations of pre-1970 Vancouver homes, we encounter at least one significant hidden condition on roughly 70% of projects. Finding knob-and-tube wiring behind a kitchen wall is not a surprise — it is a near-certainty if the home is pre-1950 and has never had a full rewire. The question is not whether you will encounter hidden conditions, but how many and how severe.
A homeowner who budgets $120,000 for a kitchen and main-floor renovation with a 10% contingency ($12,000) has a total cushion of $12,000. If they hit asbestos abatement ($7,000) and knob-and-tube rewiring ($18,000), they are already $13,000 over their contingency before a single cabinet goes up. The renovation does not stop — but the stress, the financing scramble, and the compromised finishes do. The homeowner who budgeted $24,000 (20%) absorbs both hits, stays on track, and still has $1,000 left if something minor comes up during cabinetry installation.
Unused contingency money is not lost — it becomes a bonus at the end of the project. You can put it toward upgraded finishes, landscaping, or simply keep it in your pocket. There is no downside to having more contingency than you need.
Mistake #4: Choosing Based on the Lowest Quote
Three renovation quotes come back: $145,000, $162,000, and $198,000. The lowest bidder is $53,000 cheaper than the highest. Of course you want to know why — but the wrong response is to choose the lowest quote because it saves money. The right response is to ask why the lowest quote is so much lower, because the answer almost always reveals one or more of the following:
- Scope omissions: The low bidder has excluded items that the other two included — perhaps site protection, debris removal, subcontractor coordination, or specific finishing details. A quote that omits $20,000 worth of legitimate scope looks $20,000 cheaper but is not.
- Allowance manipulation: The low bidder has used unrealistically low allowances for materials. A tile allowance of $4/sq ft in a Vancouver market where decent tile starts at $8/sq ft is not a savings — it is a deferred cost you will pay when you go to select materials.
- Subcontractor costs not yet obtained: Some general contractors quote before they have pricing from their trade subcontractors. They win the job with a low number, then “discover” higher trade costs once you have signed and demo has begun. By that point, switching is extremely expensive.
- No provision for unknowns: Experienced contractors build in a factor for site conditions and unknowns. The low bidder has not — every surprise becomes a change order at premium rates.
- Lower-quality materials or labour: The low bidder may be planning to use lower-grade materials or less experienced (cheaper) tradespeople. This does not always show up until years later — when tiles crack, cabinets warp, or plumbing starts leaking.
The true cost of switching contractors mid-project — after discovering the low bidder cannot deliver — runs $15,000–$50,000 in typical Vancouver renovation scenarios. This includes the cost of the original contractor’s work that must be redone, legal dispute costs, delays in restarting, and the premium that a new contractor charges to take over someone else’s incomplete work (they always charge more, because taking over a half-finished project is significantly harder than starting fresh).
How to Compare Quotes Properly
When comparing renovation quotes, do not compare the bottom-line number. Compare the scope of work line by line. Create a spreadsheet with every line item from the most detailed quote, then map each competing quote against those same line items. Where a competitor has a lower number for the same line item, ask them to explain the difference in writing. Where a competitor has omitted a line item entirely, add their number for that scope to the bottom line.
A quote comparison done this way almost always reveals that the “cheapest” option is not actually the cheapest — and the mid-range quote from the contractor with the clearest scope of work is the safest choice. Our Renovation Guide includes a quote comparison worksheet you can use for exactly this process.
Mistake #5: Changing Your Mind Mid-Project
Change orders are the single largest driver of cost overruns on residential renovations. Not hidden conditions, not material price increases — change orders. And the cruel mathematics of change orders is that every change you make mid-project costs 20–30% more than it would have cost if it had been included in the original scope.
Here is why the mid-project premium exists. When you signed your contract, the contractor had priced everything together in a coordinated sequence. The drywaller was scheduled for a specific week. The painter was booked to follow two weeks later. The tile setter had a slot. When you decide mid-demo that you want to add a gas line for a fireplace in the living room, the following happens:
- The gas contractor must be rescheduled — they may not be available for weeks, pushing the entire project timeline
- The drywaller, who would have incorporated the fireplace framing, now has to come back for a second mobilization — charged at a premium
- Coordinating the new sequence costs project management time
- The fireplace itself, which might have been $4,200 in the original quote, is now $5,400–$5,800 as a change order
A kitchen renovation with five “small” changes during construction — moving an island 18 inches, adding under-cabinet lighting, upgrading to a farmhouse sink, adding a pot filler, and changing the tile pattern to herringbone — can add $18,000–$35,000 to a project that was originally quoted at $85,000. Each individual change seemed manageable. The cumulative effect is devastating.
Lock In Decisions Before Demo Day
The solution is pre-construction design investment. Before signing your construction contract, spend money on design. Hire an interior designer or kitchen designer to produce detailed drawings, specifications, and finish schedules. Select every tile, every fixture, every appliance, every paint colour before demolition starts. Walk through every decision that will need to be made during construction and make it on paper — where changes cost nothing — rather than on site, where changes cost a premium.
A $3,000–$8,000 pre-construction design package will save you $15,000–$40,000 in change order costs on a major kitchen or bathroom renovation. It is one of the highest-ROI investments you can make in the renovation process. Contractors who offer design-build services — where design and construction are coordinated under one team — typically deliver lower change order rates because the design has been developed with construction in mind from the start.
Mistake #6: Under-Specifying Materials in the Contract
“Allowances” are among the most misunderstood elements of a renovation contract. An allowance is a placeholder amount the contractor has included for a material category — tile, countertops, appliances, light fixtures — that has not yet been specifically selected. Allowances are not the price of what you will get. They are the price of what an average homeowner is assumed to select. In Vancouver’s market, allowances in many quotes are dangerously low.
Consider these common allowance gaps:
| Item | Typical Quote Allowance | Reality in Vancouver Market | Gap Per Unit |
|---|---|---|---|
| Floor tile (per sq ft, installed) | $8–$12 | $18–$35 for mid-range porcelain | $10–$23/sq ft |
| Kitchen appliance package | $4,000–$6,000 | $8,000–$18,000 for quality brands | $4,000–$12,000 |
| Countertops (per lin ft, installed) | $80–$120 | $180–$350 for quartz | $100–$230/lin ft |
| Plumbing fixtures (per bathroom) | $800–$1,200 | $2,500–$5,000 for mid-range | $1,700–$3,800 |
| Light fixtures (whole home) | $2,000–$3,000 | $5,000–$15,000 | $3,000–$12,000 |
| Interior doors and hardware (per door) | $250–$400 | $450–$900 | $200–$500/door |
A homeowner who signs a contract with a $3,000 tile allowance for a bathroom that requires 250 sq ft of tile will be shocked to discover that the mid-range tile they selected at $14/sq ft (supply only) plus $12/sq ft for installation equals $6,500 — a $3,500 change order that arrives before a single tile is set.
Specify with SKUs Before Signing
The solution is to specify every material with manufacturer names, model numbers, and SKUs before signing the construction contract. Visit tile showrooms, appliance dealers, and fixture suppliers before the contract goes to paper. Get prices. Select specifically. Include the specific product in the contract — not an allowance, but a named item with a cost. Where allowances are unavoidable (you have not yet decided), make the allowance realistic by visiting the showroom, pricing what you actually want, and using that number.
Any contractor who pressures you to sign before you have made material selections is a contractor who benefits from the flexibility to substitute lower-cost materials or to charge you overage on allowances. A contractor who welcomes specification detail before signing is a contractor who has nothing to hide.
Mistake #7: DIY for the Wrong Tasks
The desire to save money through DIY labour is understandable and, in the right contexts, legitimate. Painting, demolition of non-structural elements, landscaping, and simple carpentry can all be reasonable DIY contributions to a renovation project if you have the skills and time. The mistake is attempting DIY on tasks that are either legally restricted, technically complex, or where amateur work creates problems that cost far more to fix than the original professional cost.
What Vancouver Homeowners Cannot Legally DIY
Under BC’s Safety Standards Act and the Gas Safety Regulation, the following work must be performed by a licensed tradesperson and inspected by the BC Safety Authority — homeowners cannot legally perform this work themselves even on their own home:
- Electrical connections to the panel, new circuits, or service upgrades: Homeowners may perform minor electrical work on existing circuits in their own primary residence, but any work requiring a permit must be done by a licensed electrician. Panel work, new circuits, and service changes always require a permit and a licensed electrician.
- Natural gas and propane lines: All gas line work — new installations, modifications, appliance connections — must be performed by a licensed gas contractor certified by BC Safety Authority. This includes connecting a gas range, installing a gas fireplace, or running a line to a BBQ.
- Structural modifications: Load-bearing wall removal, beam installation, and foundation work require engineer-stamped drawings and licensed contractor work. Attempting structural modifications without engineering is dangerous regardless of permit status.
What You Can DIY But Often Should Not
Many homeowners attempt tile installation, plumbing rough-in, and finish carpentry as DIY projects. Technically legal, these tasks are deceptively difficult to execute at a quality level that will pass inspection or look professional long-term. The hidden cost of re-doing amateur tiling — removing improperly set tiles, repairing damaged substrate, and re-setting — runs $5,000–$12,000 for a typical bathroom. Amateur plumbing rough-in that fails inspection requires a licensed plumber to remediate, often at $3,000–$8,000 above what the original professional installation would have cost.
The DIY tasks that genuinely save money without creating downstream problems: demolition (removing non-structural walls, stripping tile you plan to replace, ripping out flooring), painting (if done properly with preparation), landscaping, basic carpentry (building simple shelving, installing pre-hung doors in existing openings), and fixture replacements that do not require permit work (swapping a light fixture on an existing circuit, replacing a faucet).
When planning your DIY contribution with your contractor, be honest about your skill level. An experienced contractor can identify tasks where homeowner help saves money versus tasks where it creates problems. Ask directly: “What can I do to help reduce costs without creating issues for your trades?”
Mistake #8: Poor Trade Sequencing
A renovation is not a list of tasks — it is a sequence of dependent tasks where the completion of each step is a prerequisite for the next. Poor sequencing — whether caused by contractor inexperience, scheduling pressure, or homeowner interference — creates a domino effect of delays, rework, and cost overruns that can extend a project by weeks and add tens of thousands of dollars to the final cost.
The mandatory sequence that must be respected on every renovation:
Consider the real cost of inadequate living arrangement planning on a major renovation:
- Unplanned hotel stays: When a kitchen renovation runs long and you have been living on takeout for three months instead of six weeks, the cost accumulates fast. Ten extra weeks of meal expenses for a family of four — $120–$200/day in Metro Vancouver — adds $8,400–$14,000 to your project cost that was never in the budget.
- Storage unit costs: Furniture and belongings that need to move out of renovation zones need somewhere to go. Unplanned storage unit rental in Vancouver runs $180–$400/month for a family-sized unit. Six months of storage adds $1,080–$2,400 to project cost.
- Emergency accommodation: When an unexpected mold discovery or structural issue forces an evacuation mid-project, you are booking a hotel in Vancouver on short notice — the most expensive scenario possible. A two-week emergency hotel stay for a family costs $3,500–$7,000.
- Temporary kitchen setup: For kitchen renovations, setting up a functional temporary kitchen before demolition — a microwave, electric induction plate, mini-fridge, coffee maker, and a folding table in a spare room — costs $800–$2,000 and saves enormous daily stress and food expense for however long the renovation takes.
Realistic Timeline Planning
Before signing any renovation contract, have a direct conversation about realistic timelines — not best-case timelines. A kitchen renovation in Vancouver realistically takes 8–14 weeks from demo to completion for a full gut renovation. A bathroom takes 4–8 weeks. A whole-home renovation takes 4–9 months. These are honest ranges that account for permit wait times (City of Vancouver permit processing currently runs 3–6 weeks for residential renovations), inspection scheduling, and trade availability in a compressed market.
The decision of whether to stay in the home during renovation or move out depends on the scope of work. For kitchen-only or bathroom-only renovations, staying in the home is usually feasible with a temporary kitchen setup and early communication about dust and noise schedules. For whole-home renovations, staying in the home is rarely feasible and often creates safety issues (dust, open walls, active electrical work). Budget for moving out — treat it as a project cost, not an emergency expense.
When you are ready to plan your Vancouver renovation the right way — with proper budgeting, realistic timelines, and a licensed contractor who will not leave you with any of these surprises — our team at Vancouver General Contractors is ready to help. We provide detailed scopes of work, transparent pricing, and honest timeline projections on every project we take on.
Frequently Asked Questions About Renovation Mistakes in Vancouver
How do I verify a contractor’s BC Housing licence?
Go to bchousing.org and use the “Find a Licensed Residential Builder” search tool. Enter the contractor’s name or licence number. A valid licence will display as active, show the licence class (Residential Builder or General Contractor), and confirm insurance status. Always ask for the licence number before your first meeting — any contractor who cannot provide it immediately should not be on your shortlist. Also request a Certificate of Insurance naming you as an additional insured for the duration of your project.
What are the consequences of unpermitted renovation work in Vancouver?
Unpermitted work in Vancouver can result in stop-work orders, fines of $1,000–$10,000, and mandatory retroactive legalization costs of $8,000–$30,000 or more. At time of sale, unpermitted work must be disclosed and buyers will discount their offer — often by 1.5–2x the legalization cost. Most critically, your home insurer can deny claims if a fire, flood, or structural failure is connected to unpermitted work. The insurance exposure alone makes permits non-negotiable.
What is the minimum contingency I should budget for a Vancouver renovation?
For homes built after 1990: minimum 15% contingency. For homes built 1960–1990: minimum 20%. For homes built before 1960: 20–25% minimum. These higher figures account for Vancouver’s aging housing stock and the high frequency of hidden conditions (knob-and-tube wiring, asbestos, foundation issues, mold, rotted structure) that appear after demolition. A 10% contingency is simply not adequate for a pre-1980 home in Metro Vancouver.
What are the red flags of a suspiciously low renovation quote?
Red flags include: unrealistically low allowances for materials (e.g., $3/sq ft tile allowance), vague scope of work without line-item detail, no provision for permit costs, no contingency mentioned, inability to provide proof of BC Housing licence and insurance immediately, no written contract offered (or extreme pressure to sign quickly), and a reluctance to put all scope details in writing. A legitimate contractor welcomes detailed scope discussion — a low-bidder hoping to make their money on change orders does not.
How can I avoid unexpected change order costs?
Make all material selections and design decisions before signing the construction contract. Specify every material with model numbers and SKUs. Review the scope of work line by line and ask “what is not included here?” Walk through every design decision that will need to be made during construction and resolve it on paper — where changes cost nothing — before demo day. Budget a realistic contingency separately from your change order risk, and commit to yourself that you will not make changes once construction begins unless there is a genuine functional reason.
Can Vancouver homeowners do their own electrical work?
BC’s Safety Standards Act permits homeowners to perform minor electrical work on their own primary residence — specifically, work that does not require a permit. However, any electrical work that requires a permit (new circuits, panel work, service upgrades, new wiring runs) must be performed by a licensed electrician. In practice, this means almost any significant electrical work during a renovation requires a licensed electrician. Attempting to do permit-required electrical work yourself and concealing it from the inspector is illegal, voids your insurance, and creates a serious fire and safety risk.
What should I do if my contractor abandons the project mid-work?
Document everything immediately: photograph all work completed and incomplete, secure the site, and preserve all communications (texts, emails, contracts). File a complaint with BC Housing’s Licensing and Consumer Services (this triggers an investigation and may result in licence suspension). If the contractor held a BC Housing licence, you may have access to the Homeowner Protection Office’s compensation programs. Consult a construction lawyer before paying any remaining amounts — your contract likely contains provisions about abandonment and remedies. Get three quotes from licensed contractors to complete the work, and use the lowest to establish damages for any legal claim.
Does my contractor have the right to substitute materials without telling me?
No. Your construction contract should specify that no material substitutions are permitted without your written approval. If your contract includes an allowance for a specific type of material, the contractor must bring substitution options to you for approval before proceeding. If your contract specifies materials by brand and model number (as it should), the contractor cannot substitute without your written consent. If you discover unauthorized substitutions, document them in writing and send a written notice to the contractor requiring restoration of the specified material. This is a contractual breach and you have legal remedies — consult a construction lawyer if the contractor does not respond.
How do I handle disputes with my renovation contractor in BC?
First, document the dispute in detail and attempt resolution in writing — a written letter outlining the specific issue, the remedy you are requesting, and a reasonable deadline for response. Keep all communications in writing from this point forward. If direct resolution fails, file a complaint with BC Housing LCS (for licensed contractors). For monetary disputes under $35,000, BC’s Civil Resolution Tribunal (CRT) offers an online dispute resolution process that is faster and cheaper than court. For larger amounts, BC Supreme Court or binding arbitration (if your contract specifies it) are the pathways. Always consult a construction lawyer before withholding payment — improper payment withholding can itself be a breach of contract.
Does my home insurance cover renovation damage?
Standard home insurance policies have significant exclusions during active renovation. Notify your insurer before any major renovation begins — most policies require notification for renovations above a certain value (commonly $10,000–$25,000). Your insurer may require you to add a rider, increase your premium during construction, or take out a separate course-of-construction policy. Failure to notify your insurer can result in claim denial for any losses that occur during the renovation period. Your contractor’s liability insurance covers damage caused by the contractor’s work — your home insurance covers other losses during the renovation period, provided you have notified your insurer.
What is the average cost overrun on Vancouver renovations?
Industry data consistently shows budget overruns of 25–40% above original estimates on residential renovations in Metro Vancouver. This is driven by three main factors: hidden conditions in older homes (knob-and-tube, asbestos, mold, foundation issues), change orders during construction (averaging 15–25% of original contract value on projects without pre-construction design), and material and labour cost escalation during the project. Setting a realistic budget that includes a 20% contingency from the start means that even a 25% overrun on the base construction cost stays within your planned total budget.
How long does a kitchen renovation take in Vancouver?
A full gut kitchen renovation in Vancouver realistically takes 8–14 weeks from demolition to final walkthrough. This range accounts for: permit processing (3–6 weeks from City of Vancouver), rough-in inspections (1–2 weeks scheduling lag), custom cabinetry lead times (4–8 weeks from order to delivery), countertop fabrication after template (2–3 weeks), and the sequential trade schedule that must be respected. Contractors who quote 4–5 weeks for a full gut kitchen renovation in Vancouver are either not planning to pull permits or are significantly underestimating their schedule.
When should I stay in my home during a renovation versus moving out?
For single-room renovations (one bathroom, kitchen only, basement only) where the rest of the home remains fully functional, staying in the home is usually feasible with proper dust barriers and scheduling accommodations. For whole-home renovations, multi-room renovations that involve all bathrooms simultaneously, or any work that requires the main electrical panel to be shut down for extended periods, moving out is strongly recommended. Factor the cost of temporary accommodation into your renovation budget as a project cost — not as a potential cost — so you are not caught making expensive emergency arrangements mid-project.
What permits does a Vancouver kitchen renovation typically require?
A full kitchen renovation in Vancouver that involves moving walls, relocating plumbing, or upgrading electrical will typically require: a building permit (for structural changes), an electrical permit (for new circuits, panel upgrades, or service changes), and a plumbing permit (for relocating drains or supply lines). If the renovation also includes HVAC changes, a mechanical permit is required. The City of Vancouver processes residential renovation permits in the building category through its online portal — current processing times are 3–6 weeks for straightforward residential applications. Budget $1,500–$5,000 for permit fees on a major kitchen renovation depending on scope.
What is the most common reason Vancouver renovations go over budget?
The most common single cause of budget overruns in Vancouver is the combination of insufficient contingency planning and hidden conditions in older homes. When a homeowner sets a 10% contingency and then encounters knob-and-tube wiring, asbestos, and a cracked foundation sill in a 1940s East Van home, the contingency is exhausted before construction properly begins. The second most common cause is change orders — decisions changed during construction that could have been finalized during the planning phase. Solving both problems simultaneously: set a 20% contingency, invest in pre-construction design to lock in all decisions before demo, and select all materials before signing the construction contract.
How do I find a reliable, licensed general contractor in Vancouver?
Start with BC Housing’s licensed contractor directory at bchousing.org to verify any contractor you are considering. Ask for references from projects completed in the past 12 months — specifically completed projects, not projects in progress. Visit a completed project if possible. Check Google reviews, HomeStars ratings, and BBB accreditation. Get three quotes from contractors who pass the licence and insurance verification step. Compare quotes line by line, not bottom-line. Choose the contractor whose scope of work is the most detailed and transparent — detail in a quote reflects how a contractor will manage your project.
At Vancouver General Contractors, we have completed hundreds of renovation projects across Metro Vancouver — from heritage home updates in Strathcona to whole-home renovations on the North Shore. Every project comes with a valid BC Housing licence, full liability insurance, detailed scope of work, and a project team that will give you honest answers before you sign anything. If you are ready to plan your renovation the right way, reach out to our team today for a no-obligation consultation.
Final Thoughts: Protecting Your Investment
The 10 mistakes covered in this guide are not fringe cases or rare disasters. They are the everyday reality of renovation projects across Metro Vancouver. Every year, thousands of Vancouver homeowners spend more than they needed to, end up with less than they planned, and face legal and financial complications that follow them for years — because of decisions that seemed reasonable at the time but were not guided by enough information.
The common thread running through every mistake on this list is the same: insufficient planning before construction begins. The homeowner who vets their contractor, pulls the right permits, sets a realistic contingency, locks in material specifications, makes all design decisions pre-demo, and plans their living arrangements before demo day will have a dramatically better renovation experience than the homeowner who skips any one of these steps.
Renovation is not a simple transaction. In Vancouver’s regulatory and market environment, it requires more preparation, more financial buffer, and more professional guidance than most homeowners initially expect. The good news is that this preparation is entirely achievable — it just has to come before the first hammer swings.
Use our Vancouver Renovation Guide to build your planning checklist. Visit our home renovation services page to understand what a professionally managed renovation looks like from start to finish. And when you are ready to talk through your specific project, contact us — we will give you straight answers, not sales pitches.
- Demolition and rough framing — reveals hidden conditions, establishes new dimensions
- Mechanical rough-in (plumbing, electrical, HVAC) — must be complete before any closing
- Inspection of all rough-ins — permit inspector must approve before walls close. This step cannot be skipped.
- Insulation — after inspection approval
- Drywall and plastering — after insulation
- Tile setting — after drywall is complete and primed
- Cabinetry installation — after tile is grouted (for kitchen floors) or after drywall (upper cabinets)
- Countertop template — only after cabinets are installed and level. Templating before cabinets are set is a common sequencing error that results in countertops that do not fit.
- Painting — after tile grout is sealed, before fixtures are installed
- Fixture and finish installation — final stage, after painting complete
- Flooring — in areas not tiled, after all wet trades are done (flooring before plumbing inspection is a common and expensive mistake)
We have remediated projects where hardwood flooring was installed before the plumbing rough-in was inspected — and the inspection required the plumber to access a drain location under the new floor. The floor had to be demolished ($4,200), the plumbing corrected ($1,800), and the floor re-installed ($6,500). A $12,500 consequence for a sequencing decision that saved zero time and no money.
Similarly, painting before tile installation results in paint overspray and grout haze on finish surfaces, requiring repainting of every surface adjacent to tile work. Countertop templating before cabinets are fully installed and shimmed level results in countertops that require expensive field modifications — or replacement. Ask your contractor for a written trade schedule before work begins and review the sequence for logical dependencies.
Mistake #9: Renovating for Personal Taste on a Non-Forever Home
If you are renovating a home you plan to sell within five years, renovation ROI matters. Renovating for personal taste on a home you will not keep long enough to enjoy the investment is a mistake that Vancouver homeowners make regularly — and the cost gap between what they spend and what they recover at sale can be shocking.
Consider the ROI of common Vancouver renovations in the current market:
| Renovation | Average Cost | Estimated Value Added | ROI |
|---|---|---|---|
| Kitchen renovation (mid-range) | $60,000–$90,000 | $35,000–$55,000 | 55–65% |
| Primary bathroom renovation | $25,000–$45,000 | $15,000–$28,000 | 55–65% |
| Basement suite addition | $80,000–$130,000 | $75,000–$120,000 | 85–95% |
| Exterior curb appeal (paint, landscaping) | $8,000–$20,000 | $12,000–$30,000 | 120–150% |
| Luxury kitchen with ultra-custom finishes | $150,000–$220,000 | $60,000–$85,000 | 35–45% |
| Highly personalized theme renovation | $40,000–$80,000 | $5,000–$20,000 | 10–30% |
The $40,000 renovation that added $15,000 in value is not a hypothetical — it is something we see regularly on properties where homeowners have invested in highly personalized choices that reduce the buyer pool. A bold purple kitchen with custom hand-painted cabinetry, a hot tub installation in what was previously a bedroom, or a single-purpose media room conversion that eliminated bedroom count are all real examples of renovations that cost the homeowner money relative to doing nothing.
The renovations with the highest ROI in Vancouver are those that appeal to the broadest buyer market: functional basement suites with legal secondary-suite compliance, updated kitchens and bathrooms with neutral, high-quality finishes, and exterior improvements that improve first impression and mechanicals (new roof, updated windows, fresh exterior paint). If you are renovating a home you plan to sell, make choices as if you were the most common buyer in your neighbourhood — not the most unusual one.
If you are renovating a forever home you never intend to sell, personal enjoyment ROI is entirely valid. The hot tub in the master wing, the custom wine cellar, the recording studio — these are legitimate investments in your quality of life. Just do not confuse them with investments in property value.
Mistake #10: Not Planning for Living Arrangements
Renovation timelines are almost universally longer than homeowners expect, and the failure to plan for this creates a cascade of hidden costs that never appear in the renovation budget. A kitchen renovation that was supposed to take six weeks runs to eleven weeks. A whole-home renovation that was quoted as a four-month project takes seven months. These are not unusual outcomes — they are the norm.
Consider the real cost of inadequate living arrangement planning on a major renovation:
- Unplanned hotel stays: When a kitchen renovation runs long and you have been living on takeout for three months instead of six weeks, the cost accumulates fast. Ten extra weeks of meal expenses for a family of four — $120–$200/day in Metro Vancouver — adds $8,400–$14,000 to your project cost that was never in the budget.
- Storage unit costs: Furniture and belongings that need to move out of renovation zones need somewhere to go. Unplanned storage unit rental in Vancouver runs $180–$400/month for a family-sized unit. Six months of storage adds $1,080–$2,400 to project cost.
- Emergency accommodation: When an unexpected mold discovery or structural issue forces an evacuation mid-project, you are booking a hotel in Vancouver on short notice — the most expensive scenario possible. A two-week emergency hotel stay for a family costs $3,500–$7,000.
- Temporary kitchen setup: For kitchen renovations, setting up a functional temporary kitchen before demolition — a microwave, electric induction plate, mini-fridge, coffee maker, and a folding table in a spare room — costs $800–$2,000 and saves enormous daily stress and food expense for however long the renovation takes.
Realistic Timeline Planning
Before signing any renovation contract, have a direct conversation about realistic timelines — not best-case timelines. A kitchen renovation in Vancouver realistically takes 8–14 weeks from demo to completion for a full gut renovation. A bathroom takes 4–8 weeks. A whole-home renovation takes 4–9 months. These are honest ranges that account for permit wait times (City of Vancouver permit processing currently runs 3–6 weeks for residential renovations), inspection scheduling, and trade availability in a compressed market.
The decision of whether to stay in the home during renovation or move out depends on the scope of work. For kitchen-only or bathroom-only renovations, staying in the home is usually feasible with a temporary kitchen setup and early communication about dust and noise schedules. For whole-home renovations, staying in the home is rarely feasible and often creates safety issues (dust, open walls, active electrical work). Budget for moving out — treat it as a project cost, not an emergency expense.
When you are ready to plan your Vancouver renovation the right way — with proper budgeting, realistic timelines, and a licensed contractor who will not leave you with any of these surprises — our team at Vancouver General Contractors is ready to help. We provide detailed scopes of work, transparent pricing, and honest timeline projections on every project we take on.
Frequently Asked Questions About Renovation Mistakes in Vancouver
How do I verify a contractor’s BC Housing licence?
Go to bchousing.org and use the “Find a Licensed Residential Builder” search tool. Enter the contractor’s name or licence number. A valid licence will display as active, show the licence class (Residential Builder or General Contractor), and confirm insurance status. Always ask for the licence number before your first meeting — any contractor who cannot provide it immediately should not be on your shortlist. Also request a Certificate of Insurance naming you as an additional insured for the duration of your project.
What are the consequences of unpermitted renovation work in Vancouver?
Unpermitted work in Vancouver can result in stop-work orders, fines of $1,000–$10,000, and mandatory retroactive legalization costs of $8,000–$30,000 or more. At time of sale, unpermitted work must be disclosed and buyers will discount their offer — often by 1.5–2x the legalization cost. Most critically, your home insurer can deny claims if a fire, flood, or structural failure is connected to unpermitted work. The insurance exposure alone makes permits non-negotiable.
What is the minimum contingency I should budget for a Vancouver renovation?
For homes built after 1990: minimum 15% contingency. For homes built 1960–1990: minimum 20%. For homes built before 1960: 20–25% minimum. These higher figures account for Vancouver’s aging housing stock and the high frequency of hidden conditions (knob-and-tube wiring, asbestos, foundation issues, mold, rotted structure) that appear after demolition. A 10% contingency is simply not adequate for a pre-1980 home in Metro Vancouver.
What are the red flags of a suspiciously low renovation quote?
Red flags include: unrealistically low allowances for materials (e.g., $3/sq ft tile allowance), vague scope of work without line-item detail, no provision for permit costs, no contingency mentioned, inability to provide proof of BC Housing licence and insurance immediately, no written contract offered (or extreme pressure to sign quickly), and a reluctance to put all scope details in writing. A legitimate contractor welcomes detailed scope discussion — a low-bidder hoping to make their money on change orders does not.
How can I avoid unexpected change order costs?
Make all material selections and design decisions before signing the construction contract. Specify every material with model numbers and SKUs. Review the scope of work line by line and ask “what is not included here?” Walk through every design decision that will need to be made during construction and resolve it on paper — where changes cost nothing — before demo day. Budget a realistic contingency separately from your change order risk, and commit to yourself that you will not make changes once construction begins unless there is a genuine functional reason.
Can Vancouver homeowners do their own electrical work?
BC’s Safety Standards Act permits homeowners to perform minor electrical work on their own primary residence — specifically, work that does not require a permit. However, any electrical work that requires a permit (new circuits, panel work, service upgrades, new wiring runs) must be performed by a licensed electrician. In practice, this means almost any significant electrical work during a renovation requires a licensed electrician. Attempting to do permit-required electrical work yourself and concealing it from the inspector is illegal, voids your insurance, and creates a serious fire and safety risk.
What should I do if my contractor abandons the project mid-work?
Document everything immediately: photograph all work completed and incomplete, secure the site, and preserve all communications (texts, emails, contracts). File a complaint with BC Housing’s Licensing and Consumer Services (this triggers an investigation and may result in licence suspension). If the contractor held a BC Housing licence, you may have access to the Homeowner Protection Office’s compensation programs. Consult a construction lawyer before paying any remaining amounts — your contract likely contains provisions about abandonment and remedies. Get three quotes from licensed contractors to complete the work, and use the lowest to establish damages for any legal claim.
Does my contractor have the right to substitute materials without telling me?
No. Your construction contract should specify that no material substitutions are permitted without your written approval. If your contract includes an allowance for a specific type of material, the contractor must bring substitution options to you for approval before proceeding. If your contract specifies materials by brand and model number (as it should), the contractor cannot substitute without your written consent. If you discover unauthorized substitutions, document them in writing and send a written notice to the contractor requiring restoration of the specified material. This is a contractual breach and you have legal remedies — consult a construction lawyer if the contractor does not respond.
How do I handle disputes with my renovation contractor in BC?
First, document the dispute in detail and attempt resolution in writing — a written letter outlining the specific issue, the remedy you are requesting, and a reasonable deadline for response. Keep all communications in writing from this point forward. If direct resolution fails, file a complaint with BC Housing LCS (for licensed contractors). For monetary disputes under $35,000, BC’s Civil Resolution Tribunal (CRT) offers an online dispute resolution process that is faster and cheaper than court. For larger amounts, BC Supreme Court or binding arbitration (if your contract specifies it) are the pathways. Always consult a construction lawyer before withholding payment — improper payment withholding can itself be a breach of contract.
Does my home insurance cover renovation damage?
Standard home insurance policies have significant exclusions during active renovation. Notify your insurer before any major renovation begins — most policies require notification for renovations above a certain value (commonly $10,000–$25,000). Your insurer may require you to add a rider, increase your premium during construction, or take out a separate course-of-construction policy. Failure to notify your insurer can result in claim denial for any losses that occur during the renovation period. Your contractor’s liability insurance covers damage caused by the contractor’s work — your home insurance covers other losses during the renovation period, provided you have notified your insurer.
What is the average cost overrun on Vancouver renovations?
Industry data consistently shows budget overruns of 25–40% above original estimates on residential renovations in Metro Vancouver. This is driven by three main factors: hidden conditions in older homes (knob-and-tube, asbestos, mold, foundation issues), change orders during construction (averaging 15–25% of original contract value on projects without pre-construction design), and material and labour cost escalation during the project. Setting a realistic budget that includes a 20% contingency from the start means that even a 25% overrun on the base construction cost stays within your planned total budget.
How long does a kitchen renovation take in Vancouver?
A full gut kitchen renovation in Vancouver realistically takes 8–14 weeks from demolition to final walkthrough. This range accounts for: permit processing (3–6 weeks from City of Vancouver), rough-in inspections (1–2 weeks scheduling lag), custom cabinetry lead times (4–8 weeks from order to delivery), countertop fabrication after template (2–3 weeks), and the sequential trade schedule that must be respected. Contractors who quote 4–5 weeks for a full gut kitchen renovation in Vancouver are either not planning to pull permits or are significantly underestimating their schedule.
When should I stay in my home during a renovation versus moving out?
For single-room renovations (one bathroom, kitchen only, basement only) where the rest of the home remains fully functional, staying in the home is usually feasible with proper dust barriers and scheduling accommodations. For whole-home renovations, multi-room renovations that involve all bathrooms simultaneously, or any work that requires the main electrical panel to be shut down for extended periods, moving out is strongly recommended. Factor the cost of temporary accommodation into your renovation budget as a project cost — not as a potential cost — so you are not caught making expensive emergency arrangements mid-project.
What permits does a Vancouver kitchen renovation typically require?
A full kitchen renovation in Vancouver that involves moving walls, relocating plumbing, or upgrading electrical will typically require: a building permit (for structural changes), an electrical permit (for new circuits, panel upgrades, or service changes), and a plumbing permit (for relocating drains or supply lines). If the renovation also includes HVAC changes, a mechanical permit is required. The City of Vancouver processes residential renovation permits in the building category through its online portal — current processing times are 3–6 weeks for straightforward residential applications. Budget $1,500–$5,000 for permit fees on a major kitchen renovation depending on scope.
What is the most common reason Vancouver renovations go over budget?
The most common single cause of budget overruns in Vancouver is the combination of insufficient contingency planning and hidden conditions in older homes. When a homeowner sets a 10% contingency and then encounters knob-and-tube wiring, asbestos, and a cracked foundation sill in a 1940s East Van home, the contingency is exhausted before construction properly begins. The second most common cause is change orders — decisions changed during construction that could have been finalized during the planning phase. Solving both problems simultaneously: set a 20% contingency, invest in pre-construction design to lock in all decisions before demo, and select all materials before signing the construction contract.
How do I find a reliable, licensed general contractor in Vancouver?
Start with BC Housing’s licensed contractor directory at bchousing.org to verify any contractor you are considering. Ask for references from projects completed in the past 12 months — specifically completed projects, not projects in progress. Visit a completed project if possible. Check Google reviews, HomeStars ratings, and BBB accreditation. Get three quotes from contractors who pass the licence and insurance verification step. Compare quotes line by line, not bottom-line. Choose the contractor whose scope of work is the most detailed and transparent — detail in a quote reflects how a contractor will manage your project.
At Vancouver General Contractors, we have completed hundreds of renovation projects across Metro Vancouver — from heritage home updates in Strathcona to whole-home renovations on the North Shore. Every project comes with a valid BC Housing licence, full liability insurance, detailed scope of work, and a project team that will give you honest answers before you sign anything. If you are ready to plan your renovation the right way, reach out to our team today for a no-obligation consultation.
Final Thoughts: Protecting Your Investment
The 10 mistakes covered in this guide are not fringe cases or rare disasters. They are the everyday reality of renovation projects across Metro Vancouver. Every year, thousands of Vancouver homeowners spend more than they needed to, end up with less than they planned, and face legal and financial complications that follow them for years — because of decisions that seemed reasonable at the time but were not guided by enough information.
The common thread running through every mistake on this list is the same: insufficient planning before construction begins. The homeowner who vets their contractor, pulls the right permits, sets a realistic contingency, locks in material specifications, makes all design decisions pre-demo, and plans their living arrangements before demo day will have a dramatically better renovation experience than the homeowner who skips any one of these steps.
Renovation is not a simple transaction. In Vancouver’s regulatory and market environment, it requires more preparation, more financial buffer, and more professional guidance than most homeowners initially expect. The good news is that this preparation is entirely achievable — it just has to come before the first hammer swings.
Use our Vancouver Renovation Guide to build your planning checklist. Visit our home renovation services page to understand what a professionally managed renovation looks like from start to finish. And when you are ready to talk through your specific project, contact us — we will give you straight answers, not sales pitches.
Get a Free Renovation Quote
Metro Vancouver’s trusted general contractors. Free consultations across Vancouver, Burnaby, Richmond, North Shore & beyond.
Get Your Free Quote →
Comments are closed