




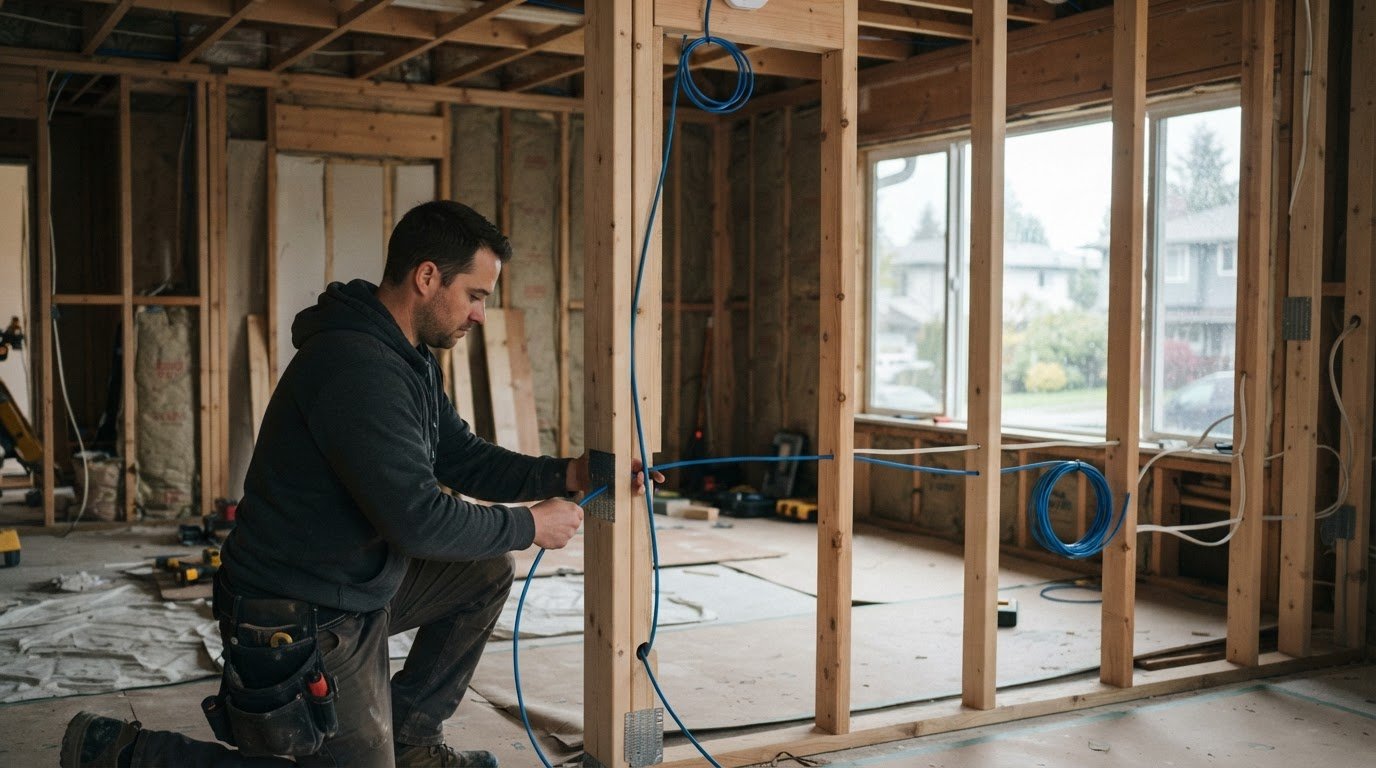
Smart Home Wiring During a Renovation: What to Install
Plan smart home wiring during a renovation before walls are closed. Running cables while walls are open can avoid the disruption of opening finished walls later, and you can plan the infrastructure before choosing a smart home ecosystem.
It’s understandable to focus first on finishes, fixtures and the devices you want in each room. But a little foresight about internet connections, Wi-Fi access points and CAT5E cabling can help keep your options open as your needs change.
This guide explains what to consider, where wired connections can make sense and how to plan for future devices without committing to a specific platform. You’ll also see why timing matters and how coordinated renovation planning can bring these decisions into the broader design and construction process.
Key Takeaways
- Plan wiring before insulation and drywall go in to reduce disruption if you add smart devices later.
- Map Wi-Fi access points and internet connections around how you use each space, with room for future network needs.
- Consider CAT5E connections at media locations to support wired devices, including televisions used for streaming.
- You can prepare for smart-home technology without choosing an ecosystem now; suitable wiring keeps options open for later.
Should I Add Smart Home Wiring During My Renovation?
In most renovations, plan wiring while walls are open and before insulation and drywall go in. Smart home wiring during a renovation can support sensors, security systems, speakers and controls without tying you to particular devices.
Low-Voltage Sensor and Control Runs
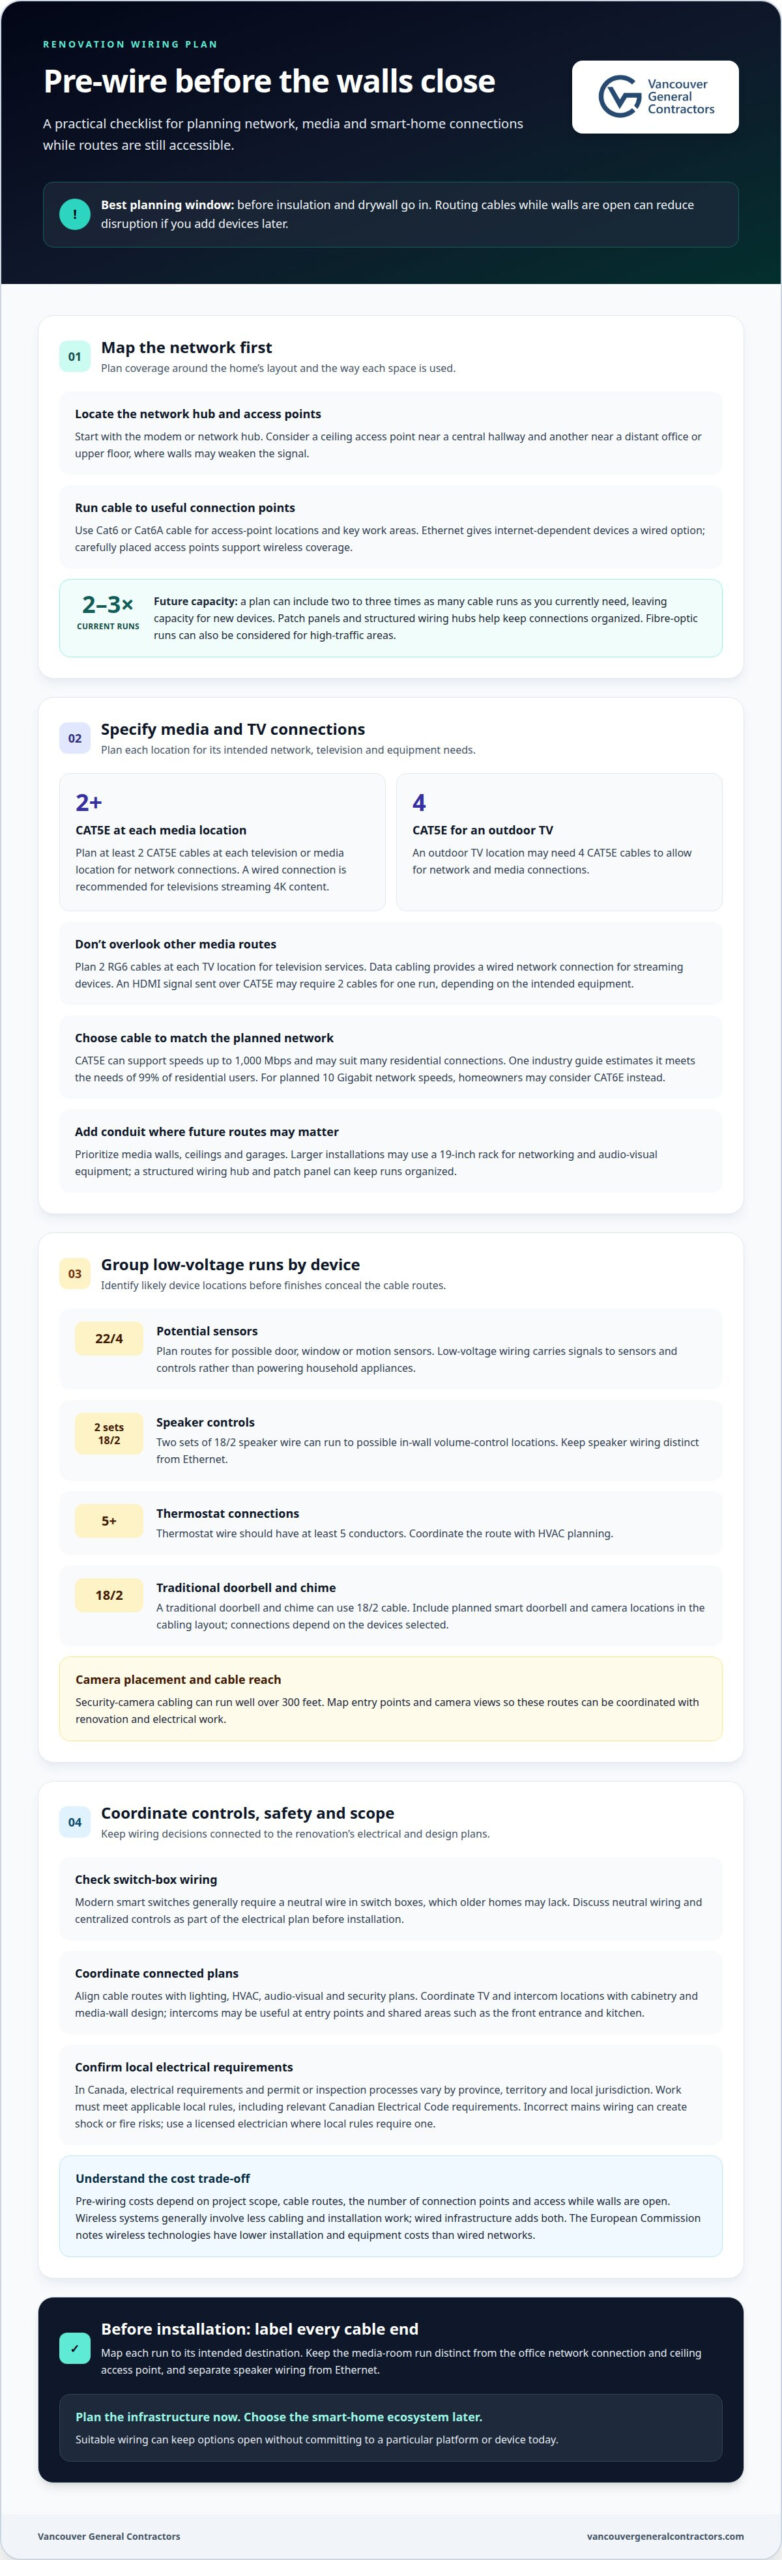
Low-voltage wiring carries signals to sensors and controls, rather than powering household appliances. Planning routes before drywall makes it easier to locate devices where they’ll be useful. For example, 22/4 cable can serve potential door, window or motion sensors. Two sets of 18/2 speaker wire can run to possible in-wall volume-control locations, while thermostat wire should have at least 5 conductors.
Wired Security Devices
Wired security devices connect cameras and sensors through cables instead of relying only on batteries or wireless links. During a renovation, cabling can reach planned camera locations before finishes conceal the route. Security-camera cabling can run well over 300 feet. A layout that identifies entry points and camera views helps coordinate these runs with the renovation and electrical work.
Permits, Codes and Electrical Safety
In Canada, electrical requirements and permit or inspection processes vary by province, territory and local jurisdiction. Electrical work must meet the rules that apply where the home is located, including applicable Canadian Electrical Code requirements. Incorrect mains wiring can create shock or fire risks. Use a licensed electrician where local rules require one, especially for work connected to the home’s power supply.
Pre-wiring costs depend on the project scope, cable routes, number of connection points and access while walls are open. Wireless systems generally involve less cabling and installation work, while wired infrastructure adds both.
Choosing What to Pre-Wire
Prioritize routes that would be difficult to add after finishes: sensor locations, speaker controls, thermostat connections and camera positions. Modern smart switches generally require neutral wires in switch boxes, which older homes may lack. A traditional doorbell and chime can use 18/2 cable. Coordinating these runs with lighting, HVAC, audio-visual and security plans helps keep the renovation organized.
Wi-Fi access points and internet wiring
Plan Ethernet connections and Wi-Fi access point locations while renovation walls are open. Ethernet gives internet-dependent devices a wired option, while carefully placed access points can improve wireless coverage in the rooms where it is needed.
Start with the modem or network hub location, then map access points around the home’s layout. Consider a ceiling location near a central hallway and another near a distant office or upper floor, where walls may weaken the signal. Run Cat6 or Cat6A cable to access point locations and key work areas. A future-ready plan can include two to three times as many cable runs as you currently need, leaving capacity for new devices. Patch panels and structured wiring hubs keep those connections organized. Fibre-optic runs can also be considered for high-traffic areas. According to the European Commission, wireless technologies have lower installation and equipment costs than wired networks.
Televisions and intercoms need planned connections too. Two RG6 cables at each TV location can support television services, while data cabling provides a wired network connection for streaming devices. Place intercom connections at useful entry points and shared areas, such as the front entrance and kitchen. Coordinate these routes with the cabinetry and media-wall design so outlets and equipment sit where they’ll be used.
Smart lighting controls also affect wiring plans. Many modern smart switches need a neutral wire in the switch box, which may be absent in older homes. Discuss neutral wiring and centralized controls as part of the electrical plan before installation. Switch-based controls provide familiar room-by-room operation; centralized controls can coordinate lighting across multiple areas. The right setup depends on the lighting plan, device locations and the automations you want.
For a whole-home project, include internet, television and control locations in the renovation design before finishes are selected. Whole home renovation planning can bring these infrastructure decisions into the broader project plan.
CAT5E networking and media cabling
Plan Ethernet cabling for network devices and Wi-Fi access points, plus separate speaker wiring for audio. A contractor can route CAT5E to media and data locations, and add conduit at key points, including media walls, ceilings and garages. Camera and smart doorbell connections depend on the devices selected, so include their planned locations in the cabling layout.
CAT5E can support network speeds up to 1000 mpbs, making it adequate for many residential connections. One industry guide estimates it meets the needs of 99% of residential users. Homeowners seeking 10 Gigabit network speeds may consider CAT6E instead. The choice depends on the network requirements planned for the home, not simply on choosing the newest cable category.
At each television or media location, plan at least 2 CAT5E cables for network connections. A wired connection is recommended for televisions streaming 4K content. An HDMI signal sent over CAT5E may require 2 cables for one run, so the intended equipment matters. An outdoor TV location may need 4 CAT5E cables, giving the layout room for its network and media connections.
Conduit supports future changes where new cable routes may be useful. Prioritize a media wall, a ceiling access point and the garage, where future devices could require different connections. Larger installations may use a 19-inch rack for networking and audio-visual equipment. A structured wiring hub and patch panel can keep the runs organized and easier to manage.
Map every cable end to its intended location before installation. Label the media-room run separately from the office network connection and ceiling access point. Keep speaker wiring distinct from Ethernet, and plan separate locations for lighting controls and motion devices. Clear labelling preserves the option to use wireless devices without relying on Wi-Fi for every connection.
Conduit at key locations can preserve options for future upgrades. It may make it easier to route replacement or additional cabling to media walls, ceilings and garages without depending on the original cable run.
Planning wiring without choosing a smart home ecosystem
Plan the infrastructure before choosing smart devices or a control platform. Neutral wires, Ethernet and speaker wiring can keep future options open.
Placing Outlets, Low-Voltage Runs and Network Equipment
Plan outlet locations, low-voltage cables and network equipment around the rooms and devices they will serve. Place outlets near planned screens, work areas and controls, then route low-voltage wiring to sensors, speakers and access points. For example, plan cable routes to the intended motion-sensor locations and Ethernet runs to network equipment and key rooms.
Position the structured wiring enclosure where network runs can converge and equipment can be organized. A 28-inch or 40-inch enclosure, or multiple enclosures, can suit different job sizes. Leave space for future rack equipment and open breakers in the control closet. The aim is a useful layout, not a commitment to a specific platform.
Steps for Renovation Wiring
Begin with the renovation drawings and a room-by-room device map. Identify outlet locations, lighting controls, speaker points, motion sensors and network destinations. Then coordinate electrical and low-voltage cable routes with the construction sequence, before insulation and drywall close the walls.
Group cable runs by destination and record where each connection ends. Neutral wires in switch boxes, Ethernet and speaker wire can support different ecosystems, including Google Home, Amazon Alexa and Apple HomeKit, so homeowners can choose devices later. Coordinate wiring with the relevant electrical and renovation work, and keep a record of the layout for future changes.
Discuss infrastructure during the design phase of a whole-home renovation, before construction details are fixed. Plan your renovation wiring as part of the project design.
You can install wiring during a renovation before choosing specific smart devices. Neutral wires in switch boxes and data cables to key locations leave room to add devices later, separating device selection from the work of preparing cable routes.
For a newly built home, discussing smart technology with the contractor early can help avoid extra infrastructure costs. Bringing the subject into an early contractor conversation allows infrastructure needs to be considered before decisions about particular devices are made.
Vancouver General Contractors
Vancouver General Contractors can help bring smart-home planning into the wider renovation, where wiring decisions need to align with room layouts, finishes and construction timing. Its design-build process manages project phases from initial concept and 3D design through construction and permits, creating a coordinated framework for decisions about outlets, network equipment and future devices.
This planning is especially useful for a whole-home, condo or kitchen renovation, or a home addition that opens walls or changes room layouts. Discuss connectivity early so the project plan can account for wiring locations before construction details are set. You can leave the smart-home ecosystem undecided while planning around how you expect to use each space.
For help bringing renovation planning together, contact Vancouver General Contractors.
Plan for how you want to live next
Technology will change, but how you use your home can guide decisions now. Instead of designing around a particular device, consider which spaces need reliable connections, flexible controls or room for future additions. Smart home wiring during a renovation can align those choices with your home’s layout and the construction already underway.
For a larger project, Vancouver General Contractors can bring those infrastructure decisions into the renovation plan. Its Home Additions, Whole Home Renovations and Condo Renovations connect design and construction planning, helping account for technology alongside the spaces you want to create. The company’s design-build process covers project phases from initial concept and 3D design through construction and permits, giving renovation decisions a coordinated path forward.
Share your renovation goals and take the next step with Contact Vancouver General Contractors today. A thoughtful plan can make your home ready for what comes next.
Frequently Asked Questions
How should a contractor document, label, protect, and test smart home wiring before walls are closed?
Label both ends of each cable, test each run and record its route before the walls close. For example, mark a cable “living room, media wall to network panel” at both ends, then note its route on the renovation plan. Cap and secure cable ends away from construction debris. Record test results using the matching cable labels so the correct run can be identified during future troubleshooting.
How much does smart home pre-wiring cost in Canada?
Smart home pre-wiring costs depend on the project scope, cable routes, number of locations and access before walls close. Installing it during renovation costs far less than retrofitting it later.
What is the cost difference between wired and wireless smart home systems?
Wireless systems have lower installation and equipment costs. Wired systems add cabling and installation work.
More Uncategorized Guides





Comments are closed